 {this post contains affiliate links}
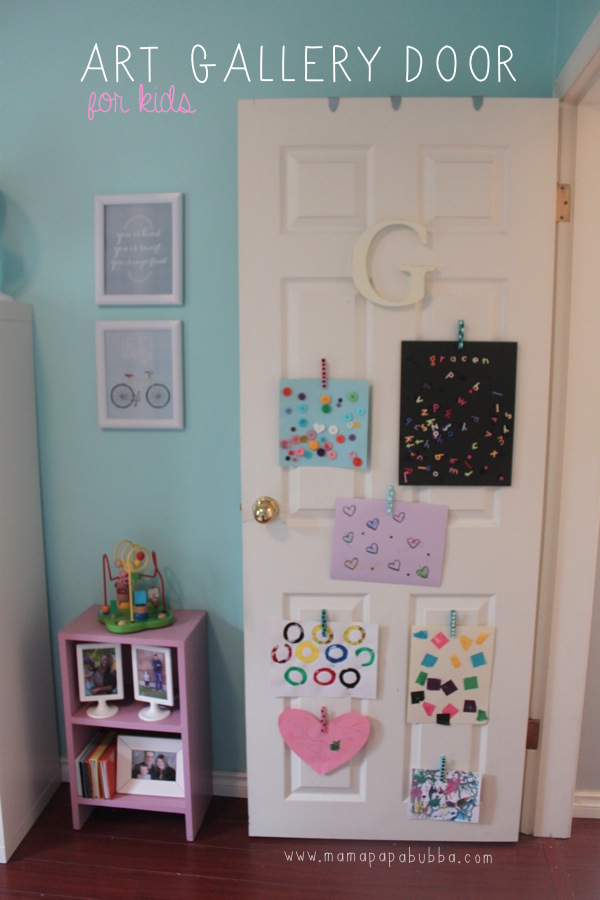
As a mama, I’m always looking for unique ways to showcase Gracen’s artwork without our little house looking like a cluttered mess. One of the places we love to hang multiple pieces is on her bedroom door. So much so, that over time, it’s become her little art gallery of sorts. For the longest while we were just taping things up using masking or scotch tape rolls, then I jumped on the washi tape bandwagon, which took it up a notch, but neither were overly toddler-friendly. I wanted Grae to be able to hang her artwork and switch around the pieces without having to muck around tape or ask for assistance. So today, we put together a little gallery door that she can update and add to all on her own, with just a press of a clothespin. Here’s what we did…

Yesterday, while Grae splashed in the wading pool out back, I painted a handful of regular wooden clothespins. She’d come out, dripping wet, help me with some painting, and jump back into the pool, splashing my table in the process. With a couple of base coats dry, we used the eraser side of pencils, dipped them in white and black paint, and polka dotted our way along each pin. The result was very handmade looking clothespins with a charm all their own.

Today, we took some small 3M poster hanging strips and sliced them vertically using a utility knife and a ruler. (This can be done using scissors, but trust me – use a utility knife. It’s much easier.)

Next, we peeled off the protective paper backings and stuck the strips onto the backs of the clothespins, leaving just the tiniest touch hanging over the top edge (hoping it might make the job easier when we want to remove them one day).

As a last step, I removed the other side of the protective paper and adhered the pins onto the door. I put them on very gently at first, and once I knew my {random} layout would work, pressed them down quite hard to ensure a good stick.
The result was a gallery door where Grae can proudly display her favourite creations without needing much help to do so.


♥
Are you following us on Facebook and Instagram yet?
We’d love to have you!

That’s a great idea! Goodbye yuck blu-tac, hello functionality!
Oh goodness – so true! I had almost forgotten about that blue gunk and the grease stains it leaves on your posters. :)
Yup, I like your idea much better!
That’s a fantastic idea! And I love 3M products. When Gracen’s a little older and needs more space than a door (we had a tsunami of creations when Simon started JK), you could put those clips along a playroom wall. We got a wire thing from IKEA and strung it along about 10 feet of wall, and have clipped Simon’s schoolwork to it, but your clips are way cuter.
I love the IKEA wire thing… I think I actually have that pinned somewhere! Hopefully one day soon we’ll have a bigger house with room for a playroom… That would be amazing!
Hang in there! It looks like you’re doing an excellent job of maximizing the space you’ve got, but more room is always a good thing with young kids. Our first house was tiny, and our second isn’t huge but has a really great floor plan for a family. And we could afford it because it was painted garishly inside and featured all sorts of weird things like carpet going up the wall instead of baseboards. :)
Any tips on hanging the buntings? I tried those 3M strips, but they don’t allow for enough drape.
What a great idea! We have a couple of budding artists in our house and never have enough space to show off their work. I’m going to try this out!
Raj
Pink Chai Style
You’ll have to let me know how it turns out, Raj!
Cool! My son loves hanging up his artwork. We have a big area to display it above his play kitchen, but he likes being able to hang it himself…this would work for that!
Great idea!