This article was originally written for the November / December 2022 issue of The Good Life, the in house magazine of Nature’s Fare. You can see all of my The Good Life articles here.
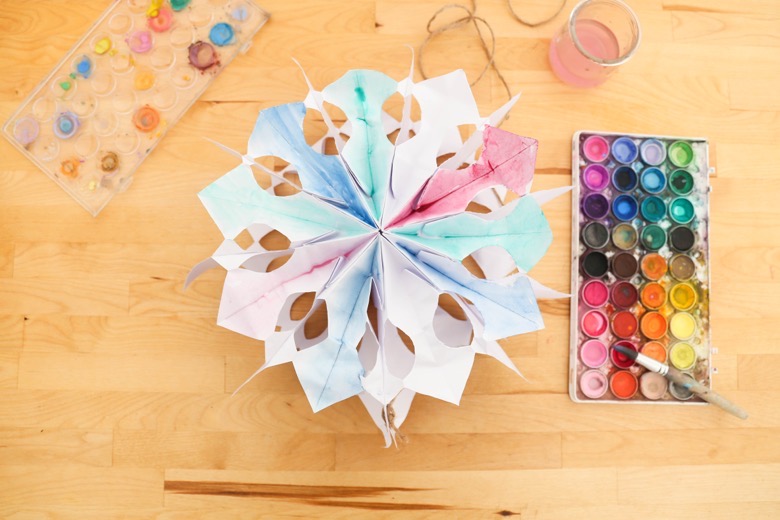
Simple winter decor made from paper bags? Yes please! These 3D paper bag snowflakes might be the simplest and quickest DIY decor project ever, but they turn out every time, look beautiful hung up, cost very little, and can be reused year after year and then composted when done. They’re so, so good.
Here’s something about me… Seasonal decor isn’t really my thing. I love it for other people, but I just don’t love it for me. I don’t love having and storing STUFF, I don’t love the extra work of swapping things out, and I’m sort of just happy with leaving our house decorated as it is all year long. There’s no Christmas village that comes out, no big mantle display, no seasonal mugs that appear in a hot cocoa station on the counter… It’s just not my vibe.

These though? I can get behind. They’re fun to make with the kids, the snowflakes can be reused year after year and fold down flat so they require very little space, and when I’m done with them? They can be recycled or composted.
Sign. me. up.
Wanna try?

Here’s what you’ll need:
– 8 to 12 paper bags that are all the same size
– a glue stick
– a pencil
– a good pair of scissors
– twine
– a hole punch (not required, but helpful)
– paper clips or small alligator clips (optional)
– watercolour paint & a paintbrush (optional)
Okay, let’s do it! Here’s how to make a paper bag snowflakes at home…

Start by placing one of your paper bags on the workspace in front of you with the folded flap facing up and the bag’s opening at the top.
Side note: bags that make great snowflakes include brown paper lunch bags, paper bakery bags, small craft bags, paper party bags, collected gift bags, and saved paper grocery bags.

Using a glue stick, cover the entire surface of the paper bag with glue. Quickly place a second bag directly on top of the first bag, making sure it’s lined up and oriented the same way as the first. With a little bit of pressure, smooth the bag down to ensure the two are fully attached.
Repeat this process until you have a stack of 8 to 12 bags glued together. For paper lunch bags, 10 tends to be a good number. If you’re using smaller bags, you’ll need more and if you’re using larger bags, such as paper grocery bags, you may be able to get away with only using 8. Something to keep in mind: the more bags you use, the more full and intricate your finished snowflake will look, but more bags will also make it more difficult to cut.

Next, it’s time to cut out your snowflake designs. This part of the process is very similar to cutting out 2-dimensional snowflakes, but can be a little more difficult due to the thickness of the paper bags. Feel free to draw your designs on with pencil first or just go straight to cutting with scissors.

First, cut the top open ends of the paper bags into a shape of your choosing. Snipping off the top corners to create a triangle top looks great, but you can also do a more rounded shape, a single angled line, a zig-zagged top, or any other shape you might like to try.
Now cut along the sides of the paper bags. Anything goes here – cut out triangles, semi-circles, and lines in different sizes and formations. Just be sure not to cut out TOO much and to keep the bottom flap part mostly in tact.
A couple of cutting tips:
– Make the cutting part of this project easier by preparing two half stacks of bags, cutting the design out of each stack, and then glueing the two stacks together.
– Make it even easier by cutting your design out of one bag and using it as a template for cutting out the other bags before glueing them together.
– For little ones requiring a lot of help, consider having them draw their design onto the paper bag stack and doing the cutting for them.

Time to fan out the bags in a circular motion to bring your creation to life! If you love how your snowflake looks fanned out, you’re ready to secure it. If it doesn’t look quite how you’d like it to, fold it back up and adjust your cuts or add a few more.

When you’re ready to secure your snowflake, you have two options – clips or glue. If you’d like your snowflakes to fold flat for easy storage after use, secure the two flat sides of the bags together with small paper clips or alligator clips. You might be able to see them a little bit, but they shouldn’t be overly noticeable. If you don’t mind storing the snowflakes in their 3D form, or if you plan on composting them after use, just glue the two sides together – so easy!

Finish off your project by using a sharp pencil tip or hole punch to create a small hole in one of the snowflake’s points. Thread a piece of twine through and secure it with a knot. This will be used for hanging your snowflake.

If you’d like to, you can add a little bit of colour to your snowflake using water colour paint… Just go easy on the water as paper bags tend to get soggy easily.

And that’s it! Make a bunch and hang your snowflakes along a wall, in front of a window, from a mantle, or even from the ceiling.
Are you following us on social media?
Find us on: Facebook | Instagram | Pinterest | Twitter
We’d love for you to join us!


 Today Gracen’s
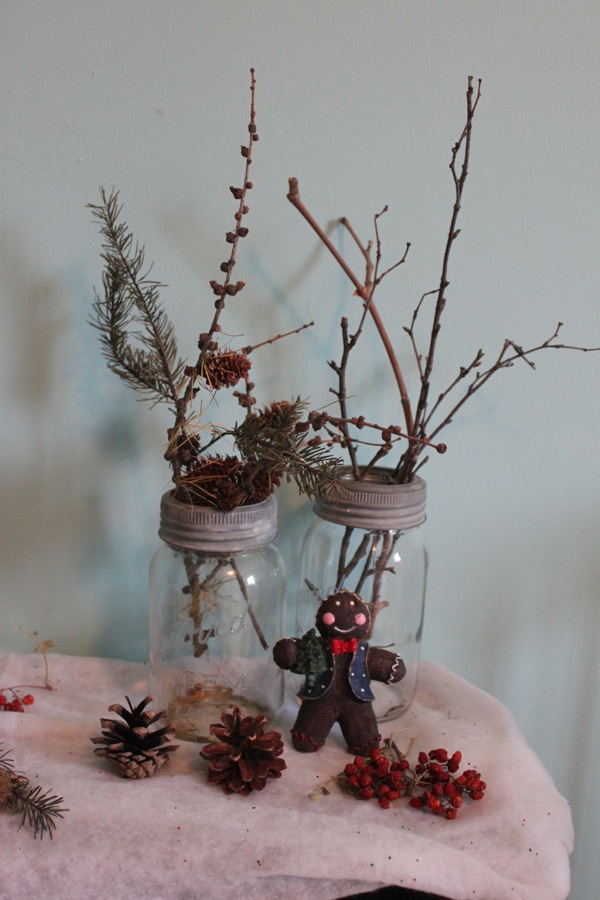
  Gone are the crunchy leaves, dried out sunflowers, mini pumpkins, new apples, and shedding cattails…
 And in are the bare branches, pinecones, evergreen limbs, and dried red berries.


 If we’re striving for accuracy, the title ‘Christmas shelf’ would probably be more appropriate at this point, but we’re sticking with ‘nature shelf’ because soon enough all of the little Christmas extras (many of which were mine when I was little) Miss G carefully selected and added will be tucked away until next year and we’ll be back to having shelves filled with plain ol’ nature things.
 And because we don’t have quite as many wintery things as we did autumn-y things, we decided to use the bottom shelves for seasonal books, which Gracen loves having on display.

 To get started, I purchased 25 of these flat 5 by 7 paper bags (you don’t want the lunch-style ones that fold out at the bottom) from one of my favourites –
  Then, using one of the stamp sets I use for my
  Next, I selected an area of wall to hang my calendar. I went with this spot because it’s right along the ground and allows Gracen to reach her own bags each day, but you could really do any spot you wish.
  Next, I filled the bags, added a note inside each, sealed them shut with washi tape, and hung them on the lines with mini wooden clothespins.
 Originally, I had really wanted craft paper bags, but I actually think the white ones turned out perfectly. They are just see-through enough to show the shape of the object(s) inside, which gets Miss G really curious.
 This year, because Grae is nearly obsessed with adding to the tree each day, we decided to make her advent calendar all about ornaments. Some days her bag will be filled with a purchased or previously made ornament to add to the tree, and other days, she’ll have to create the ornament first. Either way, there will always be a handwritten note included that tells her why the ornament is special or what she can create using her materials.


 ♥
♥