When we were on vacation, all of the old-school toys Grandma Charlotte has saved from her boys’ childhood got me thinking about favourites from my own childhood. While it’s not really a toy, one thing I LOVED growing up was the felt boards teachers would use during carpet times in elementary school. You just knew that if you sat down to listen to a story and the teacher reached for her felt board and a bag of felt pieces, it was going to be a good one.
This then got me thinking about all of the cool things Miss G and I could do with a felt board of our own. From matching games, to sorting activities, to building funny faces, and learning about shapes and colours… The options are endless really.
Now, we probably could have bought a pre-made felt board and coordinating pieces, but what fun is that?! Especially when making one of your own is so easy. The best part is that this entire project can be done over the course of a nap time if your little one sleeps for at least an hour.

We picked up this square poster frame from IKEA, grabbed a package of felt from the craft store (you can also buy it on a roll from fabric stores), and gathered up a glue gun (I later changed my mind and used Tacky Glue but I think either would work), a pencil, and some scissors.

To get started, I took the cardboard backing out of the picture frame, lined it up with the corner edges of the felt piece, and traced the other two sides onto the felt in pencil.

Next, I cut the felt square out. (Make sure you’re using really sharp scissors here. Your sanity and straight line with thank you.)

Next, because I chose to use white felt, I took the paper insert that came inside the frame, flipped it over, and glued it onto the cardboard insert to create a white backing for my felt. (You can use your glue gun or Tacky Glue here, but you could just as easily use white glue or a glue stick too.) See the difference? Much better with a little help from the insert.

Next up, I carefully gave my felt piece a quick iron. You don’t have to do this, but I found it made it much easier to mount the felt onto the cardboard when the large creases had been removed. Just be sure to use a low heat and keep your iron moving if you do this step. Then, mount your felt onto the cardboard using thin glue strips in order to avoid ripples and bumps in the felt. Also because felt does have some give and can stretch over time, it’s a good idea to glue the middle as well as the edges (I did the edges and a giant ‘x’ across the centre). Once you’ve got your felt piece placed on the glue, smooth it down from the centre outwards to ensure a good stick.

When your glue has had a chance to dry, place your cardboard backing into the frame and secure it.

Voila! Felt board complete.

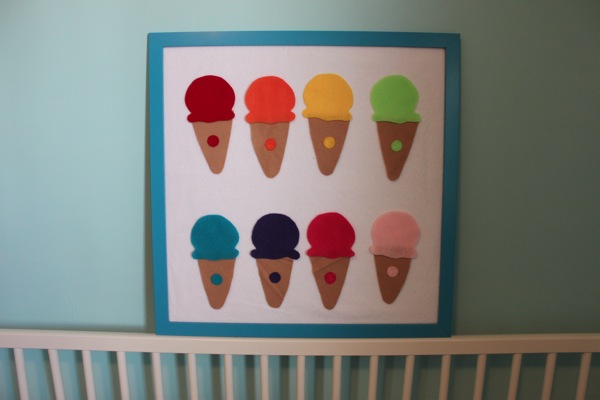
With Miss G still sleeping and a little time still on my hands, I decided it would be really fun to have a game of some sort ready to go for when she woke up. I had no idea what I would make, but it needed to be something quick and easy. Thank goodness for Pinterest! I searched “felt board ideas” and got all of these great results. Scrolling through, I was immediately drawn to an ice cream cone colour matching game that I knew would be quick to cut out and super engaging for my little lady who loves matching games and announcing the colours she sees around her.

I just cut out my first cone and ice cream scoop freehand and then used the pieces as a guide for my others, but upon visiting childcareland.com later, I saw that she has a printable template available also.

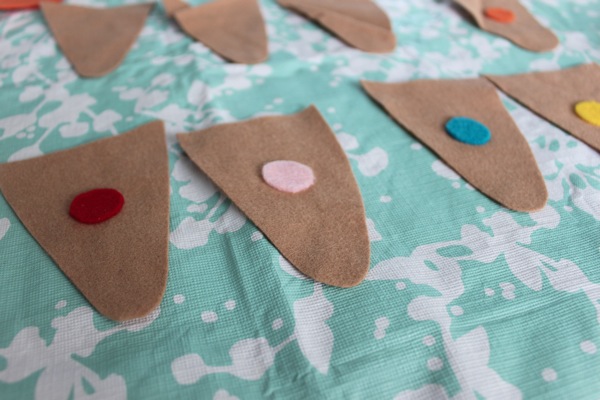
I cut my circles out using a coin as a guide and glued them onto the cones using a little dot of Tacky Glue. And that was it. After a few minutes drying time, the pieces were ready to be put to use.

I love this felt board set because it can be used when talking about colours, it can be used as a matching game, it can used to learn about rainbow order, and it can be used just for fun (think 8 scoop ice cream cones!)

Here’s the finished product.

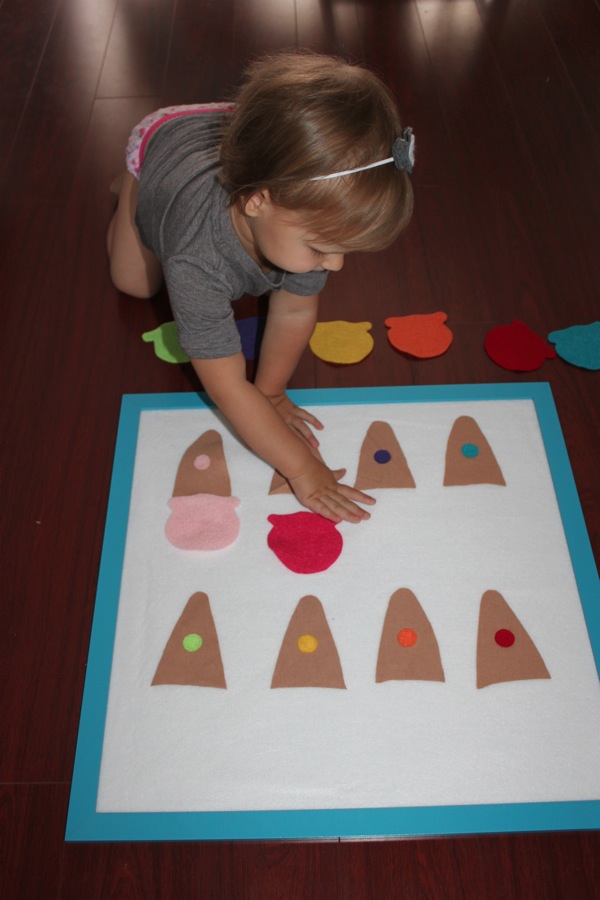
Miss G was thrilled to wake up to this little surprise and matched the scoops to the cones again and again, naming the colours as she went along.
Can’t wait to make some other pieces for her soon.
UPDATE: Check out our new and improved DIY felt board tutorial!
♥
For more fun not found on the blog, join us on Facebook or follow us on Instagram.

 All you need is some plain dinnerware, a Sharpie or two, and in our case, some tape, and a pair of scissors.
 Because we chose to decorate bowls, I wanted to tape off the inside of the bowl, where the food goes. Some may say that the Sharpie is sealed in by the end of the process, but something just doesn’t seem right about putting Grae’s food on top of permanent marker. Plus, I think having just the rim decorated looks cute. Painter’s tape would have been the obvious choice here, but since I didn’t have any lying around, we made do with packaging tape and it worked just fine.
 Grae got started drawing right away. I explained that we weren’t drawing in the middle of the bowl and that we were just decorating around the edge, and that’s exactly what she did (therefore the tape was pretty much unnecessary, but hey, you never know).
  When I asked Gracen what I should draw on my dish, her immediate response was, “Apple!” I ran with that idea, and since she’s been so interested in colours for the past couple of months, I got started on a little colours of the rainbow theme of sorts.

 Gracen drew and drew and drew and never did I have to encourage her to keep going, choose a new colour, or fill in a blank space. She was having so much fun and was so thrilled about the fact that she was using Mama’s ‘special’ markers that she had more than enough motivation for over an hour’s worth of drawing.
 Of course, in that hour, she stopped to come over and admire my dish several times. She’d look with big eyes, then nod her head with a slow, enthusiastic “Yaaaaaaa…” and a sweet little smile on her face, in obvious approval. Then she’d go on to point out the colours and pictures she saw {and shared those she wanted to see in the very near future – my apple, tree, birdie, and banana were all ideas she offered}.
 The finishing touch was to happily sprinkle her entire rim with dots of different colours. She’d stop a moment, glance at it sideways, then pick up another Sharpie and add more. This continued again and again until one time she took that same sideways glance, then very nonchalantly announced “All done”. And that was that.
 Before we could get it in the house to cure in the oven, she wanted to put her new dish to use, so she carefully browsed through the garden for a handful of ripe strawberries and a sprig of mint.
 With her snack gone in less than a minute (yes, she shoved that entire thing of mint in her mouth and chowed down on it like the
 One final touch to add – our names, the year, and for Grae, her bright green signature.
 And then into the oven they went. In attempt to “bake the marker on better”, I amped up the heat to 400 and left the dishes in for 45 minutes, despite the general recommendation of baking them at 300 degrees for 30 minutes. Bad idea. Although Miss G’s came out fine, my lighter colours really, really faded, some to the point of becoming nearly invisible. Learn from my mistake. The good news is that there’s an easy fix for mistakes such as mine. Just simply redraw your design and then pop it back in the oven for another 30 minutes at 300.
  We let our bowls cool, gave them a good {hand} wash, and used them for dinner. I did try washing them (okay, maybe I even scrubbed a little bit), and so far, so good. The designs still look exactly as they did, and I’m hoping they stay that way for a while at least.