When we were on vacation, all of the old-school toys Grandma Charlotte has saved from her boys’ childhood got me thinking about favourites from my own childhood. While it’s not really a toy, one thing I LOVED growing up was the felt boards teachers would use during carpet times in elementary school. You just knew that if you sat down to listen to a story and the teacher reached for her felt board and a bag of felt pieces, it was going to be a good one.
This then got me thinking about all of the cool things Miss G and I could do with a felt board of our own. From matching games, to sorting activities, to building funny faces, and learning about shapes and colours… The options are endless really.
Now, we probably could have bought a pre-made felt board and coordinating pieces, but what fun is that?! Especially when making one of your own is so easy. The best part is that this entire project can be done over the course of a nap time if your little one sleeps for at least an hour.

We picked up this square poster frame from IKEA, grabbed a package of felt from the craft store (you can also buy it on a roll from fabric stores), and gathered up a glue gun (I later changed my mind and used Tacky Glue but I think either would work), a pencil, and some scissors.

To get started, I took the cardboard backing out of the picture frame, lined it up with the corner edges of the felt piece, and traced the other two sides onto the felt in pencil.

Next, I cut the felt square out. (Make sure you’re using really sharp scissors here. Your sanity and straight line with thank you.)

Next, because I chose to use white felt, I took the paper insert that came inside the frame, flipped it over, and glued it onto the cardboard insert to create a white backing for my felt. (You can use your glue gun or Tacky Glue here, but you could just as easily use white glue or a glue stick too.) See the difference? Much better with a little help from the insert.

Next up, I carefully gave my felt piece a quick iron. You don’t have to do this, but I found it made it much easier to mount the felt onto the cardboard when the large creases had been removed. Just be sure to use a low heat and keep your iron moving if you do this step. Then, mount your felt onto the cardboard using thin glue strips in order to avoid ripples and bumps in the felt. Also because felt does have some give and can stretch over time, it’s a good idea to glue the middle as well as the edges (I did the edges and a giant ‘x’ across the centre). Once you’ve got your felt piece placed on the glue, smooth it down from the centre outwards to ensure a good stick.

When your glue has had a chance to dry, place your cardboard backing into the frame and secure it.

Voila! Felt board complete.

With Miss G still sleeping and a little time still on my hands, I decided it would be really fun to have a game of some sort ready to go for when she woke up. I had no idea what I would make, but it needed to be something quick and easy. Thank goodness for Pinterest! I searched “felt board ideas” and got all of these great results. Scrolling through, I was immediately drawn to an ice cream cone colour matching game that I knew would be quick to cut out and super engaging for my little lady who loves matching games and announcing the colours she sees around her.

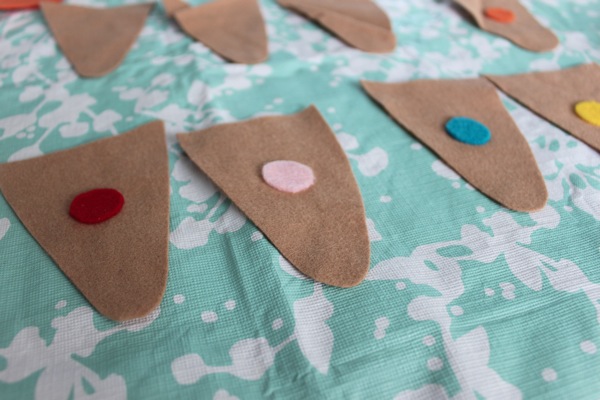
I just cut out my first cone and ice cream scoop freehand and then used the pieces as a guide for my others, but upon visiting childcareland.com later, I saw that she has a printable template available also.

I cut my circles out using a coin as a guide and glued them onto the cones using a little dot of Tacky Glue. And that was it. After a few minutes drying time, the pieces were ready to be put to use.

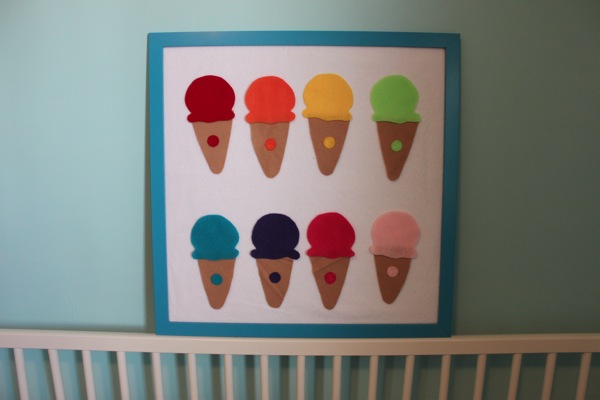
I love this felt board set because it can be used when talking about colours, it can be used as a matching game, it can used to learn about rainbow order, and it can be used just for fun (think 8 scoop ice cream cones!)

Here’s the finished product.

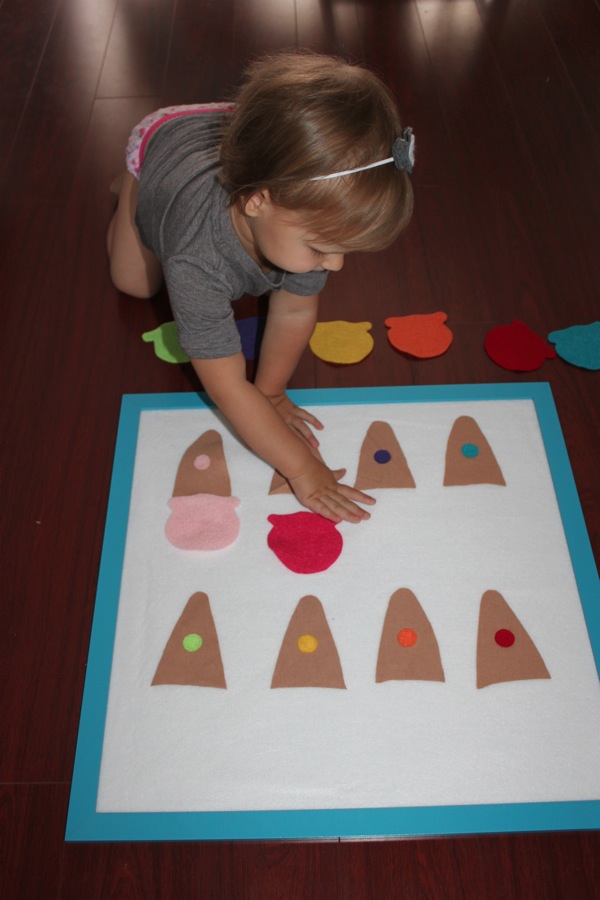
Miss G was thrilled to wake up to this little surprise and matched the scoops to the cones again and again, naming the colours as she went along.
Can’t wait to make some other pieces for her soon.
UPDATE: Check out our new and improved DIY felt board tutorial!
♥
For more fun not found on the blog, join us on Facebook or follow us on Instagram.

I am SO going to do this for a friend for a gift! her daughters birthday is in Sept and the party theme is Ice Cream!
Thanks for sharing!!
I think this would make a great gift! I have a few friends whose little ones have birthdays coming up soon and I was thinking of whipping up a couple of extras for them too! :)
Ok – I finally made this for my daughters friend – I am blogging about it tomorrow – I will link up here for sure!!!
Thanks for the idea!
I was looking through your blog tonight, and I anticipate using a lot of your ideas that you do to play with your daughter – I love how engaged she is with learning – I really want to be able to do that with my daughter as well!!! Thanks for sharing all of your stuff – it is really going to help!!!
Thanks for the kind words – I’m more than happy to share. :) Can’t wait to see your post tomorrow!
I made a travel one the other day and it was a big hit. It had Fabric on the outside and rolled up. I gave it as a gift with the book Chicka Chicka Boom and had all the letters and tree cut out. I am going to make one for Kaylee for our next Plane trip.
That’s brilliant, Erin! I may have a 5 hour drive with just Grae (and no Brad) and I’ve been looking at some ideas… I’ve been thinking about doing a baking sheet play station with magnets on one side and a felt board or chalk board on the other, but if I borrow your idea, she could have all three! Love it. Do you have a picture of the one you made? I’d love to see it!
What a great idea! Love the thought of a roll up travel one!
Soooo cute!! Love this idea :)
Simple, but a ton of fun. G still plays her ice cream game all the time.
I love it – so bright and colorful and great for promoting all kinds of learning!
Thanks, Deborah! :)
What a wonderful activity! Love your tutorial, and the colourful “scoops” look so inviting!
Hi there,
Sorry if my question seems stupid, but I have no experience with felt board games. Do the felt pieces stick to the board just by themselves? Or how are they attached to the felt board?
You betcha! Felt sticks to felt. :) I answered a few felt board-related questions in this post: https://mamapapabubba.com/2012/12/21/felt-board-name-game/. :)
My felt didn’t stick so I put 2 sided tape on mine… thinking of putting felt sticks to the other boards.