
Grae’s been absolutely loving our coloured gel baggies. Today we took them off of the window where they’ve been hanging out for the last couple of days and tried them out on a very simple DIY light box I threw together for us to experiment with.

Grae’s been absolutely loving our coloured gel baggies. Today we took them off of the window where they’ve been hanging out for the last couple of days and tried them out on a very simple DIY light box I threw together for us to experiment with.

Oh my goodness… Gracen has just been loving the book activities we’ve been doing with our Preschool Book Club! So much so that yesterday while she was happily engaged in an activity not based on a book, she stopped suddenly and announced, ‘I know what this activity needs! A book to go with it!!’ Then she ran to the shelf, sorted through to find a story that coordinated with the project, and brought it over, declaring, ‘Now that’s better!’ Hah!

Gracen just recently started talking about rainbows a lot, which couldn’t have come at a better time with St. Patrick’s Day right around the corner. Since her Valentine’s colouring matching sticky wall activity was such a hit, I decided we’d do a variation of it for the week leading up to St. Patrick’s Day.

This time, using the same method as I did last time, I drew a quick rainbow with clouds on the contact paper.

And instead of construction paper cut-outs, this time I included tissue paper pieces (in coordinating rainbow colours) and cotton balls for the clouds.
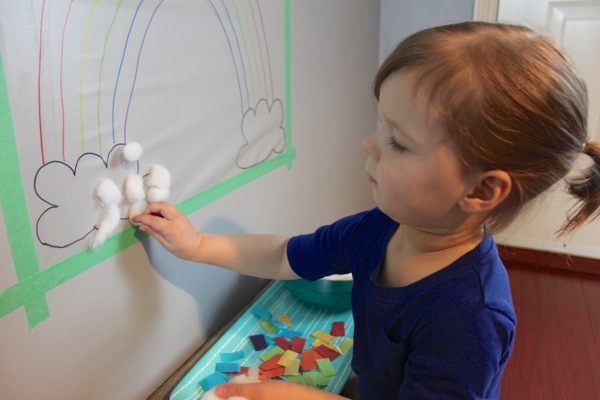
I thought Gracen might ask what the cotton balls were for, given that the rainbow drawing really didn’t include any white, but not the case. She immediately dove into the bowl and started filling up the clouds.

Clearly, the cotton balls were the favourite of this activity. If I would have known, I would have attempted to dye cotton balls in all of the rainbow colours and skipped the tissue paper all together, but maybe we can try that another time.
Once all of the cotton balls had been used in one way or another, she began sticking the red tissue paper pieces on, lining them up just so. After a few, she looked at them sideways, then looked at me and exclaimed, “A row, Mum! Just like a real rainbow.” For the next week or so, I can almost guarantee that Miss G will be working on her rainbow rows.
♥
For extra fun, like us on Facebook here and find us on Instagram here.
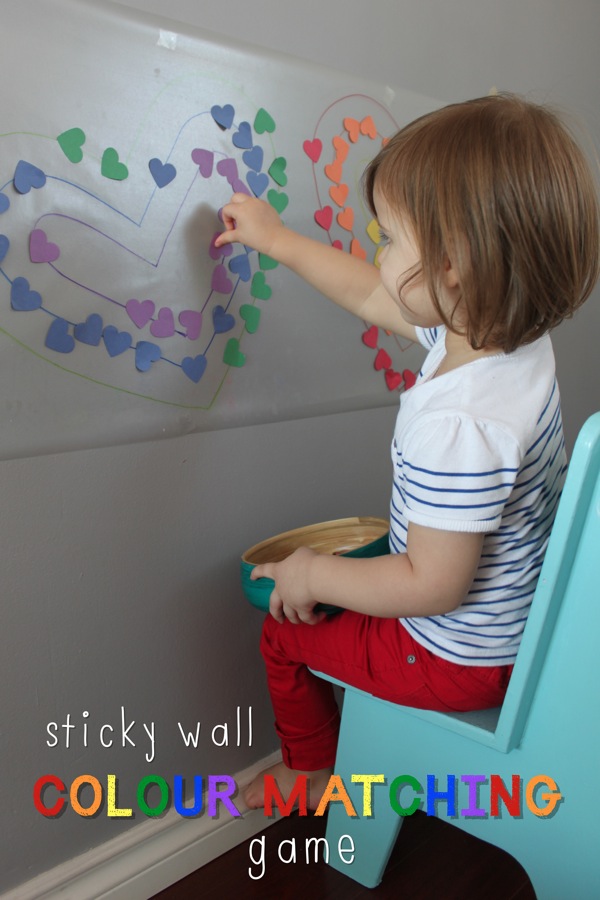
One of the little activities I set up for Miss and her friends to enjoy at our Valentine’s tea was this sticky wall colour matching game. The idea came from No Time for Flashcards (an amazing activity resource for kids of all ages) and although I followed Allison‘s instructions pretty closely, I made a couple of little changes along the way.

Needed for the project was construction paper in rainbow colours, a heart-shaped paper punch, permanent markers in coordinating rainbow colours, and clear contact paper {which can be purchased at dollar stores and home hardware stores}.

First off, I punched out tons of hearts and mixed them up really well in order to make the activity more challenging.

Next, I rolled the contact paper out on the floor (paper backing side down) and drew rainbow-coloured hearts inside one another on the non-sticky side of the contact paper (using permanent markers for this part is key).

The following morning I peeled the paper off of the corners, and taped the sheet up to the wall before peeling the entire backing off. As you can see, I attempted to make it look cute by taping it to the wall with my black and white polka dotted washi tape, but it simply didn’t cut it. The ugly masking tape had to be brought out, but it worked perfectly.
When Miss G’s little friends came over, they began popping up the hearts all over the place {somewhat to Grae’s dismay}. And though most of them didn’t get put in the ‘correct’ places, they had a lot of fun with it. In fact, at one point I think we had 3 toddlers pressing their faces onto the sticky wall and slowly pulling them away before sticking them back on again. ☺
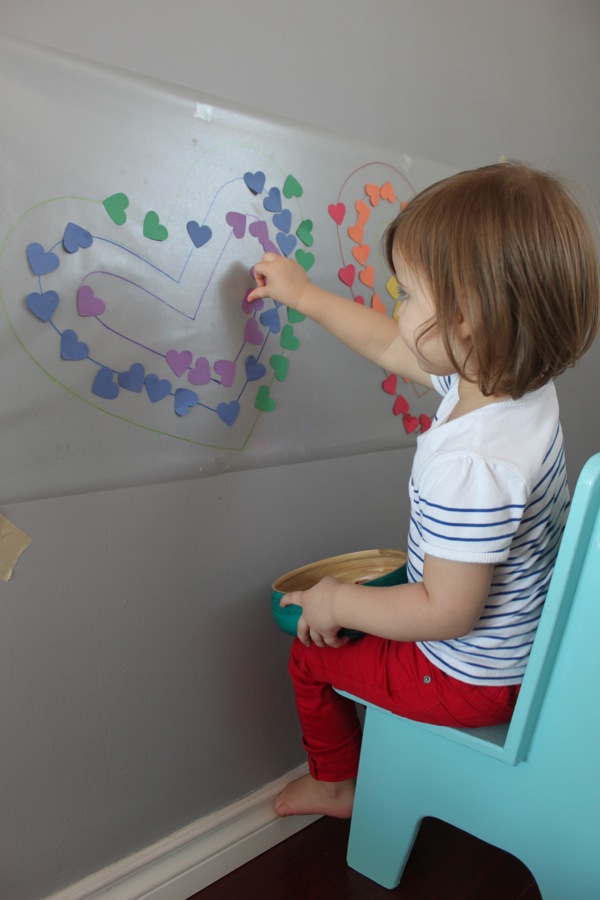
Of course, once everyone had gone, she got straight to fixing things. The beauty about contact paper is that the paper hearts can easily be removed and reattached if need be.

Grae worked hard on her project for a good long while and it’ll stay up for the next while for her to revisit when desired, which I know will be often.
♥
For extra fun, like us on Facebook here and find us on Instagram here.
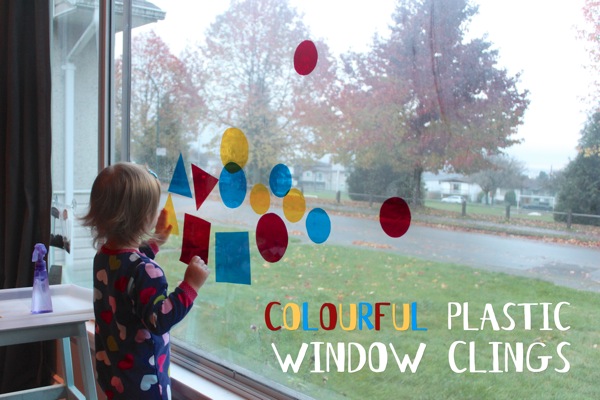
During our recent visit to Urban Source (I feel like a lot of my upcoming posts will start this way), Gracen selected several sheets of coloured acetate (basically a brightly-hued transparent film) to bring home. Right away, two activities came to mind… One of which was this window cling art.
 During nap time, I used different objects from around the house as tracers to cut the large sheets into an assortment of shapes. I placed the shapes, along with a spray bottle filled with water, on a tray next to our large front window, and left it there for my curious little monkey to discover upon her awakening.
 Of course she beelined to the tray the moment she was up. I explained that we could use water to help the shapes stick to the window, and she was off. A little mist….
 And stick a shape on top.
 Voila! Instant window art. Super fun and super easy.
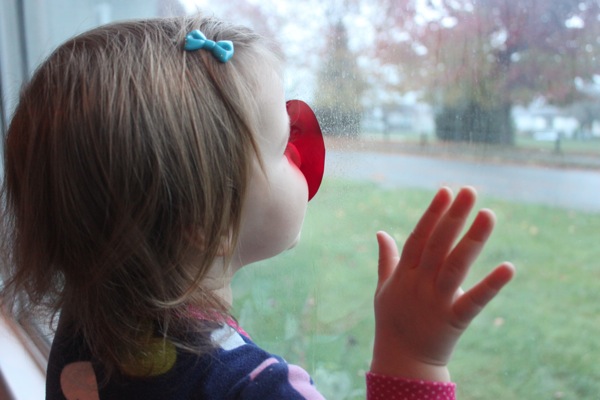 It didn’t take her long to realize that looking through the shapes was pretty cool too… “Mama! Everything is all pink!”
 Of course the previous method works well for seeing the outside world in pink, but this is much more effective for making your house turn pink.
 The really cool thing about the fact that our shapes are primary colours is that they lend themselves to colour mixing very well. Grae was amazed at all of the colours she could make by simply overlapping two shapes.
 And after experimenting with colour mixing, she tried sorting the pieces into groups based on shapes and colours.
 And soon after that, the pieces started becoming pictures of things. The triangles stacked on top of one another became her tree and the tower of large circles became her snowman (if you look closely, you’ll see she is in the process of adding buttons to her snowman’s belly).
This was such a fun and simple activity and as long as you can deal with dirty windows in the name of play, it can stay out for several days to be revisited over time. The other thing I like about it is that if you don’t have coloured acetate just hanging around the house, you can always reuse project covers, plastic duo tangs (or, as I’ve learned from my American friends, plastic “prongy folders”), scraps of vellum scrapbooking paper, or even plastic packaging.
♥
On a side note, I know that I have seen this idea around the web before… Trouble is, I cannot for the life of me find the link I’m thinking of! If you know, please pass the info my way as I’d love to give credit where credit’s due.
After seeing how Lindsay from The Little Red Horse turned my felt board DIY into an awesome birthday gift (check it out here), I decided to *borrow* her idea and whip up something similar for one of Grae’s little friends whose party we attended this weekend. (Thank you, Lindsay!)
I liked the idea of a creating a colour matching game, but wanted to try something different than ice cream cones this time around… Something a little more October birthday-ish, so cupcakes it was!

All I did was cut out cupcake tops (with a candle attached for gluing purposes), cupcake liners and candles in coordinating colours, and little yellow flames.

Then, using Aleene’s OK To Wash-It glue, I attached the coloured candles and flames to the cupcake tops.

Voila! An easy little felt board game that allows munchkins to practice colour matching by pairing up the tops and bottoms of the cupcakes.
Sadly, I didn’t take a photo of the finished product, but the felt board looked exactly like Gracen’s, said “HAPPY BIRTHDAY” across the top, had two of the felt cupcakes in the middle (because the little boy was turning two) and said “JACKSON” (the little boy’s name) across the bottom. We also included the rest of the alphabet, the other cupcakes, and a jack-o-lantern face designing game each in a little bag separately.
Gracen loves her felt board, so she was very proud to give one to her little friend come party time. ☺
♥
This morning Miss G found a little wooden Melissa & Doug box {that used to house her alphabet magnets}, brought it to me, and asked, “Play game?” Ummmm… Okay. I was certainly not going to turn away that sweet little face, so I had to think on my toes.

The two compartments of course lead to a sorting activity of some sort, and the first thing that popped into my head was colours.

I grabbed two pieces of coloured paper, cut them {very roughly} to fit inside the compartments, and asked Grae if she wanted to help me find little things in pinks and yellows.

Of course she was more than game, so we went around the house collecting things and deciding whether or not they were too big. This is what we came up with.

Grae needed no explanation. I simply said, “Do you want to play?” and off she went.

I did realize part way into our collecting that the activity wouldn’t last long, but we had already started and it’s not like it was a huge time investment, so we continued along our way. I wasnt timing, but the game probably lasted all of 60 seconds from start to finish. The good news is that Grae seemed to enjoy herself and was happy to take everything out, mix it up, and play again and again.
Next time, if we wanted to get more ‘bang for our buck’, we could easily use two more similar colours (aqua and blue, grey and black, or something similar) or try sorting based on something different all together like circles and squares, wood and plastic, or tall and short.
Here’s a little video of Grae hard at play multiple rounds in:
♥
When we were on vacation, all of the old-school toys Grandma Charlotte has saved from her boys’ childhood got me thinking about favourites from my own childhood. While it’s not really a toy, one thing I LOVED growing up was the felt boards teachers would use during carpet times in elementary school. You just knew that if you sat down to listen to a story and the teacher reached for her felt board and a bag of felt pieces, it was going to be a good one.
This then got me thinking about all of the cool things Miss G and I could do with a felt board of our own. From matching games, to sorting activities, to building funny faces, and learning about shapes and colours… The options are endless really.
Now, we probably could have bought a pre-made felt board and coordinating pieces, but what fun is that?! Especially when making one of your own is so easy. The best part is that this entire project can be done over the course of a nap time if your little one sleeps for at least an hour.

We picked up this square poster frame from IKEA, grabbed a package of felt from the craft store (you can also buy it on a roll from fabric stores), and gathered up a glue gun (I later changed my mind and used Tacky Glue but I think either would work), a pencil, and some scissors.

To get started, I took the cardboard backing out of the picture frame, lined it up with the corner edges of the felt piece, and traced the other two sides onto the felt in pencil.

Next, I cut the felt square out. (Make sure you’re using really sharp scissors here. Your sanity and straight line with thank you.)

Next, because I chose to use white felt, I took the paper insert that came inside the frame, flipped it over, and glued it onto the cardboard insert to create a white backing for my felt. (You can use your glue gun or Tacky Glue here, but you could just as easily use white glue or a glue stick too.) See the difference? Much better with a little help from the insert.

Next up, I carefully gave my felt piece a quick iron. You don’t have to do this, but I found it made it much easier to mount the felt onto the cardboard when the large creases had been removed. Just be sure to use a low heat and keep your iron moving if you do this step. Then, mount your felt onto the cardboard using thin glue strips in order to avoid ripples and bumps in the felt. Also because felt does have some give and can stretch over time, it’s a good idea to glue the middle as well as the edges (I did the edges and a giant ‘x’ across the centre). Once you’ve got your felt piece placed on the glue, smooth it down from the centre outwards to ensure a good stick.

When your glue has had a chance to dry, place your cardboard backing into the frame and secure it.

Voila! Felt board complete.

With Miss G still sleeping and a little time still on my hands, I decided it would be really fun to have a game of some sort ready to go for when she woke up. I had no idea what I would make, but it needed to be something quick and easy. Thank goodness for Pinterest! I searched “felt board ideas” and got all of these great results. Scrolling through, I was immediately drawn to an ice cream cone colour matching game that I knew would be quick to cut out and super engaging for my little lady who loves matching games and announcing the colours she sees around her.

I just cut out my first cone and ice cream scoop freehand and then used the pieces as a guide for my others, but upon visiting childcareland.com later, I saw that she has a printable template available also.
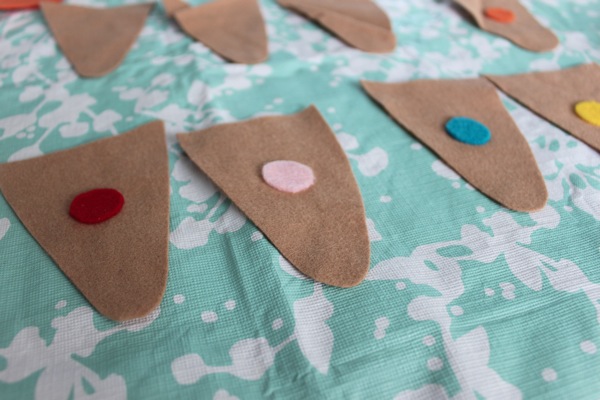
I cut my circles out using a coin as a guide and glued them onto the cones using a little dot of Tacky Glue. And that was it. After a few minutes drying time, the pieces were ready to be put to use.

I love this felt board set because it can be used when talking about colours, it can be used as a matching game, it can used to learn about rainbow order, and it can be used just for fun (think 8 scoop ice cream cones!)
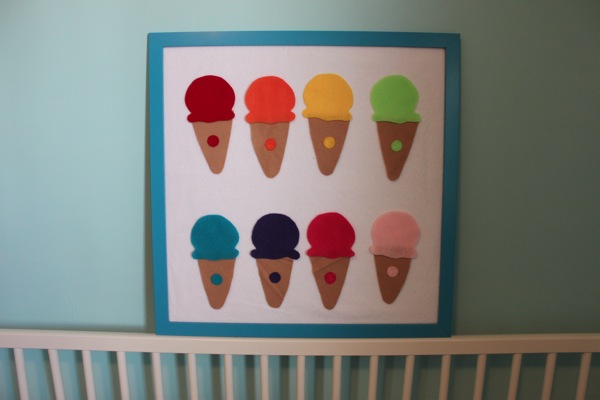
Here’s the finished product.
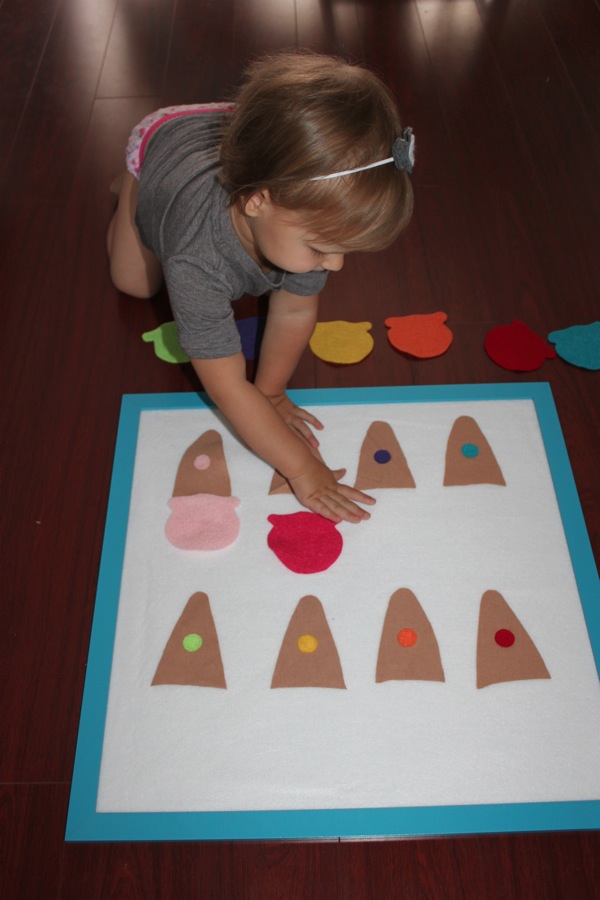
Miss G was thrilled to wake up to this little surprise and matched the scoops to the cones again and again, naming the colours as she went along.
Can’t wait to make some other pieces for her soon.
UPDATE: Check out our new and improved DIY felt board tutorial!
♥
For more fun not found on the blog, join us on Facebook or follow us on Instagram.