 Though this afternoon’s squirt gun painting wasn’t planned, a monstrous hour and 45 minute clean-up after quiet play time didn’t leave us much time before dinner, so we ditched our other {more involved} painting plans and tried something super simple and quick to set up!
Tag Archives: summer things to do
Simple Bed Sheet Tent
As a girl, I adored spending time in special little forts and hideaways, and now I love creating similar spaces for Miss G to cozy up in. Though we’re huge fans of our super simple backyard teepee, this summer we decided to try something new – a simple triangular tent created using only a few things from around the house.
Rock Painting {a summer favourite}
Simple Summer Fun: Seashell Painting

While cleaning out our vehicle yesterday, I realized that we still had a big stash of beach shells we’d collected a couple months hiding in our hatch (you know you’re a parent when…) We’d originally collected them with the intent of painting them, so that’s just what we did.
Bubble Painting
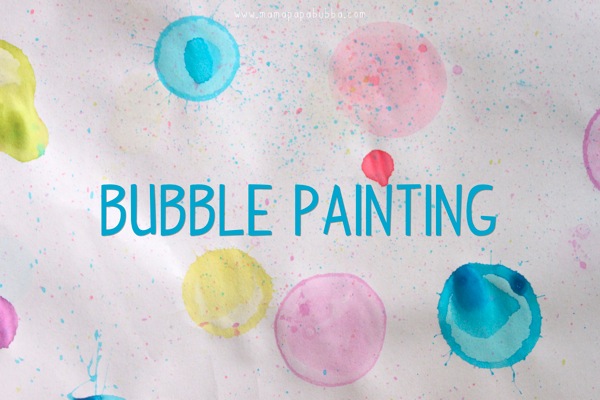
Yesterday Miss G and I finally got around to something that’s been on my mental activity list forever now… Bubble painting! Now if you cruise Pinterest, you’ll see that bubble painting is all over the internet and everyone seems to do it a little bit differently. Variations include all different sorts of bubble solutions, wands, and methods, so we just made up our own.
Floating Flowers… Fun for Pools, Baths, & Sensory Bins
 When we went to pick up a pool noodle for Gracen’s marble run water slide, she originally fell in love with a flower-shaped noodle. While I knew it wouldn’t be the best fit for our marble run, at $1.25, I knew we would eventually figure out a way to put it to good use.
 It was my first time seeing this sort of pool noodle, and all I knew was that I wanted to slice it up to create tons of little individual flower shapes.
 So that’s just what I did. Just like when slicing a pool noodle in half vertically, I found that using a sharp, serrated knife and a sawing motion worked best. I sliced ours about an inch thick, but you could do them any thickness you like – even varying thicknesses would be fun!
 As I chopped, Miss G ran the ready flowers over to her blow up pool and tossed them in!
 It’s such a simple thing, but they looked so pretty and inviting dancing around on the water’s surface. (I’m already picturing them in bath tubs and sensory bins too!)
 I think Miss G agreed, because she immediately jumped in {despite the freezing cold water} and started splashing around like mad!
 When the splashing had subsided a little bit, Grandma Charlotte showed Grae how the flowers could be used as building blocks.
 It’s definitely easier in still-ish water, but it’s equally fun when in or out of the pool. Towers can be built…
 Pyramids can be built…
 And ‘trains’ can be built too! Of course, the possibilities are really endless when it comes to building structures – even when they’re floating ones.
 Now the only question is how I’m going to convince Brad that heaps of pool noodle flowers are a Kuwait necessity… I mean with the heat and the amount of time we spend in and around water there, they are, aren’t they? ☺

Super Simple 5 Minute Backyard Teepee
First off, I have to say that my Baba is hands down one of the most amazing, wonderful women I know. She’s one of those ladies who can truly do anything… From sewing to cooking to running a farm, fixing things, painting, gardening, building things, and entertaining – she excels at all. Oh, and at 70 something years old, having never used a computer or the internet, she bought herself an iPad and taught herself how to use it too. Amazing, right? (Hi Baba! Love you!) ☺
Growing up, my little brother and I would spend a week or two at my Baba’s house each summer. Our days out at the farm were wonderful. We spent nearly all of our time outdoors… We herded cattle, carried huge buckets of grain out each morning, and watched calves being born. We roamed through massive gardens with freedom to pick and eat as much as we pleased. We devoured fresh peas off the vine, ate up buckets of raspberries, and wandered around with long stalks of rhubarb with little glass bowls of dipping sugar. Baba taught us how to use the ride-on mower, make pedaheh from scratch, and draw with artists’ pencils and shading sticks – all of the things childhoods should be made of.
But above all other adventures and activities that took place on that farm, the one that stands out most in my mind – the one that was most anticipated each year – was building a backyard teepee. Baba would take us out into the forest, small saw in hand, and we’d cut down the trees that would form the structure of our new home. We’d drag them back, position them and tie them up, then drape them in sheets until our teepee was fully enclosed. Perhaps the very best part was furnishing it afterwards. We’d carefully separate the space in half, position our mattresses and end tables (Baba doesn’t mess around), then stock it up with blankets, flashlights, snacks, books, and activities. I can’t even describe how cool it all seemed as a child.
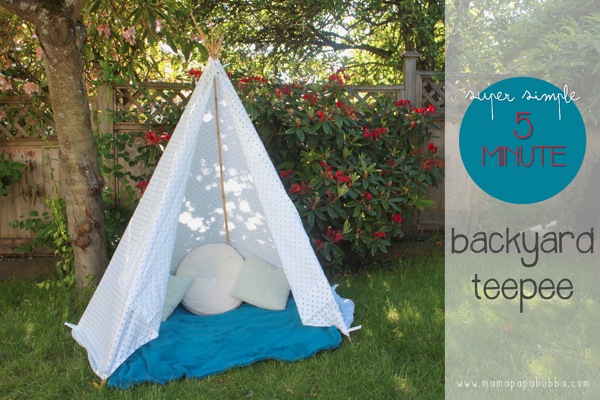
Recently, I introduced the magic of backyard teepees to Miss G. Nothing that could rival one of the ones my Baba used to make, but a teepee none the less. Our first one was a completely impromptu build, but it was so quick and easy that we’ve made them the same way each time since. Here’s how we put together our super simple backyard teepee in no longer than five minutes…

First up, the materials… We use 6 6-foot tall bamboo stakes (purchased at any store that has a decent gardening section), a king-sized sheet, some jute, and 10 – 12 clothespins.
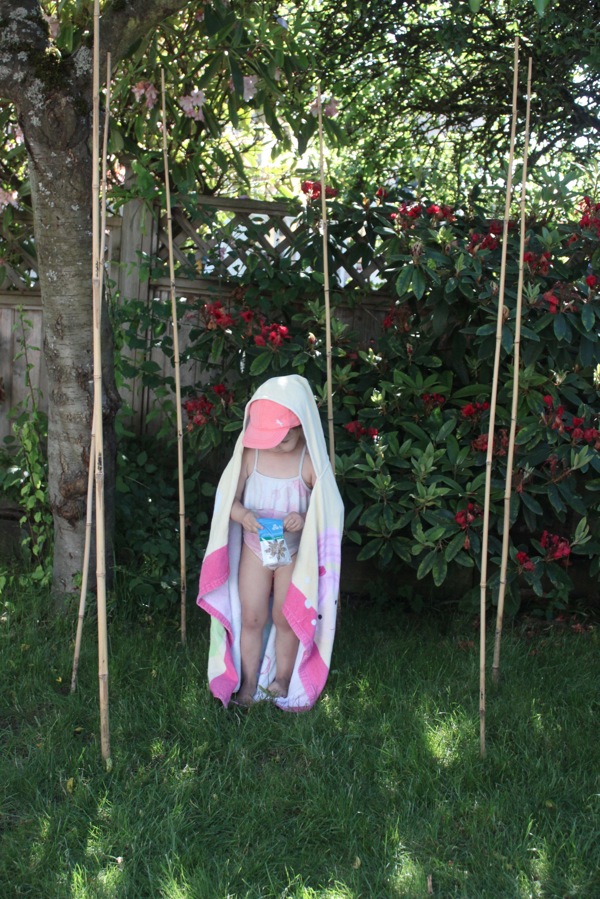
To start out, I push the stakes into the ground just an inch or two to form a circle with an open front. (As you can see, G likes to stand in the middle and have me build around her. ☺)

Next, I gather up the top of the stakes in one hand (there really isn’t a right way to do this – I just grab them and how they come together is how they come together) and use the other hand to wrap the jute around. One thing I try to do while wrapping the jute is to weave it in and out of the stakes – this gives it some better holding power. When the jute seems secure, I tie it off in a bow so it’s easy to undo later.


With the structure built, it’s time to enclose it with the sheet. To do this, I simply drape the sheet around the stakes horizontally with the ends being at the front opening. To hold it in place temporarily, I bring the two sides of the sheet together at the top and secure it using a clothespin and add another two at the base of the two front stakes.

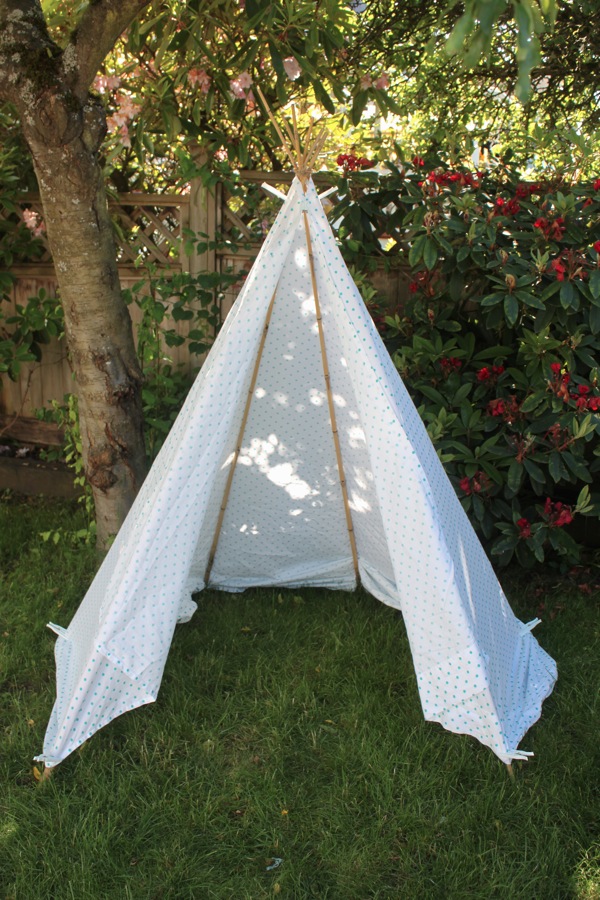
Next up, it’s time fix the positioning a little, smooth everything out, tuck in the extra fabric, and secure it all. I like to start at the front, making sure that both of the front stakes are fully covered and each side has a flap of extra fabric that can be used to close up the teepee completely if desired. To do this, I just tug and adjust until it’s the way I want it. With the sheet positioned properly, I move to the top and add several clothes pins to secure the sheet to the stakes. I usually use four, but you could put one on each of the 6 stakes if you wanted to. Then I go to the bottom and add a pin to each of the stakes, tucking under the extra fabric along the way if needed.
And that’s it – the basic teepee is complete. Super simple, right?

To make ours extra cozy, we always add a blanket in the bottom and a few throw cushions along the sides.
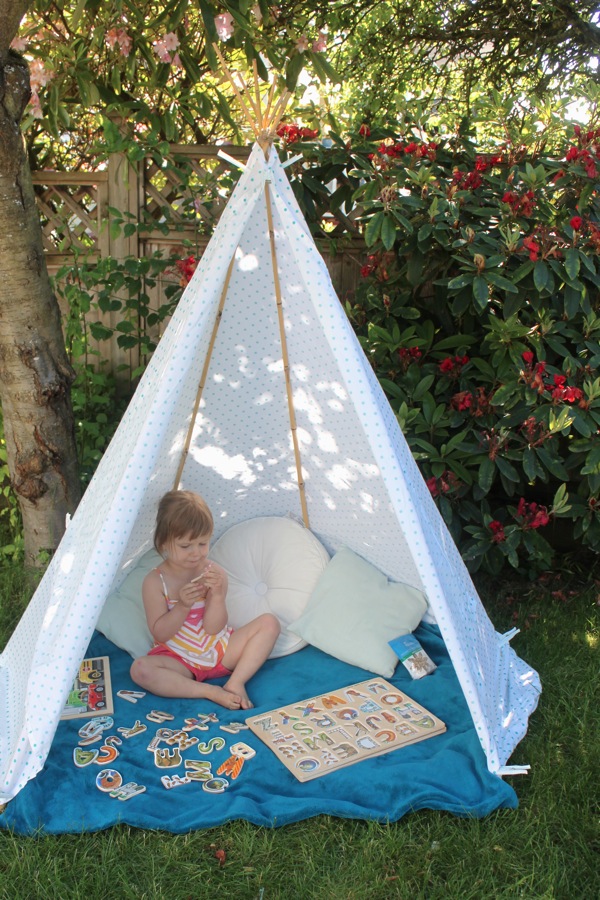

One of Gracen’s favourite parts is selecting an activity to bring into her teepee with her. Most often, it’s a stack of books to read, but today it was a stack of puzzles instead.

When we’re done playing for the day, we normally take down the sheet and bring everything inside, but leave the bamboo stake structure up, which makes for an even faster set up the next time and the time after that and the time after that…
♥
Are you following us on Facebook and Instagram yet?
We’d love to have you!


