 I’ve seen snow ice cream floating around the web a lot lately (like here, here, and here)… Some recipes use eggnog, some use sweetened condensed milk, some use vanilla pudding powder, and others use raw eggs. The trouble is that I wouldn’t feel good about giving any of those things to my little lady. So today we set off to create a healthier version. (It would have been a shame not to with all of this snow we’ve been getting in the Okanagan!)
I’m happy to report that the end result turned out wonderfully! It was sweet, creamy, and delicious – a perfect afternoon treat.
 Here’s our line up of ingredients… Cream, vanilla almond milk, pure maple syrup, pure vanilla, and some really good cinnamon.
 Oh, and a bunch of this – light and fluffy freshly-fallen snow.
 To get us started, Gracen poured both the cream and vanilla almond milk into a large mixing bowl.
 Then she added some pure maple syrup…
 Some pure vanilla…
 And a few pinches of cinnamon.
 Then she stirred everything up.
 The next step involved adding the snow.
 The monkey requested a mitten in order to get the job done.
 With all of the ingredients added, it was time to mix, mix, mix.
 We found that alternating mixing with a sort of mashing motion worked really well and broke up the clumps at the same time. Here’s what our batch looked like once it was ready.
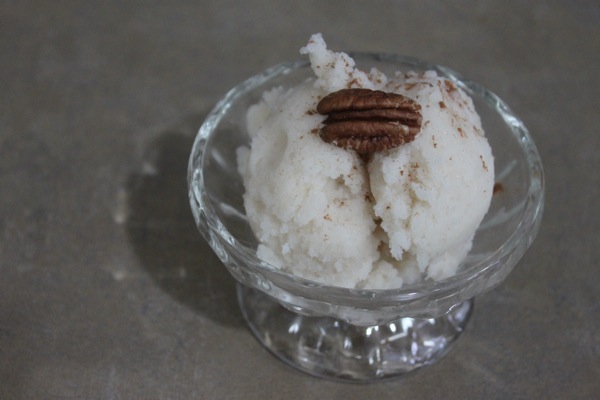
 To serve it, I added a little sprinkle of cinnamon (Miss G loves it and it has great health benefits, so we add it to a lot of things) and topped it with a pecan.
 Not only was it delish, but it was a really fun snowy day activity.
- 3/4 cup of vanilla almond milk
- 1/4 cup of cream
- 1/4 cup of pure maple syrup
- 1 teaspoon of pure vanilla
- a couple of pinches of cinnamon
- 6 cups of freshly fallen snow
- You do have to work a little bit quickly in order to prevent the snow from melting and turning your ice cream into soup. If needed, you might be able to buy yourself a few minutes of extra time by placing your large mixing bowl into an even larger bowl lined with ice.
- This ice cream is best made and served fresh. After a few hours in the freezer, ours pretty much turned into an ice block.
- If you don’t have snow where you are, processing ice cubes in a blender or food processor until fine is a fairly effective way of making your own snow.

What a cute idea!! Love it, and love that it’s homemade healthy :)
The homemade and healthy bit is very important to me too! Plus it’s fun and easy. :)
I never heard of people eating snow… like making something to eat with real snow! lol. my parents taught me that eating snow is unhealthy and dangerous when I was little. So I would have never thought to make something with it. lol. obviously it is not unhealthy as my mom always taught me.
Your mom was probably trying to protect you from the nasty yellow stuff! ;) I would only ever consider using freshly fallen stuff because, well… you never know!
Ohhhhhh this sounds delicious. It’s on our Winter Bucket List we’re now just waiting for the snow.
Thank you so much for linking up to Tuesday Tots last week just letting you know that I will be featuring this over on Rainy Day Mum this week.
Thanks so much, Cerys! I hope you guys enjoy making your own snow ice cream… We had SO much fun with it! :)
Ooh that does look strangely delicious