
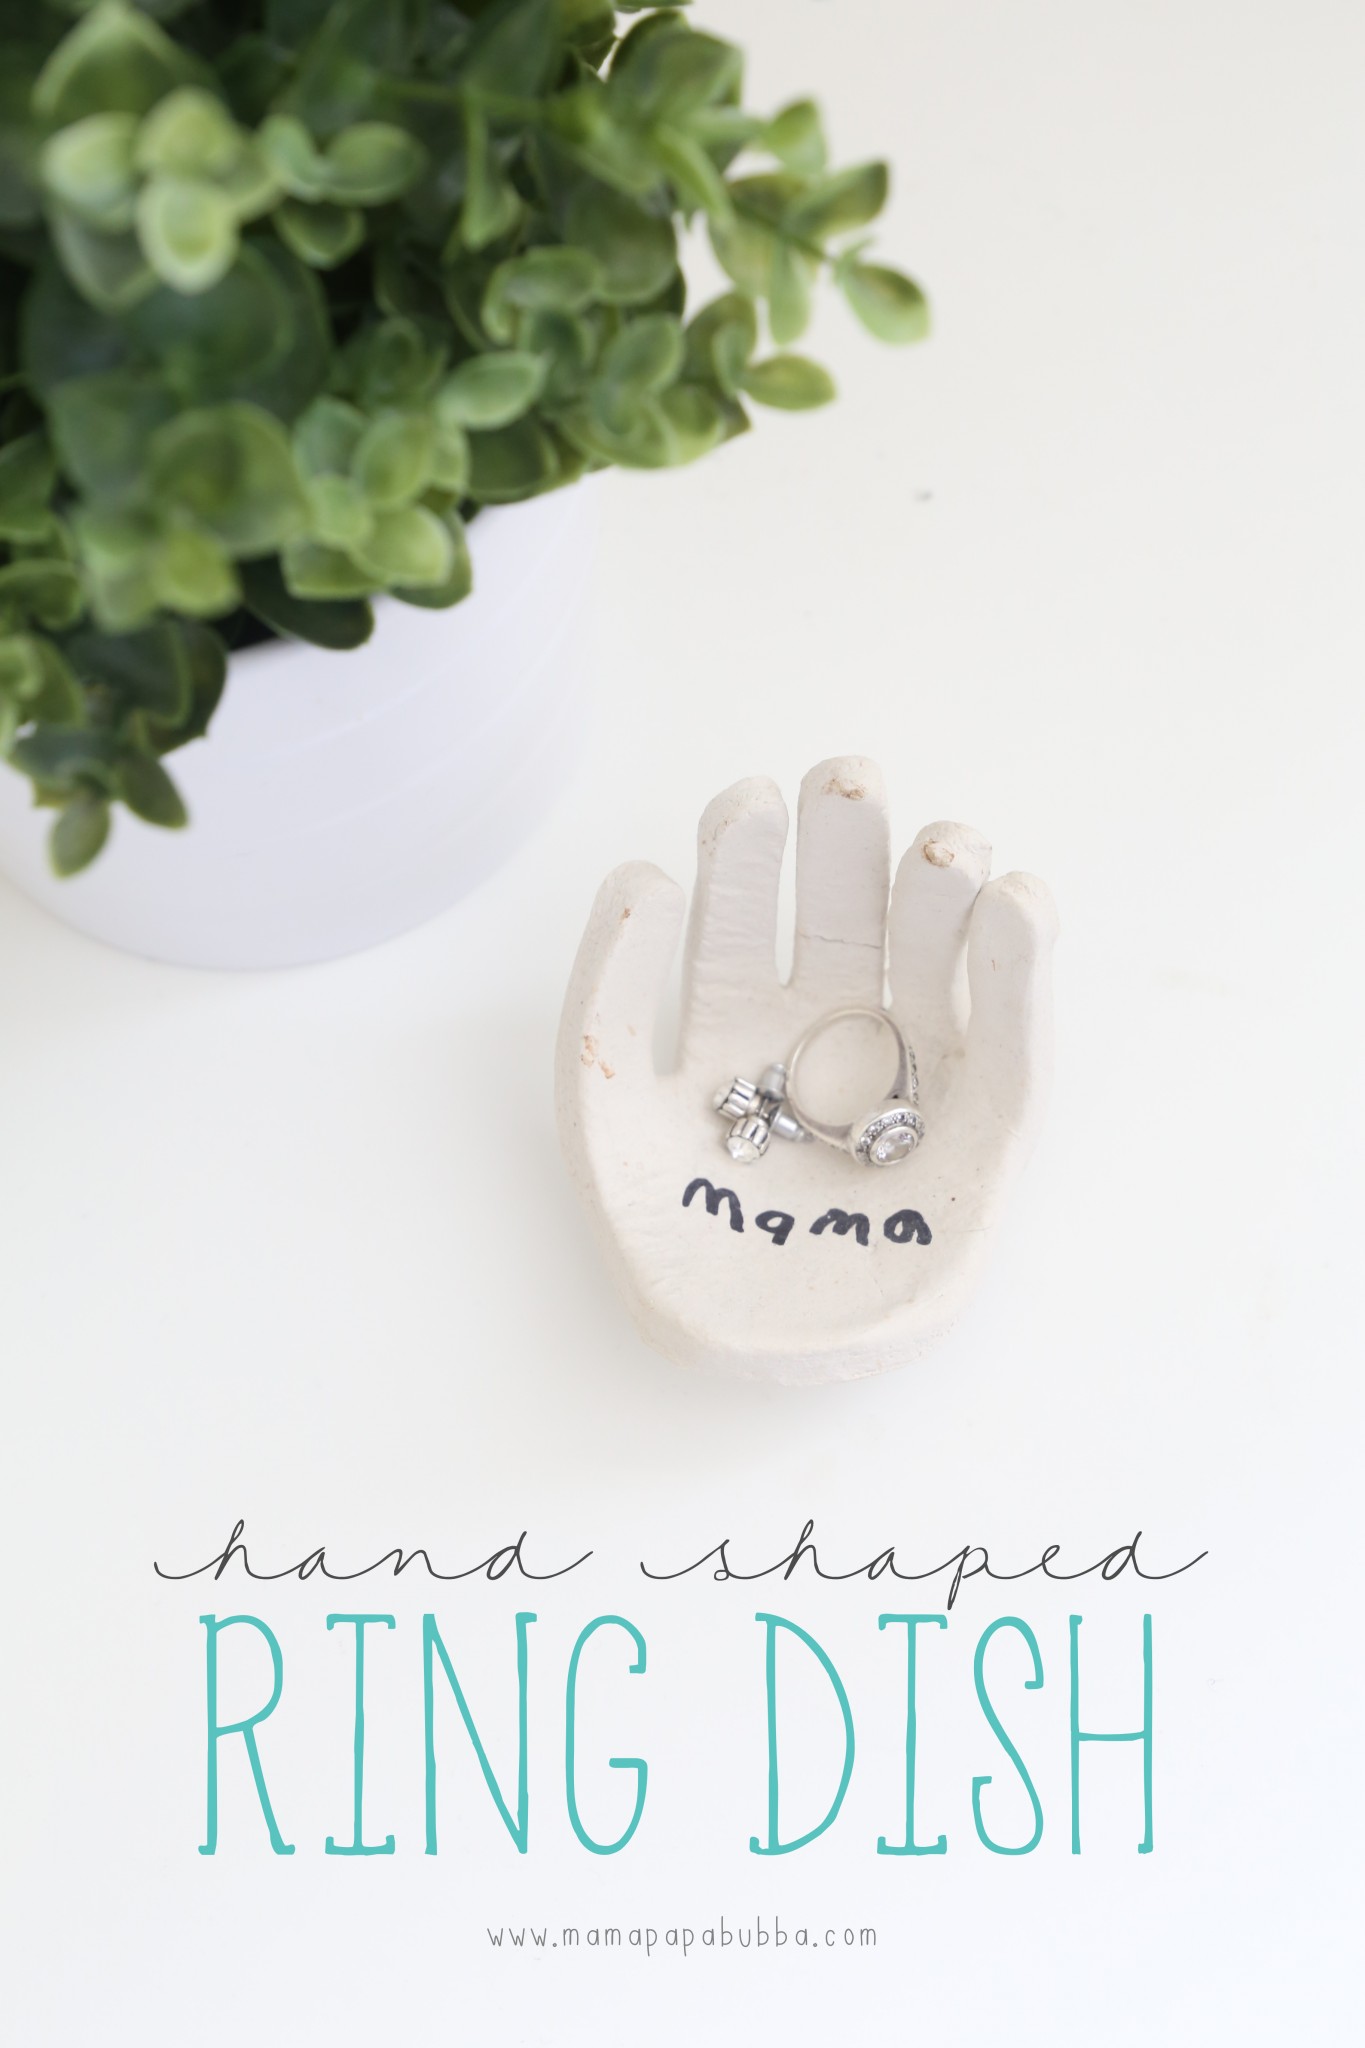
With Mother’s Day only a few days away, I started thinking about some of the fun Mother’s / Father’s Day gifts kids tend to make in school year after year. The first project that came to mind? Clay pinch pots – a classic. I don’t know what exactly has made them the go-to gift for moms and dads, but my guess is that it’s their versatility. Dad needs a coin dish? Check. A safe spot to store his tie clip and cufflinks? Check. Mom needs a bowl to hold bobby pins and hair elastics? A special spot to store her rings at night? Check. Check. And that’s how this project came about. I {quite desperately} need a spot to keep my rings while not wearing them instead of my usual leaving them somewhere in our large apartment only misplace them and eventually find them a few days later. While we could have made just a regular pinch pot, we decided to try making a hand-shaped ring dish since I’m a little obsessed with handprint projects. Didn’t it turn out sweet?
 {this post contains affiliate links}
The entire project was pretty simple, both material-wise and process-wise. Here’s what we used… Some air-dry clay I picked up when we first arrived in Kuwait, a small ball, an embroidery needle {though a pencil, toothpick, or bamboo skewer would work well too}, a sharp kitchen knife, and a small rolling pin.

To get started, took out about a third of our package of clay and rolled it out so it was just under a centimetre thick. Then Grae very gently set her hand on top, making sure not to press down.

As she did that, I traced around her hand using our embroidery needle.

Next, using our sharp knife, I carefully cut out the handprint, keeping my lines as smooth as possible.

Gracen helped me peel away the extra clay, and this is what we were left with. Cute, but those edges were a little rough for our liking.

Grae very happily retrieved a bowl of water from the kitchen, and I began smoothing the handprint’s edges by wetting my fingertip and running it along the sides of the hands. This method worked really well and I was able to smooth the tight in between the fingers parts by using a wet cotton swab.

Next, we gently lifted the hand and turned it upside down on top of our ball. We quickly realized that our ball wasn’t stable enough on its own, so Grae offered me a chunk of play dough to help keep it still – smart girl! With our ball in place, we very gently pressed our fingers down so that the palm of the hand took the shape of the ball. I also used this opportunity to smooth a couple of edges on the bottom side of the clay hand.

About 8 hours later, the hand felt quite dry and firm, so we removed it from the ball and let it sit overnight so that the other side could dry completely too. The next morning, the hand felt dry all around, so we got to decorating.

At this point we could have painted the hand using acrylics, but because I’m all about black and white right now, we left it as was. To make it extra special, I asked Gracen if she would write ‘Mama’ on the palm of the hand, and she happily agreed. This part was a little tricky as her printing is still quite big, but after a couple of tries, she fit it on just perfectly {a good white eraser took care of the first attempts}.

Using a black Sharpie, I carefully traced over her letters…

And then fully erased any leftover pencil marks.

That’s it. Now I have a beautiful spot for my rings that doubles as a keepsake of my little lady at 3.5{ish} years old and I couldn’t love it more.

Edited to add: And here it is 3 years and an international move later… Still gorgeous as ever and on my bedside table. Admittedly it suffered a fall in the hands of its clumsy owner not long ago, but it was nothing a little glue couldn’t fix! {Let’s not talk about the fact that it made it in a box from the Middle East all the way back to Canada without so much as a scratch only to be dropped by yours truly while cleaning – ugh.} Either way, a glued on finger won’t stop me from keeping this little treasure until the end of time. I love it so.
Are you following us on Facebook and Instagram yet?
We’d love to have you!
really good idea! I was thinking that you can even use the fingers to stack up the rings :-)
Oh, I just love this! Thinking of all the ways we could decorate our hands! What a super gift idea! Thanks so much for sharing with me, Jen!
So all you have to do is let it air dry? No oven?
Also, what kind of paint or varnish would you use?
Love this! :)
This is adorable! I also wanted to mention my daughter is named Gracen as well!
I have my treasured hand shaped ring dish that my daughter Jen made 35 years ago as a Kindergartener!! My son made a pinch pot when he was a Kindergartener 30 yrs. ago. I still keep these treasures on my night stand. Wish I could send a photo. I posted it on my FB : )
This couldn’t
I am loving this for a blending family wedding idea. Thanks!
Bernie. 18 September 2014. Just love love,love this!! Thank you so much! Can’t wait to do with my Grade R class and use as ‘end of year gifts’ for their moms!! They will enjoy decorating and then we will varnish for a professional ‘finish’
Awesome project! Also, I had to mention that I love her name! I have a 4 year old son, Greyson, who we also call grey. We almost spelled it Graecen, but figured that would get butchered!
Soo love this ideal :)
How much of the clay from the package did you use? I have three little hands I need to copy and I am wondering how much I should order. Thanks!
You’ll be fine with just one pack, Jamison! We used less than a quarter of the clay for ours. :)
Did you use a certain type of clay?
Hi Anita! We used the exact clay shown in the photo and linked in the post – DAS air dry clay. :)
I made 10 hands of different age children and only used half a pack of clay. They painted them and then varnished. Great project
Oh, Jen this is so gorgeous! We just made plain old boring salt dough handprints for the kids to paint next week, but we may have to try a few of these, too!
A friend and I just did these with our daycare kids today. I can’t wait to see the look on their mom’s faces. They are absolutely adorable. Thank you so much for this post!
I’m having a hard time with the clay sticking to my surface when I roll it out. Any suggestions? Thanks!
This may be a little late since mother’s day was yesterday, but I used parchment paper and a good heavy rolling pin. It worked well and didn’t stick.
Hi- What is the size of the ball that you used?
I made these bowls and they are super cute. I made the mistake of using gold leaf paint and then spray laquer which melted the gold leaf and made it run. To fix it, I sprayed over the mess with metallic gold paint and it looks so amazing now. I was thinking of painting just the inside part of the bowl in a light blue or pink as gifts. Or maybe paint around the edges in those colors. Thank you for the inspiration!!!
Where can I buy this?
Hi, this post is old but I’m hoping someone will respond. I made a few of these for my kids grandmothers. I didn’t use the same brand of clay; I went to pick one up, barely tapped it against something and it practically crumbled. Is there any thing I can do to keep that from happening?
Ugh! How frustrating! What type of clay did you use, Brittney?
I used Amaco air-dry clay. The ones that didn’t break, I coated in some rubber cement and they are still in one piece. I have been extra careful with them, so I can’t say if it has helped… Hopefully it has. Thanks for the reply. If you can suggest anything else, I’d appreciate it.
We just made these, they’re drying now. Can we just color on them with Crayola markers?! Thanks
I was wondering how many sticks of clay or pounds i need for 14 kids
Hi, will these work with Baking soda clay?
Do you think these would be good gift idea for a 9 and 11 year old to give their parents?
So adorable! I cannot wait until we are old enough to make these.
This ring dish is absolutely adorable! My kids are growing up way too fast and this would be a great way to “freeze time” a bit so I can remember their little hands. If I wanted to have my kids paint them, what type of paint would you recommend using? Or would colored sharpies be better?
Thanks so much! I’d recommend acrylic. :)
What size ball did you use? Tennis ball?
I just made these for my lass of 12 it is a cute project but I had trouble with it. It took so long to dry out. When you thought it as dry, it wasn’t and we had many break :( What is the fastest way to dry them? I even put them in the oven on low to dry them out. we used air-dry clay. It took more than 2-3 days to dry :(
Thank you this is very cool
We just tried this and the fingers kept falling off once we put it over the ball… any suggestions??
Hi Kelly! What kind of clay were you using?
Polyform Air Dry Modeling Clay that I got at Michaels.
How can I download this? Please send me a link.
Thank you,
Sheila
Hi Sheila! There’s nothing to download. :) You trace your own hand for the project! <3
That looks awesome I am thinking of making my mum one for her birthday so how much clay do you use and can it be any coloured clay you want? Also what clay is that? Is it DAS or another clay?
Hi Loren! For little kid hands we used less than a 1/4 of the pack of air-dry clay. And yes – we used DAS. The exact one you see in the photos. It’s also linked. I recommend this one because we’ve used it many times and I know it works, but you can use any air-dry clay you like. :)
So adorable! I these will be my Project for the next Week
I’m wondering if there is a way to incorporate two children’s hands into this. I have a 4.5 year old and 4 month old and want to try to have both in one for a gift for grandma. Hmmmmm…
How about draw the hands one at a time next to each other, cut round them in one piece and use a slightly larger bowl or ball to curl the fingers?
Would this work with Salt Dough? Has anyone tried it?
If you are looking for the best and expert strategy coaching then Lara Schmoisman is the best marketing strategist and coach, podcaster, and international speaker at laraschmoisman.com. She is helping entrepreneurs and businesses across all types of industries to stand out from the crowd and grow in the digital world.
Little update! I did this with my class of 28 10 and 11 year olds and 4 packs of the clay shown was enough:)