Earlier in the week, Miss G and I put together an adorable little Pinterest-inspired card for her Gido’s (grandpa’s) birthday. (Gido if you’re reading this right now, you shouldn’t be! Back to preparing/enjoying your bike trip!!!) The original post comes from A Day in the Life, and although we stuck to the basic plan, we made a few little changes along the way too. Here’s our version…
First up – materials… A couple of pieces of card stock, some crayons, a pencil, a black Sharpie, a glue stick, and some scissors.
To get started, we traced Grae’s hand onto the card stock in pencil (her favourite part – the girl loves having her hand traced).
Then I folded the card stock in half, and cut out the hand, giving us two identical copies. We did try to ‘team cut’ the hand shape, but it was pretty tricky, so Grae became the recycling collector/depositor for this part instead.
Next, using our black marker and the hand-over-hand technique, we printed “I love you…’ on the front of the left hand.
Then it was time to decorate both hands. Everything is better with colourful baby squiggles, is it not?
Next, we cut two strips of our white card stock, glued them together to form one extra-long strip, and wrote “this much!”, plus a personalized message, along the length before Grae added her special touches to it.
With the decorating complete, we folded up the strip accordion-style…
And attached each side to the palms of the hands using our glue stick.
When we were on vacation, all of the old-school toys Grandma Charlotte has saved from her boys’ childhood got me thinking about favourites from my own childhood. While it’s not really a toy, one thing I LOVED growing up was the felt boards teachers would use during carpet times in elementary school. You just knew that if you sat down to listen to a story and the teacher reached for her felt board and a bag of felt pieces, it was going to be a good one.
This then got me thinking about all of the cool things Miss G and I could do with a felt board of our own. From matching games, to sorting activities, to building funny faces, and learning about shapes and colours… The options are endless really.
Now, we probably could have bought a pre-made felt board and coordinating pieces, but what fun is that?! Especially when making one of your own is so easy. The best part is that this entire project can be done over the course of a nap time if your little one sleeps for at least an hour.
We picked up this square poster frame from IKEA, grabbed a package of felt from the craft store (you can also buy it on a roll from fabric stores), and gathered up a glue gun (I later changed my mind and used Tacky Glue but I think either would work), a pencil, and some scissors.
To get started, I took the cardboard backing out of the picture frame, lined it up with the corner edges of the felt piece, and traced the other two sides onto the felt in pencil.
Next, I cut the felt square out. (Make sure you’re using really sharp scissors here. Your sanity and straight line with thank you.)
Next, because I chose to use white felt, I took the paper insert that came inside the frame, flipped it over, and glued it onto the cardboard insert to create a white backing for my felt. (You can use your glue gun or Tacky Glue here, but you could just as easily use white glue or a glue stick too.) See the difference? Much better with a little help from the insert.
Next up, I carefully gave my felt piece a quick iron. You don’t have to do this, but I found it made it much easier to mount the felt onto the cardboard when the large creases had been removed. Just be sure to use a low heat and keep your iron moving if you do this step. Then, mount your felt onto the cardboard using thin glue strips in order to avoid ripples and bumps in the felt. Also because felt does have some give and can stretch over time, it’s a good idea to glue the middle as well as the edges (I did the edges and a giant ‘x’ across the centre). Once you’ve got your felt piece placed on the glue, smooth it down from the centre outwards to ensure a good stick.
When your glue has had a chance to dry, place your cardboard backing into the frame and secure it.
Voila! Felt board complete.
With Miss G still sleeping and a little time still on my hands, I decided it would be really fun to have a game of some sort ready to go for when she woke up. I had no idea what I would make, but it needed to be something quick and easy. Thank goodness for Pinterest! I searched “felt board ideas” and got all of these great results. Scrolling through, I was immediately drawn to an ice cream cone colour matching game that I knew would be quick to cut out and super engaging for my little lady who loves matching games and announcing the colours she sees around her.
I just cut out my first cone and ice cream scoop freehand and then used the pieces as a guide for my others, but upon visiting childcareland.com later, I saw that she has a printable template available also.
I cut my circles out using a coin as a guide and glued them onto the cones using a little dot of Tacky Glue. And that was it. After a few minutes drying time, the pieces were ready to be put to use.
I love this felt board set because it can be used when talking about colours, it can be used as a matching game, it can used to learn about rainbow order, and it can be used just for fun (think 8 scoop ice cream cones!)
Here’s the finished product.
Miss G was thrilled to wake up to this little surprise and matched the scoops to the cones again and again, naming the colours as she went along.
Can’t wait to make some other pieces for her soon.
I must admit… I started this project in iPhoto long, long ago. So long ago, in fact, that Grae is wearing diapers in a couple of the photos {and we’ve been done with those for nearly 10 months now}. Mama fail. Life gets busy… What can you do? The good news is that I’m back on the project in full force (well, I’ve actually restarted altogether). The motivation? Both Gracen’s nearing second birthday and receiving a promo code for a free hardcover book from Shutterfly (love a free photo book, plus the timing couldn’t be any better).
Here’s a little sneak peek at G’s alphabet book in progress…
I’ve had several questions about how I add text to pictures for the photo books I’ve made previously and I’m happy to say, it’s very easy. Personally, I use Pixelmator, but Photoshop or any other photo editing program you’re comfortable with will work. All I do is open the photo in the program, add a text box, and type in my words (in this case I did two separate text boxes – one for the larger letter, and one for the smaller sentence). Once my photo and text looks the way I want it to, I export it to jpeg format. Then you can print the photos as is and pop them into an album, or import them into an online photo book creator.
Easy, personalized, and guaranteed to be a well-loved book for a long time!
♥
See some of Gracen’s other photo books by clicking on the links:
It had been a while since I had made Gracen a photo book, so a couple of weeks ago, I selected some photos (the hardest part when you have as many as I do) to make her a knock-off version of the Usborne That’s Not My…. books. If you haven’t come across these books yet, you should really check them out. They’re short, simple stories with strong repetition, touch and feel parts, and bold, colourful illustrations.
I actually first fell in love with them when my friend and teaching partner at the time was selling Usborne and read one aloud at a book party. It was probably the best read aloud I’ve listened to before in my life. Since moving to Vancouver, we started signing them out from our local libraries, and they’ve quickly become family favourites.
Here are some pages from the version I whipped up for Miss G… (Please forgive my made up words in advance. ☺)
Gracen LOVES this new little book. (What’s not to like – it’s all about her!)
The best part is that these books are super easy to put together, can be added to at any time, and can easily be reprinted if needed. Not to mention that they put some of those photos just sitting on the computer to good use too!
Crafternoon project numéro deux involved lots of paint, pre-cut out paper butterflies, chubby little fingers, some symmetry, and a whole lot of mess. Of course Miss G was all over it.
Squeeeeeeeze…
Spread it around…
Marvel at the beauty of your artwork while whispering ‘wooooooooooooow’…
I remember loving making Valentine’s Day cards for my friends when I was little, so I was very excited to make them with Gracen for the first time this year… Here’s what she shared with her little friends and cousins today:
‘Have a colourful Valentine’s Day!’ cards with homemade heart-shaped crayons for her little friends. (We cheated a little bit and borrowed this already made card.)
A bigger version of the same card for her cousins Korbin, Chayton, and Kinslee.
And also for the cousins – felt heart hair clips for the little girls…
And felt tic-tac-toe boards for the big boys.
And something special for Papa too…
A handmade card card stamped with her little hands and feet.
Today we spent our afternoon doing a bunch of little art projects for Valentine’s Day.
Gracen happily drew a “picture” on the back of each of her little friends’ cards.
All we have to do tomorrow is attach the heart-shaped crayons we made yesterday, and they’ll be done!
Our next project involved punching out hundreds of little paint chip hearts… Technically Grae wasn’t the one doing the punching, but she was a great assistant.
Her real job was getting each little heart into this container for safe keeping. Of course this job was right up her alley because it involved transferring objects from one place to another. Little weirdo.
And while all those paper hearts kept Miss G busy, I worked on some Valentine’s Day hair clips for Grae and her little cousin, Kinslee.
Our last project of the afternoon involved a wax / watercolour resist. First, Gracen scribbled all over white card stock with white crayons…
Then we cut out a bunch of hearts, taped them down to some plastic, and painted them using homemade watercolours.
It took a minute for Grae to really get into the painting part (at first she was squeezing and shaking the paint out of the brush), but once she got the idea, she went for it.
Tada! Another masterpiece by Miss G. :) We’ll let them dry overnight and tomorrow she’ll hang them up on her bedroom door. And just in time. Only 3 days left!
This morning Gracen and I got to work on valentines for her little friends…
Now the project actually calls for old broken crayon chunks, but since our collection wasn’t large enough yet, we supplemented with some new crayons too. Gracen was an excellent paper peeler.
She was also in charge of breaking the crayons into chunks.
Then I helped by chopping them up into smaller chunks with a knife.
Then we stuffed our heart shaped mold as full as it could be.
We popped the whole thing into a warm oven…
And watched the crayons slowly melt.
And before long, it was time to take them out.
We let them cool a while and then popped them out of the molds.
Presto! Heart-shaped crayons. Very simple, but made with love. Tomorrow we’ll work on the cards to attach them to…
Gracen adores the little family and friends photo book she got in her stocking while we were up in the Okanagan.
I’m fairly certain we’ve “read” it at least 5 times a day each day since she got it. She carefully points to each person’s face and either tells me the person’s name or waits for me to tell it to her.
“Manmaw” (Grandma) and “Ee-Doh” (Gido) are easy peasy.
Grandpa Dave still gets called “Ee-Doh” most of the time, but we’re working on fixing that.
Inevitably, someone in the book is always “pretty, pretty, pretty”. Today Grae ran her little finger over Auntie Rozi’s hair several times and announced, “pretty, pretty, pretty”. I asked her, “Grae, do you think Auntie Rozi is pretty?” and with big eyes, she gave me the biggest, most serious nod ever. Aw, Auntie Rozi – Grae thinks you’re pretty!
Here are a few of the other pages in Miss G’s book:
Making the book was super easy. All I did was round up some photos, add the text using Pixelmator (the photo editing program I use), and printed them out. I picked up the little album while grocery shopping, and it cost next to nothing.
We’re still waiting on a couple of photos of great grandparents, but Gracen loves this little book anyways. The best part is that Little G always has her loved ones close by. :)
Gracen absolutely adores the little colouring book we made for her ‘Christmas in January’ stocking. She loves pointing out her family members and having me tell her about what’s happening in the pictures. We’ve already coloured 4 pages today, and it’s still morning!
All we did was take some of our favourite photos of her and her cousins, pop them into Photoshop, and turn them into line drawings rather than photos. Then I printed them all on card stock, bound them, and that was it!
Here’s a little peek at some of the other pages in the book:
Here’s my cool girl helping her Mama with grocery shopping.
This is my all time favourite picture of Grae and her cousin, Kinslee, who is exactly 6 weeks younger than her.
Of course, her cousin, ‘SuperChay’, had to be in the colouring book.
And here’s one of her cousin Korbin’s pages.
The best part is that while we colour, we can talk about all the fun memories that fill the pages. This photo was taken when Grae’s cousins came to visit us in Vernon and we all visited the pool for Chayton’s birthday. I have a feeling these little colouring books will become a yearly tradition in our family. :)
Here’s a little peek at the project Gracen and I worked on yesterday and today… Since she LOVES books more than life itself, I thought it would be fun to make her a couple of photo books for the stocking she’ll open when we celebrate Christmas in Vernon in a couple of weeks. This one is all about body parts. You’ll have to excuse the cheesy name. I just couldn’t help myself. Here are a few of the pages:
I’d love to actually have an actual bound book printed, but I know that with the amount of “love” this little book is about to receive, it wouldn’t last as long as I’d like it to. For now, I’m going to get the photos printed and put them all in a pretty little album. Hopefully Miss G likes it as much as I expect her to.
This morning we took advantage of Bradley’s later shift and made some ornaments for our teeny tiny tree.
The pipe cleaner decorations were a little bit tricky for G to make, so we adapted the activity and gave her some pasta to thread onto her pipe cleaners. Although she could do it, eating the dry noodles was apparently more appealing.
Gracen’s Borax crystal ornaments made for her by Papa.
The messy glittery glass ornaments were more up G’s alley and she loved getting to pick out her own glitter colour. I have a feeling if we make this one yearly, we’ll have to start buying bigger glass bulbs.
Our reindeer family ornament. The little Rudolph on the righthand side was made using Grae’s thumbprint.
We also made a few different salt dough ornaments. The Christmas bulbs on these little trees were made using our thumb imprints.
I’m looking forward to keeping up this tradition in years to come… Before you know it, we’ll have a giant tree filled with all kinds of eclectic handmade ornaments. :)


 I’ve had several questions about how I add text to pictures for the photo books I’ve made previously and I’m happy to say, it’s very easy. Personally, I use Pixelmator, but Photoshop or any other photo editing program you’re comfortable with will work. All I do is open the photo in the program, add a text box, and type in my words (in this case I did two separate text boxes – one for the larger letter, and one for the smaller sentence). Once my photo and text looks the way I want it to, I export it to jpeg format. Then you can print the photos as is and pop them into an album, or import them into an online photo book creator.


 Gracen LOVES this new little book. (What’s not to like – it’s all about her!)
 Squeeeeeeeze…
 Spread it around…
 Marvel at the beauty of your artwork while whispering ‘wooooooooooooow’…
 Then fold it over and smush!
 Open it up to reveal your beautiful butterfly!

 Over and over if you wish.
 ‘Have a colourful Valentine’s Day!’ cards with
  A bigger version of the same card for her cousins Korbin, Chayton, and Kinslee.
 And also for the cousins – felt heart hair clips for the little girls…
 And felt tic-tac-toe boards for the big boys.
 And something special for Papa too…
 A handmade card card stamped with her little hands and feet.


 ♥
♥ Today we spent our afternoon doing a bunch of little art projects for Valentine’s Day.
 Gracen happily drew a “picture” on the back of each of her little friends’ cards.
 All we have to do tomorrow is attach the
  Our next project involved punching out hundreds of little paint chip hearts… Technically Grae wasn’t the one doing the punching, but she was a great assistant.
 Her real job was getting each little heart into this container for safe keeping. Of course this job was right up her alley because it involved transferring objects from one place to another. Little weirdo.
 And while all those paper hearts kept Miss G busy, I worked on some Valentine’s Day hair clips for Grae and her little cousin, Kinslee.
 Our last project of the afternoon involved a wax / watercolour resist. First, Gracen scribbled all over white card stock with white crayons…
 Then we cut out a bunch of hearts, taped them down to some plastic, and painted them using homemade watercolours.
 It took a minute for Grae to really get into the painting part (at first she was squeezing and shaking the paint out of the brush), but once she got the idea, she went for it.
 Tada! Another masterpiece by Miss G. :) We’ll let them dry overnight and tomorrow she’ll hang them up on her bedroom door. And just in time. Only 3 days left!
 Now the project actually calls for old broken crayon chunks, but since our collection wasn’t large enough yet, we supplemented with some new crayons too. Gracen was an excellent paper peeler.
 She was also in charge of breaking the crayons into chunks.
 Then I helped by chopping them up into smaller chunks with a knife.
 Then we stuffed our heart shaped mold as full as it could be.
 We popped the whole thing into a warm oven…
 And watched the crayons slowly melt.
 And before long, it was time to take them out.
 We let them cool a while and then popped them out of the molds.
 Presto! Heart-shaped crayons. Very simple, but made with love. Tomorrow we’ll work on the cards to attach them to…
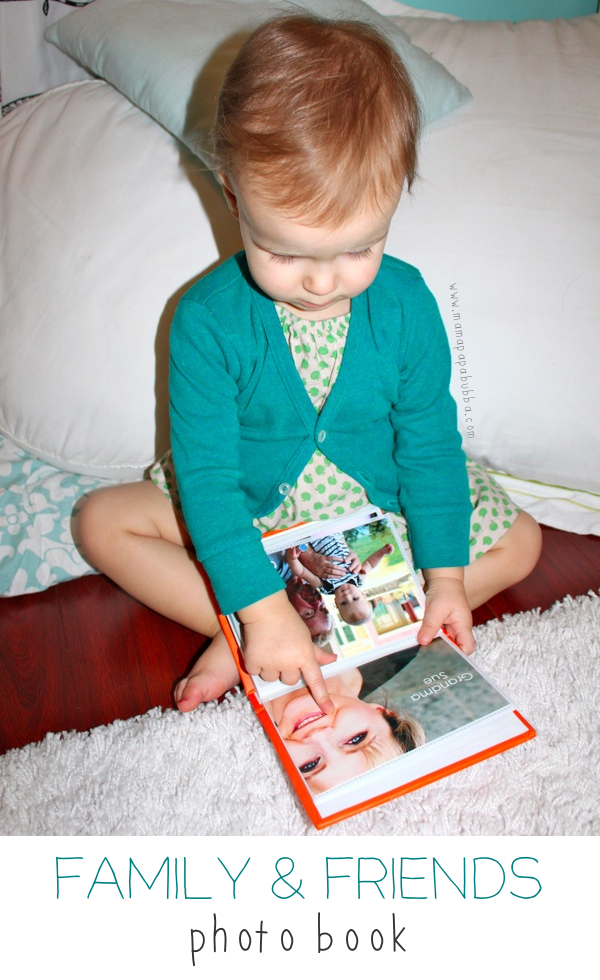


 Gracen absolutely adores the little colouring book we made for her ‘Christmas in January’ stocking. She loves pointing out her family members and having me tell her about what’s happening in the pictures. We’ve already coloured 4 pages today, and it’s still morning!
 All we did was take some of our favourite photos of her and her cousins, pop them into Photoshop, and turn them into line drawings rather than photos. Then I printed them all on card stock, bound them, and that was it!
 Here’s my cool girl helping her Mama with grocery shopping.
 This is my all time favourite picture of Grae and her cousin, Kinslee, who is exactly 6 weeks younger than her.
 Of course, her cousin, ‘SuperChay’, had to be in the colouring book.
 And here’s one of her cousin Korbin’s pages.
 The best part is that while we colour, we can talk about all the fun memories that fill the pages. This photo was taken when Grae’s cousins came to visit us in Vernon and we all visited the pool for Chayton’s birthday. I have a feeling these little colouring books will become a yearly tradition in our family. :)


