
Mmmm…. Almond milk. I love it, but honestly, most of the store bought stuff just isn’t all that good. And even if it does taste good, it most likely contains several ingredients that just aren’t needed when you make it fresh at home.

Mmmm…. Almond milk. I love it, but honestly, most of the store bought stuff just isn’t all that good. And even if it does taste good, it most likely contains several ingredients that just aren’t needed when you make it fresh at home.

Let’s be honest here… Who really has the patience to sit for ages making perler bead creations?? I wish I did. Miss G and I made a few little things the other day and had fun, but truth be told, what we really wanted to do was run our fingers through them – hah! That, or use them for something completely different {and less fine motor skill intensive} than what they’re intended for – like making a simple shake and search I spy bottle.

Goodness… I’m pretty sure I put making these simple little sensory blocks on my to do list about 3 months ago. It’s ridiculous that it’s taken me this long to get to them given the fact that the entire project took about 10 minutes start to finish, but feel like that’s just my current state of life. Non-priority tasks aren’t happening as quickly as I’d like them to, but it is what it is. Either way, they’re made now, and I’m so happy with how they turned out! Sam loves them too, which is exactly what I’d hoped for. They’re sort of like a combination of a miniature sensory bottle {making them perfect for little hands} and these really fun little sensory blocks that I was highly considering buying online late one night {making them perfect for stacking and crashing}. They’re also part musical instrument, so multi-purpose indeed {hah – have I sold you on making a set for your bub yet??}

After making a super fun, soap-included funfetti sugar scrub for Miss G last week, we decided that this mama needed a sugar scrub of her own too! My little helper and I hit the kitchen with some basic ingredients from our pantry and came up with an amazing smelling scrub that involves two of my very favourite things – COFFEE and being pampered!

Well, I’m excited to say that we’ve officially made it a full 3 months home from the NICU without baby bubba getting sick! According to our nurses, the first 3 months {and especially the first 4 – 6 weeks} are the most critical as far as keeping little NICU babes healthy and bug-free, and I’m so glad we were successful. During those first 6 weeks, we really avoided taking Sam to public places as much as possible, and though we’ve loosened up quite a bit since then, we’re still all about the hand washing in this house. It’s such an easy thing to do and since it’s the best way to keep germs at bay, we’re going to keep on it. After all, we don’t want baby bubba getting sick now any more than we did in the first 3 months – having a sick baby is awful!

You know those projects that seem to sit on your to do list for ages and ages without actually getting done? That’s these cute little wooden cherries! In fact, if I’m being completely truthful, they’re almost a year in the making… Oy.

Ever since attending their launch party for Fun, Miss G has absolutely loved visiting Lush, so there was no walking by when we spent a day on Robson Street a few weeks ago. The moment she got wind of the store’s signature scent, her eyes lit up and she was asking to go in {twist my rubber arm}. As always, the ladies working there were lovely and pampered us with all sorts of fun product demonstrations, our favourite of which was a luxurious lemony body scrub that left our hands feeling soft and smelling delicious.

Gracen and I have been busy crafting up all sorts of fun homemade ornaments for our tree this week, and this cute little Santa is the latest addition to the fleet. I’ve made these with several classes of students during my time teaching, and while they’re a perfect project for older kids, Miss G and I had a great time working on one together.

While we’re all set up in our new place with the day-to-day essentials, we’re still working on making our house feel like home. So far, Gracen’s room seems to feel the most homey, largely in part to the fact that it’s the only space in the house with anything on the walls. It’s still a work in progress, but we’ve framed several photos and a couple of my favourite downloadable prints, and we’ve been working on adding a few homemade pieces too.

Deep in a bin of secondhand Duplo I picked up yesterday, Miss G discovered a tiny little Lightening McQueen car and immediately fell in love. Though she’s not really watched any movies yet, she and Brad have watched bits and pieces of Cars on their special days together and she adores the characters. Upon discovering him, she suggested that we build him a track to drive on. She most likely had our painter’s tape roadway in mind, but when I suggested a cut and paste city with lots of roads for driving, she was more than game.

A couple of mornings ago during breakfast, Miss G turned to me with the sparkle in her eyes that means she’s got a brilliant new idea bubbling, and said, ‘Mama, I have an idea… We should decorate our whole apartment with Halloween stuff! Like ghosts and bats and jack-o-lanterns and all that spooky stuff.’ I agreed and got to thinking about all of the fun holiday items and decorations we had to leave in Canada when moving to the Middle East.

When you move overseas and take only things that can come along with you on the airplane, there are many things that just don’t make the cut. In the case of Miss G, we brought her clothes and shoes as would be expected, plus 2 rubbermaid bins packed full of good quality wooden toys and puzzles, a couple of games, craft supplies that aren’t readily available in Kuwait, her very favourite dress-up items and puppets, and as many soft covered books as would fit. One thing that didn’t make the cut however, was her awesome collection of wooden stamps. They’re bulky, heavy, and many are season specific, so they had to stay.
My personal rule? All things Christmas wait until December 1st. Well, besides crafting or purchasing the odd little gift here and thereI guess…
This year though, I’ve broken my own rule. I’m not sure how it happened, but we were looking for a fun afternoon activity and somehow I ended up whipping up a batch of baking soda clay without giving any thought to the fact that it’s still November. Oops… It’s okay, though. We started the tradition of making special handcrafted ornaments together as a family last year, and I already have {more than a} few new types in mind for this year, so we’ll just call this our practice round…
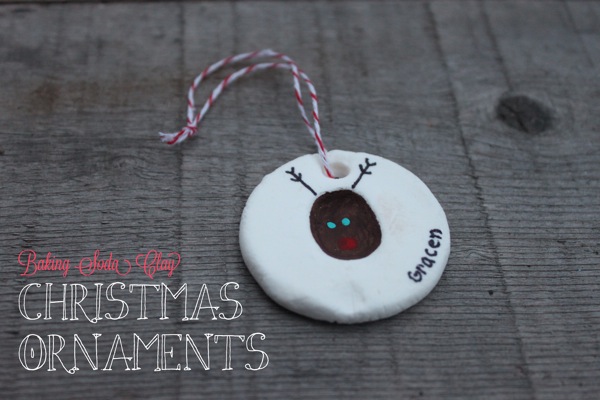
I’ve always been a fan of salt dough ornaments. The dough is easy and inexpensive to make, it’s really easy to work with, and you can shape and mould it almost any way you like. The only downside to salt dough, however, is that it loses some of its appeal when it dries out. Last year we made several different salt dough ornaments, and though they are special because they are handmade, they did crack / puff up / brown a little bit during the drying process. So when I started seeing baking soda clay pop up all over Pinterest just after Christmas last year, I knew we’d have to baking soda clay ornaments a shot during our next round.

The dough itself is very easy to make. It involves just three ingredients (baking soda, cornstarch, and water) and a little heat, and before you know it, it’s done. I followed this recipe almost exactly, but added about a tablespoon more cornstarch. The result is this amazingly soft, smooth, bright white dough that feels silky in your hands.
UPDATE: The recipe link we used for this project no longer exists… Here is a similar baking soda clay recipe.
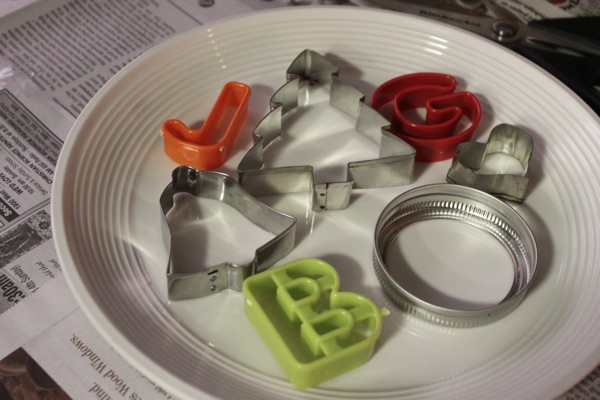
Once the dough was made and was cooling, I collected a few things from around the house to use to create shapes. Cookie cutters were the obvious first choice, but mason jar lids, the rims of glasses, and butter knives all work well for the job too.

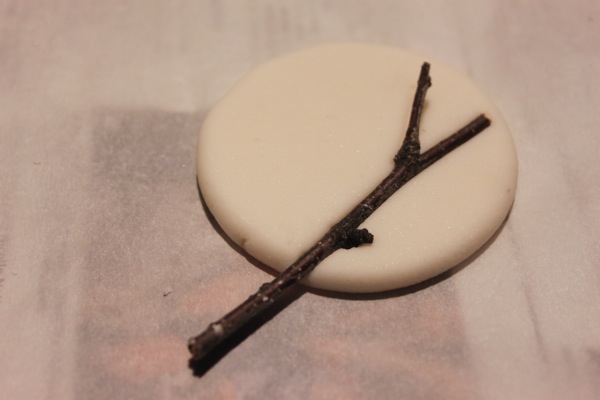
Next, I gathered some materials to make impressions in the dough. After a visit raiding Gracen’s stamp collection and nature shelf, this is what I had.
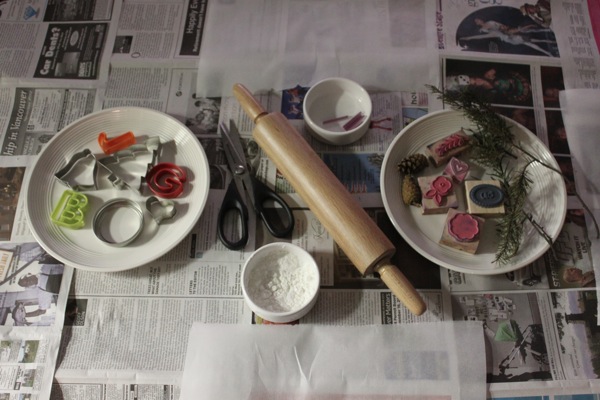
I also got out a rolling pin, some kitchen scissors (for freehand shapes), some straw pieces (for creating holes to tie twine through), and some extra corn starch to prevent the dough from sticking to everything.
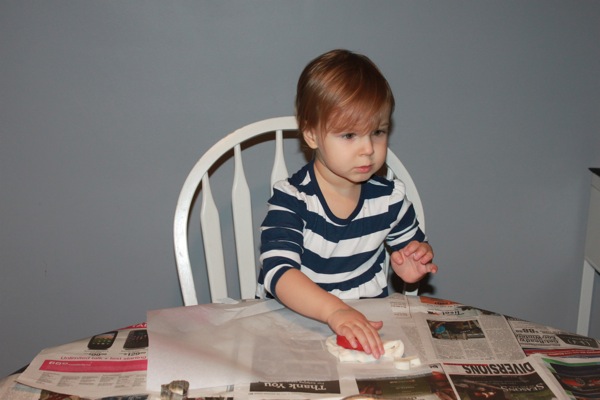

We got started by giving Gracen a chunk of the dough to just play with and explore at first, but of course she requested a cookie cutter and stamp and was right down to business. That’s just her style.
Now anywhere you read about baking soda dough, the instructions will clearly advise to leave the dough sit until completely cool, but we were too impatient for that. As a result, our dough was still a tad bit warm and sticky, which made it a little bit tricky to work with. My advice? Wait until it’s completely cool. Lesson learned.

What we found worked really well, even with our warm sticky dough, was using the bottom of a flat dish or glass to flatten the dough, rather than using the rolling pin. The rolling pin was just too sticky for our dough, but the dish bottoms worked perfectly.


As far as making the impressions went, we found that lightly dusting the stamp or object with cornstarch first, then pressing it into the dough and removing it slowly turned out great results.

The same technique worked best with the cookie cutters too – dust cookie cutter with cornstarch, then push the dough out of the cookie cutter gently and slowly.

When we’d used up every last bit of dough, I popped the ornaments onto a parchment-lined baking sheet and put it into a just-warm oven to dry out. We left them in there for several hours, flipping them every now and again, and before going to bed, I turned off the heat and left them sit in oven overnight.


The next day, we got out our paintbrushes and acrylic paints, and painted away.

These are some of my very favourite ornaments that Grae made. She pressed the dough, cut the shapes, and decorated them all by herself.

This little reindeer family was made by making 3 small balls, flattening them down with the bottom of a cornstarched bowl, and then pressing our thumbs into the middles. I cheated a little bit and used a Sharpie for the antlers and names, because well, we all know how they would have turned out had I used paint…
 This heart ornament also started as a flattened ball, and then I used a cookie cutter to push just part of the way through to the dough to make the heart shape.
Once our paint was dry, we added some string to hang them from. Ribbon or jute would be pretty, but I have a thing for baker’s twine currently, so we went with that. Here are some of our finished ornaments…


Aren’t they pretty?

And because our yearly ornament making tradition is bound to leave us with heaps of special, handcrafted tree decorations one day, we added the year onto each.
♥
Though we didn’t do it this time around, giving the ornaments a light coat of Mod Podge or spray-on sealant make protect them and help them last longer.