 Though this afternoon’s squirt gun painting wasn’t planned, a monstrous hour and 45 minute clean-up after quiet play time didn’t leave us much time before dinner, so we ditched our other {more involved} painting plans and tried something super simple and quick to set up!
Tag Archives: summer fun
Simple Bed Sheet Tent
As a girl, I adored spending time in special little forts and hideaways, and now I love creating similar spaces for Miss G to cozy up in. Though we’re huge fans of our super simple backyard teepee, this summer we decided to try something new – a simple triangular tent created using only a few things from around the house.
Water Fight {round 2}
Backyard Waterfight
Chalk on the Trampoline
This afternoon we tried the neatest thing… Using chalk on the trampoline! My sister-in-law suggested the idea and the kids absolutely loved it. The chalk went on smoothly and vibrantly, and in no time, the trampoline was transformed into a giant chalkboard-esque canvas.
Bubble Painting
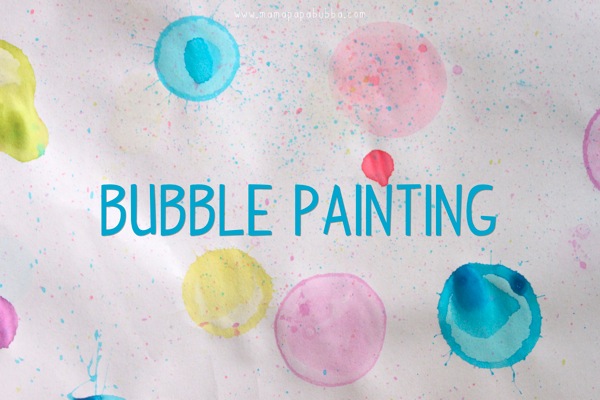
Yesterday Miss G and I finally got around to something that’s been on my mental activity list forever now… Bubble painting! Now if you cruise Pinterest, you’ll see that bubble painting is all over the internet and everyone seems to do it a little bit differently. Variations include all different sorts of bubble solutions, wands, and methods, so we just made up our own.
Frozen SCENTED Sidewalk Chalk Popsicles
 When I saw this post from Reading Confetti, I immediately fell in love. We’ve made our own sidewalk chalk paint for a long while now and I’d seen many frozen versions, but never had I seen them made in popsicle moulds before! After sharing the idea on our Facebook page and pinning it on several Pinterest boards, I made a mental note to pick up some more cornstarch the next time I was out so we could get the project under way.
 Well luckily for me, not only did I remember to pick up cornstarch during our next grocery shop, but I also ran into these Duncan Hines Frosting Creations packets for the first time ever. Immediately, I knew our frozen chalk pops would be scented. A few days later, Miss G and I gathered up our materials and got to work.
Using our tried and true sidewalk chalk paint method, we mixed 2 cups of warm water with 1 cup of cornstarch in our blender for a minute or so. Then we collected our popsicle moulds, our Frosting Creation packets, some gel food colouring (liquid will work too, but the colours won’t be nearly as intense), and several popsicle sticks.
 Next up, I used the popsicle sticks to scoop a small amount of gel food colouring into each popsicle mould, and Miss G selected a Frostings Creation packet to coordinate with each colour before we added a small amount (maybe 1/8th of the packet) to each slot. (If you’re making this at home and can’t find the frosting flavour packets, you could always use unsweetened Kool-Aid or Jell-O powder instead.)
 With our food colouring and powdered scent ready, we filled each popsicle mould about 2/3rds full of our cornstarch/water combo and Gracen stirred them well.
 Then we topped them up with a little bit more cornstarch/water and Grae gently stirred them a little more.
 At that point, all that was left to do was put our plastic handles in and freeze the chalk pops overnight.
 The next day, they looked like this. The colours were vibrant, the texture was smooth and creamy, and they smelled absolutely delicious.
 The blue one smelled like cotton candy, the green one was mint chocolate, the red was strawberry shortcake, and the orange was orange creme… YUM. The only potentially bad news is that because they do look so real and smell so wonderfully, some munchkins may be tempted to try eating them (yuck!) That being said, because they’re made strictly of kitchen ingredients, they are technically safe to consume. So though they may taste chalky and gross, they certainly wouldn’t harm a curious little monkey who snuck a lick.
 With our fun new chalk pops in hand, we headed into the backyard to test them out. The verdict? They’re really awesome!
 When they’re melting and drippy, they go on much like their liquid counterpart does, only via a wand of sorts instead of a paintbrush. When they’re not melting, they go on much like regular sidewalk chalk does – dry and colourful with a little bit of pressure. When dry, the colours are super vibrant and to me, they look very much like they’ve been made with regular sidewalk chalk.
 By the time our chalk pops had melted, our cement pad was fully covered in bright swirls, drawings, drips, and letters. And the great news is that it all washed away really easily without any fuss – much easier than our sidewalk chalk paint normally does for some reason.
I can’t wait to pull this activity out again in Kuwait where the temperatures soar and our courtyard is made completely of cement.
♥
For extra fun, like us on Facebook here and find us on Instagram here.
Pool Time
Backyard Hammock
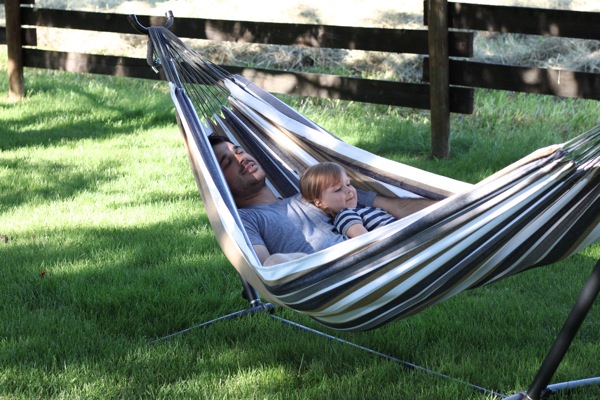


 After an easy breezy 6 hour road trip up to the Okanagan (seriously, this new colouring obsession is pretty awesome, especially during car trips) we arrived to Brad’s parents place where a new hammock was waiting to be set up. Gracen helped her Papa put it together and they jumped in immediately afterwards. These photos I was able to catch are some of my new favourites.
♥
For extra fun, like us on Facebook here and find us on Instagram here.
A Local Favourite: Maple Grove Pool


 Today we took our little fish to one of our very favourite summer spots in the city… Maple Grove Outdoor Pool. Gracen seriously loves this place. The pool’s fairly shallow, so there are lots of areas where she can easily wade around without assistance, there’s a little slide which she zooms down on repeat, and there’s a island in the middle of the deeper end for her to jump off of. We also love the fact that it’s surrounded by grassy areas and big trees and there’s a playground just outside of the gates. It’s the perfect spot to escape to when our house is 32 degrees and we need to cool down, asap. I’m guessing we’ll be visiting a lot during the month of July.
Maple Grove Pool is open from 10:15 a.m. to 7:45 p.m. daily, with the closing time being an hour earlier after August 21st. Admission is as follows: munckins 2 and under are free, children 3 to 18 years are $1.50, and adults are $2.50. Concession items are available and the facility operates on a cash only basis.
♥
For extra fun, like us on Facebook here and find us on Instagram here.
Strawberry Fields {A Visit to Krause Berry Farms}
Today we did something I’ve been wanting to do with Miss G for a long while… We went strawberry picking! After asking local parents for their favourite strawberry farm recommendations, we decided to head out to Langley to visit Krause Berry Farms. Promises of giant fields filled with berries, a gorgeous market selling fresh produce and baked goods, playground fun for kiddos, wine tasting for adults, and a farm animal petting area sounded too good to pass up.


 We arrived early and the farm was already bustling with visitors. We got our buckets weighed, put down our loonie deposit for a wagon, and headed out to the furthest corner of the strawberry patch.


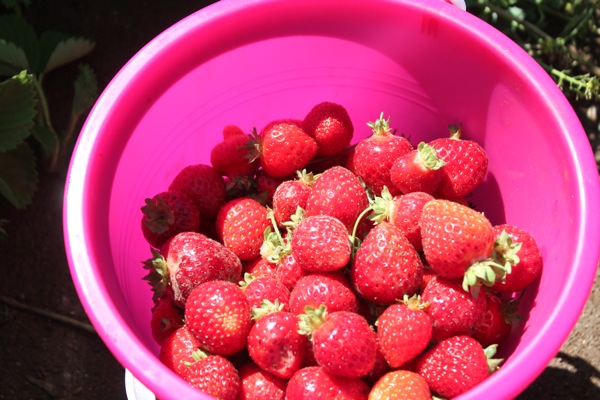 The berries were plentiful and our buckets filled quickly, though strawberry picking isn’t easy work. It was hot (really hot) out and by the time we were about halfway through our hour and a half long picking session, Grae and I gave up on crouching and full-on sat down in the strawberry field (slightly less glamourous, but oh so much more comfy!)
 While my little helper was interested in berry picking and very patient about it all, she didn’t so much want to pick the strawberries herself. She did pick a few here and there, but sitting beside you while you filled her bucket for her was much more her style. That and sneaking a semi-clean strawberry into her mouth every once and a while…

 With two extra-large sand pails full of ripe strawberries, we decided to have them weighed, pay for them, and check out the rest of the farm.


 First stop – the playground. Grae loved the tractor-shaped play apparatus, and even though it was cooking by this time, it did provide some shady spots to play in.
 Next up, we visited the market. Oh my goodness, this may just be my favourite part of the farm. Not only can you purchase all kinds of local produce both from the farm and from other local farmers, but the bakery is stocked full of delicious breads, shortcakes, cookies, and cakes too. Plus there’s a fudgery stocked with over 40 different kinds of fudge and all sorts of canned goods and fun kitchen gadgets too!
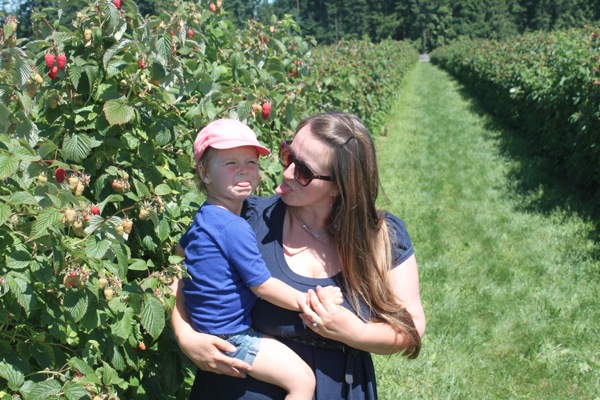 After a quick stop to see the animals out back (there weren’t that many and the enclosures didn’t really allow for easy petting, but G enjoyed it anyways), we stopped to take a couple of photos along the raspberry bushes. By this time, we were all hot, sweaty, and tired, and Gracen was feeling straight up silly. For one reason or another, she decided that the only way she’d have her photo taken was if her tongue was out, and by that time, I really didn’t blame her. Sometimes joining the crazy is just more fun. ☺
It was a lovely day and I’m already trying to figure out if we’ll have time to make another trip out when Krause’s u-pick blueberries are ready in mid-July… Though next time we’d do things a little differently as by the time we got home, most of our berries were already pretty mushy.
Notes to self:
1) Stacking fresh, ripe strawberries in big, tall buckets leads to severe strawberry smushing – bring big, shallow containers next time instead.
2) Locking your berries in a hot vehicle on a 30 degree day doesn’t help the situation – next time, play first, pick last.
♥
For extra fun, like us on Facebook here and find us on Instagram here.
Cork Sail Boats {With Sparkly Sails}
 Oh my goodness. Miss G and I had so much fun with this little project this afternoon. The best part is that it was completely impromptu. She wanted ‘to craft’ as she always says, and when digging through our craft supply drawer, came across a little bag of corks we scored at our last trip to Urban Source. I had boat building in mind ever since we picked them out, and when I suggested it to her, she was fully game. Together, we did a little Pinterest search, and Grae selected the images from these three posts for inspiration.
 With an idea in mind, it was time to gather up some materials. The corks were a given, the elastics would hold the actual boat together, the toothpicks or dowels would hold up our sails (we went with the mini dowels in the end), and the nail would help us poke our holes. The last thing we needed was something to make our sails out of… We thought of patterned scrapbook paper, but knew that would eventually just get wet. We also thought of the plastic sheets we used to make our window clings, but Grae wasn’t overly excited about the colours we had left. Then we thought of foam sheets – being waterproof and super lightweight, they’d be perfect. And even more perfect? Finding sparkly ones! Gracen was sold.
 To get started, Gracen lined up 3 corks and held them together while I secured them with 2 thick elastic bands – one on each side.
 Then, using our nail and “our big, big muscles” in the words of Grae, we created a little hole in the very centre of the cork wharf.
 Together we pushed our mini wooden dowel down into the hole (a food pick or bamboo skewer could work too).
 Using another mini dowel for reference, sketched a quick sail outline on the back of our sparkly foam.
 Because our foam was of the adhesive variety, we made our sail double-sided, but this would be unnecessary if we had just regular foam sheets.
 After making a couple of teeny little slits in our sail, one at the top and one at the bottom, we slid it onto our dowel post.
 The finishing touch was adding a little flag above our sail. To do this, Gracen selected a roll of washi tape and folded a piece in half around the top of our dowel. Then I cut it to form a flag shape.
 With our first boat complete, it was time for the big moment – to see whether or not it would float. It did!
 And this little lady was very pleased about that.
 We made one more boat, and the play begun immediately. Bobbing, blowing, and swooshing ensued throughout the afternoon and I’m sure it’ll continue for the next several days.
And while the boats have been fun in a bowl of water, I have a couple of other ideas to make them even more fun to play with. Now where to find more corks…
♥
For extra fun, like us on Facebook here and find us on Instagram here.
A Delicious First {& a Recipe}


 This happened tonight… Miss G’s first ever ice cream cone. And oh my goodness, did she ever love it. Before we knew it, all that was left was sticky fingers and a drippy chin and dress.
She’s already planned our next two flavours too – pumpkin with cinnamon first, and then strawberry afterwards. There’s bound to be plenty of ice cream in our future.
{Healthier} Creamy Coconut Ice Cream with Candied Coconut Sprinkles
Ice cream:
- 1/2 cup of whipping cream
- 2 cans of coconut milk (we used full fat)
- 6 tablespoons of pure maple syrup
- 1 tablespoon of pure vanilla
Whisk all ingredients together in a large bowl, then place in fridge to cool for a couple of hours. Process in an ice cream machine for 20 minutes and put into the freezer for a few hours to set.
Sprinkles:
- 1/2 cup of unsweetened shredded coconut
- 1 teaspoon of pure maple syrup
Put both ingredients into a jar or bag and shake well. Spread coconut out on a baking sheet in a thin layer. Roast at 250 degrees until crunchy and golden brown.
Enjoy!
For more healthy-ish desserts, click here.
♥
For extra fun not always found on the blog, like us on Facebook here and find us on Instagram here.
Super Simple 5 Minute Backyard Teepee
First off, I have to say that my Baba is hands down one of the most amazing, wonderful women I know. She’s one of those ladies who can truly do anything… From sewing to cooking to running a farm, fixing things, painting, gardening, building things, and entertaining – she excels at all. Oh, and at 70 something years old, having never used a computer or the internet, she bought herself an iPad and taught herself how to use it too. Amazing, right? (Hi Baba! Love you!) ☺
Growing up, my little brother and I would spend a week or two at my Baba’s house each summer. Our days out at the farm were wonderful. We spent nearly all of our time outdoors… We herded cattle, carried huge buckets of grain out each morning, and watched calves being born. We roamed through massive gardens with freedom to pick and eat as much as we pleased. We devoured fresh peas off the vine, ate up buckets of raspberries, and wandered around with long stalks of rhubarb with little glass bowls of dipping sugar. Baba taught us how to use the ride-on mower, make pedaheh from scratch, and draw with artists’ pencils and shading sticks – all of the things childhoods should be made of.
But above all other adventures and activities that took place on that farm, the one that stands out most in my mind – the one that was most anticipated each year – was building a backyard teepee. Baba would take us out into the forest, small saw in hand, and we’d cut down the trees that would form the structure of our new home. We’d drag them back, position them and tie them up, then drape them in sheets until our teepee was fully enclosed. Perhaps the very best part was furnishing it afterwards. We’d carefully separate the space in half, position our mattresses and end tables (Baba doesn’t mess around), then stock it up with blankets, flashlights, snacks, books, and activities. I can’t even describe how cool it all seemed as a child.
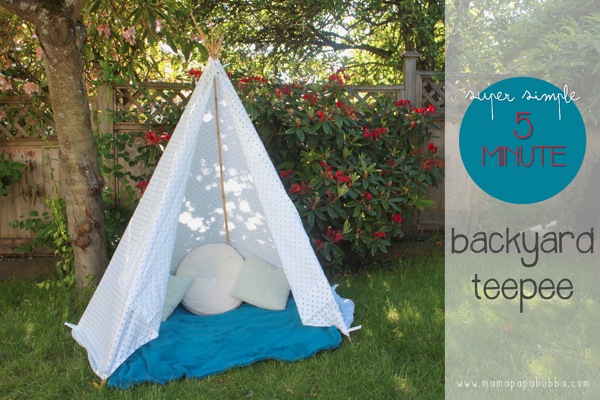
Recently, I introduced the magic of backyard teepees to Miss G. Nothing that could rival one of the ones my Baba used to make, but a teepee none the less. Our first one was a completely impromptu build, but it was so quick and easy that we’ve made them the same way each time since. Here’s how we put together our super simple backyard teepee in no longer than five minutes…

First up, the materials… We use 6 6-foot tall bamboo stakes (purchased at any store that has a decent gardening section), a king-sized sheet, some jute, and 10 – 12 clothespins.
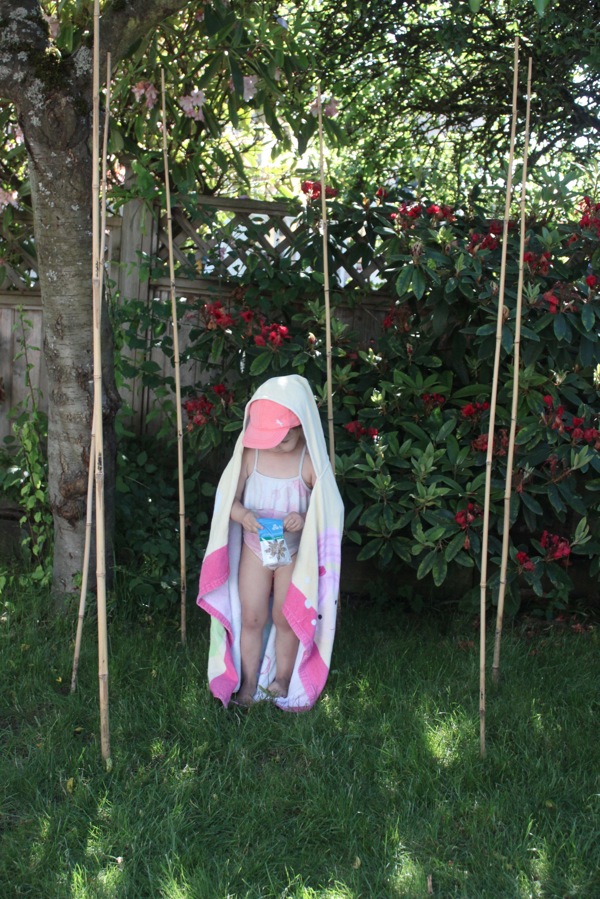
To start out, I push the stakes into the ground just an inch or two to form a circle with an open front. (As you can see, G likes to stand in the middle and have me build around her. ☺)

Next, I gather up the top of the stakes in one hand (there really isn’t a right way to do this – I just grab them and how they come together is how they come together) and use the other hand to wrap the jute around. One thing I try to do while wrapping the jute is to weave it in and out of the stakes – this gives it some better holding power. When the jute seems secure, I tie it off in a bow so it’s easy to undo later.


With the structure built, it’s time to enclose it with the sheet. To do this, I simply drape the sheet around the stakes horizontally with the ends being at the front opening. To hold it in place temporarily, I bring the two sides of the sheet together at the top and secure it using a clothespin and add another two at the base of the two front stakes.

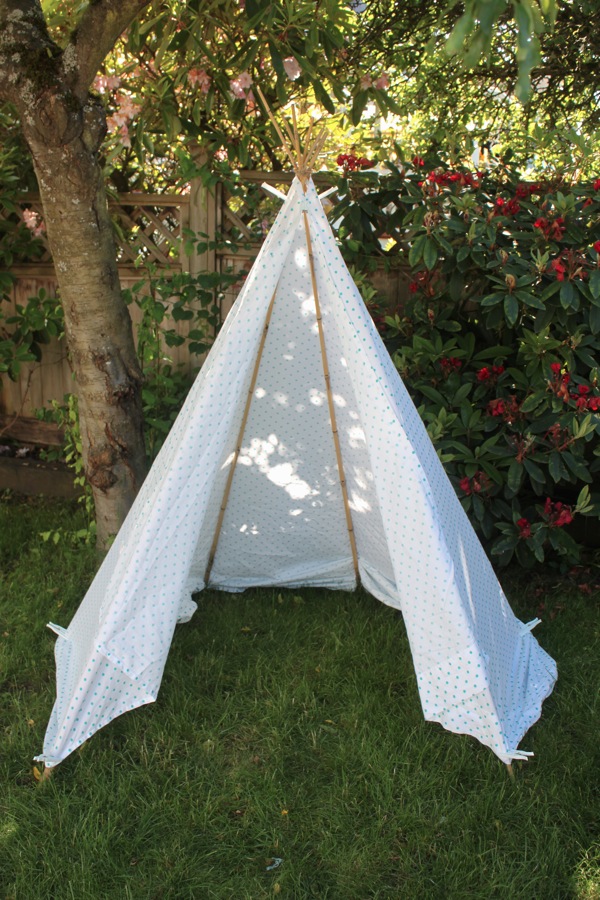
Next up, it’s time fix the positioning a little, smooth everything out, tuck in the extra fabric, and secure it all. I like to start at the front, making sure that both of the front stakes are fully covered and each side has a flap of extra fabric that can be used to close up the teepee completely if desired. To do this, I just tug and adjust until it’s the way I want it. With the sheet positioned properly, I move to the top and add several clothes pins to secure the sheet to the stakes. I usually use four, but you could put one on each of the 6 stakes if you wanted to. Then I go to the bottom and add a pin to each of the stakes, tucking under the extra fabric along the way if needed.
And that’s it – the basic teepee is complete. Super simple, right?

To make ours extra cozy, we always add a blanket in the bottom and a few throw cushions along the sides.
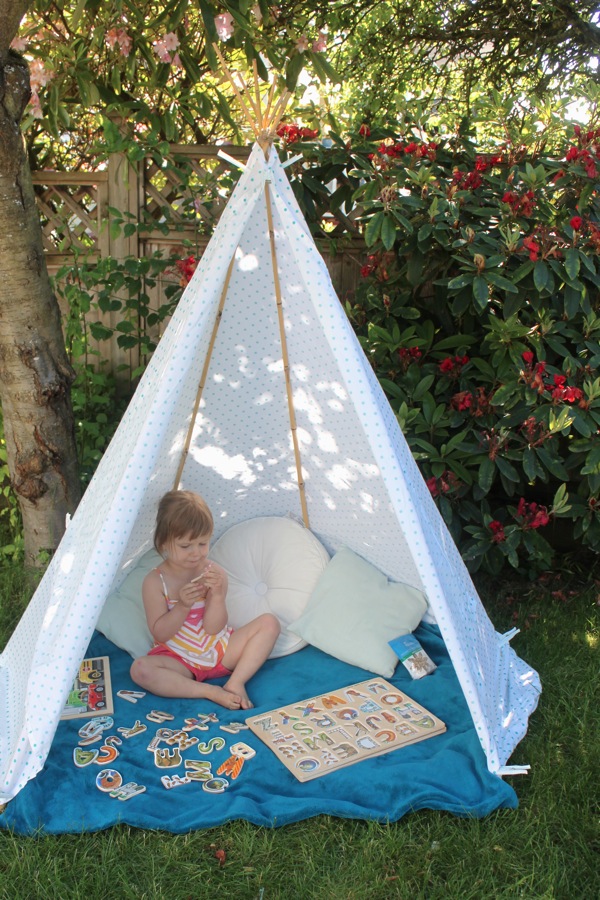

One of Gracen’s favourite parts is selecting an activity to bring into her teepee with her. Most often, it’s a stack of books to read, but today it was a stack of puzzles instead.

When we’re done playing for the day, we normally take down the sheet and bring everything inside, but leave the bamboo stake structure up, which makes for an even faster set up the next time and the time after that and the time after that…
♥
Are you following us on Facebook and Instagram yet?
We’d love to have you!
Pool Party Bath
 This was an on the fly idea that came about tonight during dinner. G was wearing her bathing suit (as you do when you’re 2 and a 1/2 and hanging out at home) and asked for a ‘special, special, soooooo special bath’ tonight. No go-to ideas came to mind, but my little doodle eating dinner in a ruffled polka dot bathing suit gave me one! … A pool party bath!
 I filled the tub up nice and full and added a few drops of aqua gel food colouring to give it a pool feel, then collected a few pool/summer things – beach balls, a watering can, a pail and shovel, some water wings, and a water bottle. For extra fun, I loaded our little bubble machine up with solution and placed it so that the bubbles would flow down into the tub from up above. Gracen grabbed her sun glasses and her pool towel, and we were good to go.
 Such a simple idea, but Grae just thought it was the best thing ever. Things did get a little wild when she began trying to pop every single bubble before they hit the water, but it was all good fun. Part way through, we took out our window crayons and added a ‘party wall’, which was just as much fun to splash off as it was to draw on. ☺
For more of our fun bath ideas, click here.
♥
For extra fun, like us on Facebook here and find us on Instagram here.


 Top knots, ruffled bathing suits, backyard pools, and vacation time… These are the things summer is made of.