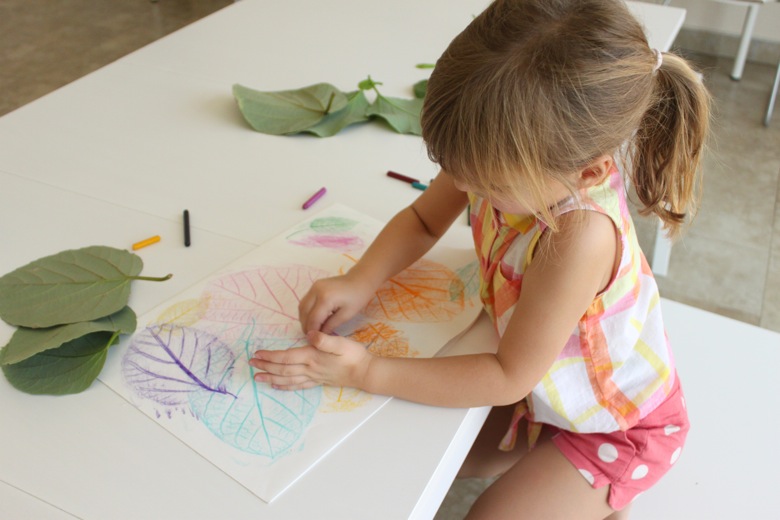
Today before starting on our stamped leaf garland of thanks, Miss G and I did a classic kid project – leaf rubbings! Although we’ve tried rubbings once before while still in Canada, Grae was only 2 then and the process was still a little tricky for her. At 4 though? She rocked it!


First off, we headed outdoors and collected some really awesome, really huge leaves.


Pink-cheeked, we headed indoors, raided our stash of broken crayons, and peeled off the wrappers {talk about a good fine motor skill workout!}


Next, using a large pad of white paper, we sandwiched a leaf between the top sheet of paper and the rest of the stack {you can obviously do this with a single sheet of paper also, but I find that doing it with the whole pad helps the leaf stay in position}. Then, using a crayon on its side, Grae gently rubbed the colour all over the leaf, allowing the magic to happen. One at a time, we added leaf after leaf to create beautiful leaf rubbing collages.

Simple as that! Our collages now hang on the wall above our creative space and add a hint of nature and a pop of colour to our work area.
Are you following us on Facebook and Instagram yet?
We’d love to have you!

Hi Jen.
I realize that this post is super old, but I was wondering what kind of paper that you used for this?
Regards May
Just regular old art paper. This was purchased in one of those big kids’ paper packs from IKEA. :D
Great activity ! Such a pretty result , I love it !!
Thanks, Julie! :D
I am going to do this with my students. Thanks for the pictures!
👍👍
Nice and used chalk worked fine