When I saw that the awesome teachers’ store in our hometown, Vernon Teach & Learn, was selling butterfly larvae, I jumped on the opportunity and immediately put an order through by phone. Now while I’m well aware that some people may think raising butterflies in your home is a tad on the crazy side, I actually think it’s pretty awesome. It’s something I’ve done with my Kindergarten classes in the past and the process is nothing short of amazing. For a child to be able to witness tiny caterpillars grow, build chrysalises, and emerge as butterflies up close and personal all in a span of a few weeks is pretty special. I can’t wait to share the experience with Grae. Ten fuzzy little caterpillars (two of which will be adopted by a friend tomorrow) arrived to our doorstep today and we couldn’t be more excited.
To order butterfly larvae of your own, contact Vernon Teach & Learn. They are incredibly helpful and kind, and our caterpillars arrived here to Vancouver the day after ordering. Their larvae packages can be found here.
♥
For extra fun, like us on Facebook here and find us on Instagram here.
Gracen and I have been spending a whole lot of time at the beach lately (yay!), but this afternoon, we finally got around to finishing off a fun little project we started days and days ago.
It began like this. Coffee filters, coloured water, and a plastic dropper out, creative table-style. Simply left out for her to discover and explore when she felt up to it.
Of course it didn’t take Grae long to find a table full of fun materials to experiment with. Without hesitation, she began using her dropper to slurp up coloured water and spew it back out on the filters.
She really loved watching how the colours spread and mixed with one another.
So much in fact, that she fully covered upwards of 30 separate filters. Thank goodness for a big laundry drying rack! We placed the filters on the rack in our solarium, and they dried in no time.
After tucking them away for several days, we came home from the beach today {some of us still sporting our bathing suits and sandy fingernails} and dug them out for a quick pre-nap project. We also gathered a pair of scissors, some long green pipe cleaners, and some short colourful pipe cleaners (regular pipe cleaners cut into thirds).
To transform our beautiful watercolour-y filters into flowers, we started by carefully folding them in half three times.
Then Grae would give me some sort of petal description (‘long and skinny!’, ‘pokey like the rose bush!’, ‘big, big, big, big, BIIIIIIIG!’, and ‘you know…..like….ummmm….like the little circle circle ones?’ were a few) and I’d cut the curved edge to match. I also snipped the very tip of the point off at this point too.
Then came her very favourite part – carefully unfolding the cut filter to reveal its shape.
Here are a few of the other shapes we came up with together.
Next, Grae would pick a small pipe cleaner, bend over the top so it was no longer pokey, and place the bottom through the tiny hole in the centre of the filter.
Then she’d bring the filter up around the pipe cleaner and pinch it at the base.
While she held it tightly, I’d wrap a long green pipe cleaner around the filter and short pipe cleaner to form the stem.
Fun, right?
Every flower turned out completely different from the last…
And by the end we had a beautiful bouquet of colourful flowers perfect for the mantle, a table centrepiece, or a Mother’s Day gift.
♥
For extra fun, like us on Facebook here and find us on Instagram here.
Early this morning while cuddling in bed, Miss G was browsing one of my yearbooks from while I was teaching in Kuwait. She found my class’ page topped with my photo and asked…
Gracen: You are in your classroom here, Mama?
Mama: Yup.
Gracen: Where is Papa?
Mama: He’s in his classroom on the other side of campus.
Gracen: So we had a little babysitter for Grae, ya?
Mama: Well no, Love. You weren’t born yet.
Gracen: So actually I was just zero???
♥
For extra fun, like us on Facebook here and find us on Instagram here.
While we’ve done plenty of regular mess-free painting on our sidewalks and fence, today Gracen asked if I’d draw her something to paint. While maybe not as open-ended as I’d usually aim for, I do find that sometimes she prefers having a jumping off point, so I drew an assortment of shapes on the ground using sidewalk chalk. The activity was actually perfect for her new found interest of colouring in the lines, and when the water dried, it left our cement pad covered in beautiful, watercolour-esque shapes. So simple, but she enjoyed so much that she’s already asked to do it again.
♥
For extra fun, like us on Facebook here and find us on Instagram here.
While down at the beach today, G begins to attempt crawling across the busy path…
Mama: Grae, let’s not crawl across the path please. Let’s walk.
Grae: What ’cause?
Mama: Well, because there are a lot of people walking and biking past and the cement is hard and rough. You’d probably make holes in the knees of your leggings.
Gracen: And then I no have knees anymore? I just have my knee’s skeletons?
♥
For extra fun, like us on Facebook here and find us on Instagram here.
This afternoon the sun was out and I decided to set up something really fun for Grae to explore and experiment with in the backyard.
The set up was pretty simple… Several differently shaped jars and medicine bottles filled with coloured vinegar (we used gel food colouring), a couple of small jars of baking soda, a couple of spoons, and a few empty mixing containers all on a tray. Oh, and some safety goggles. Because in Gracen’s world, science equals goggles. ☺
After helping her with her goggles, Grae set off to work.
As I usually do with this kind of activity, I didn’t give her any instructions. I simply said, “Do you want to play?”
The answer was an excited ‘yes’, and after a few questions about whether or not she could dump/mix/pour things (of course the answer to all was yes), she got started.
While she’s seen the reaction baking soda and vinegar have while moon painting, this was on a much bigger scale.
And she loved it. Mixing a little bit of this with a little bit of that in order to cause colour changes and fizzy foam eruptions was right up her alley.
My little scientist made reaction after reaction, delighting each time she caused foam to spew out of the top of her jar.
One thing that was interesting is how the colour of the vinegar seemed to change with the addition of baking soda. In the case of the orange and the pink, the colours seemed to explode with brightness as the reactions occurred.
With almost all of her baking soda resources used up and her largest jar of vinegar left, we fetched just a little more baking soda from in the house.
It started off slowly, but the reaction did not disappoint. After scrounging leftover baking soda from wherever she could, she managed to create enough fizzing foam to have it flow generously out of the top of the jar. Success!
After she’d depleted her resources, what was left was a beautiful rainbow-y mess. For a little bit of added fun, we filled up a bin with warm soap water, grabbed a cloth, a scrubber brush, and a couple of towels, and had a little dishwashing station right there in the backyard.
♥
For extra fun, like us on Facebook here and find us on Instagram here.
Unfortunately, we have not quite recovered from when we veered off the path of consistent naps yet… Gracen is such a routine little thing, that sometimes it’s difficult to get back on track after falling off. As of now, she goes down for a nap after lunch as usual, she lays in the dark singing and chatting to herself for a good long while, and when she doesn’t fall asleep, I part her curtains just a little to let in some light, and she has some quiet play time alone in her barely-lit room. Down time we both need.
Besides the fact that she truly does still need her nap and our afternoon is tough without out it, the following morning we are guaranteed to have an extra early wake up (we’re talking somewhere in the 5 a.m. range). This kid is proof to the fact that good day time sleep equals good nighttime sleep, let me tell you. Then of course, she’s tired the next morning, nap time is extra tough that day, and the cycle continues. Viciously. Ugh.
Oh, and on top of that? Quiet play time equals this:
A Grae-nado as we call it.
Here’s hoping for a return of naps, ASAP.
♥
For extra fun, like us on Facebook here and find us on Instagram here.
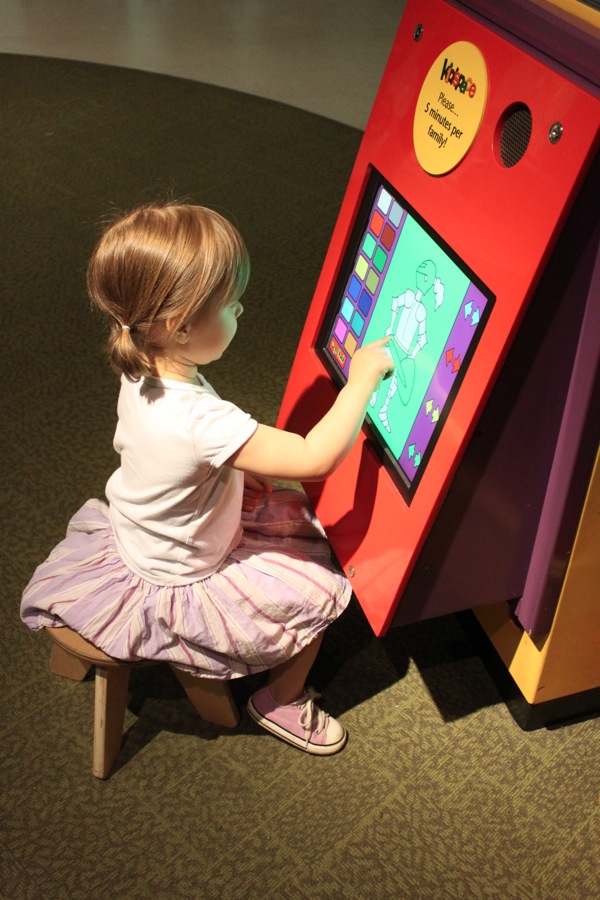
I can’t even tell you how excited I was to win an annual family pass to Science World from Lisa at The Sprog and VanCity. Knowing that we only have a few months left here in Vancouver, I am absolutely determined to make the most of the pass. (Rainy day? You know where we’ll be. ☺) With our package arriving late yesterday afternoon, we headed off this morning for our first visit to Science World in a long time. G had an absolute blast.
It was also a great spot for me to work on my new personal challenge… using my camera in manual mode only. With Gracen excited as all get out, the first half of our stops being very dark, and the second half being very well lit, there were more than enough challenges to try and work around. Here are a few of my favourite shots…
♥
For extra fun, like us on Facebook here and find us on Instagram here.
Yesterday, when I told Gracen that we’d be celebrating Papa’s birthday soon, the first thing she said was, “We need to make a cake!” Then she went on about painting him party hats and getting 3 pink gifts, but I digress. Originally, I was thinking about doing two cakes. Something delicious and wildly unhealthy from Pioneer Woman for Brad, and something wholesome, wholewheat, and sugar/butter-free for Miss G to enjoy. Buuuuut, when I thought about doing a cheesecake for Brad (one of his favourites), I realized that I could probably do a modified version that would suit everyone’s needs since cheesecake is mostly just cream cheese. My main obstacle was coming up with a yummy crust without using the usual graham wafer/sugar/butter combo, but I played around a little bit and I’m happy to report and it turned out really well.
As for the cheesecake itself, I wasn’t sure about it at first. It tasted good fresh out of the oven, but it was light and bubbly instead of thick and dense the way proper cheesecake is supposed to be. In the words of my husband, it tasted “healthyish”. I had come to terms with the fact that I’d have to do some recipe revamping in the future, until we tasted it again tonight. After sitting in the refrigerator overnight, it had densed up significantly and was actually really good! Good enough to make again, that’s for sure.
Here’s the lineup of ingredients my little sous chef and I used to make our mini mason jar cheesecakes… Sour cream, cream cheese, lemon zest, pure maple syrup, pure vanilla, almonds, an egg, and coconut. Plus the mini mason jars themselves, of course. 5 of these little jelly jars works perfectly with this recipe.
To make our crust, we added some coconut, some raw almonds, a little bit of pure maple syrup, and a little bit of pure vanilla into our food processor and blended until it was thick and sticky.
Then we scooped the crust mixture evenly into our 5 jars, and Miss G used a cork to flatten them out.
This was the end result.
With our crusts ready to go, we switched our focus over to the actual cheesecake part. First, we added our room temperature cream cheese and egg into our mixer and beat until smooth.
Next we added our sour cream, pure maple syrup, pure vanilla, and lemon zest, and mixed again.
Baking is ridiculously fun, wouldn’t you agree?
With our cheesecake filling prepared, we poured the mixture evenly into our 5 mason jars.
Then we placed them into a high-walled baking dish, filled it halfway up the jars with hot water, and baked the entire thing.
When they’d finished baking, I topped the ones for Gracen and I with stewed blueberries…
And the birthday boy’s with deliciously naughty Nutella. Of course the options are endless really… Fresh berries, shredded coconut, sliced bananas, or mini dark chocolate chips would all make yummy toppings too.
The biggest perks to these little desserts is that they already come in a storage container, they’re super easy to hand out at parties, and they tuck easily into picnic baskets and backpacks for a treat on the go.
Blend almonds, coconut, maple syrup, and vanilla in a food processor until thick and paste-like. Divide the mixture equally into 5 mini mason jars and use a cork to create a flat, even crust.
In a mixer, combine the cream cheese and egg until smooth. Add in the sour cream, vanilla, lemon zest, and pure maple syrup and mix again.
Pour the cream cheese mixture evenly into the 5 mason jars. Place the jars in a high-walled baking dish, fill it with water until halfway up the jars, and bake for 30 minutes at 325 degrees.
Allow to cool on the counter. Top with toppings of your choice before or after refrigerating overnight.
Enjoy!
♥
For extra fun, like us on Facebook here and find us on Instagram here.
Vigid, more formally known as Vigid Milkman, is Gracen’s beloved butterfly kite she received in her Easter basket last month. I have no idea where Vigid (pronounced vee-gid) came from, but Milkman is after Melky Cabrera, a Toronto Bluejays player Miss G and her Papa watch together. Crazy name aside, Grae is absolutely smitten with Vigid Milkman. She watches out our big front window, and the moment she sees the slightest rustle of the tree leaves across the street, she asks if there is enough wind for Vigid to fly. Much to her happiness, today was an oddly windy day (our yard is littered with trash to prove it) and the moment her Papa returned from home from work, he asked if she’d like to fly Vigid. Did she ever!
♥
For extra fun, like us on Facebook here and find us on Instagram here.
Never once have we attempted to teach this little lady her letters, yet somehow she knows almost all of them. The way she hangs onto information blows me away.
♥
For extra fun, like us on Facebook here and find us on Instagram here.



 When I saw that the awesome teachers’ store in our hometown, Vernon Teach & Learn, was selling butterfly larvae, I jumped on the opportunity and immediately put an order through by phone. Now while I’m well aware that some people may think raising butterflies in your home is a tad on the crazy side, I actually think it’s pretty awesome. It’s something I’ve done with my Kindergarten classes in the past and the process is nothing short of amazing. For a child to be able to witness tiny caterpillars grow, build chrysalises, and emerge as butterflies up close and personal all in a span of a few weeks is pretty special. I can’t wait to share the experience with Grae. Ten fuzzy little caterpillars (two of which will be adopted by a friend tomorrow) arrived to our doorstep today and we couldn’t be more excited.
 Gracen and I have been spending a whole lot of time at the beach lately (yay!), but this afternoon, we finally got around to finishing off a fun little project we started days and days ago.
 It began like this. Coffee filters, coloured water, and a plastic dropper out,
  Of course it didn’t take Grae long to find a table full of fun materials to experiment with. Without hesitation, she began using her dropper to slurp up coloured water and spew it back out on the filters.
 She really loved watching how the colours spread and mixed with one another.
 So much in fact, that she fully covered upwards of 30 separate filters. Thank goodness for a big laundry drying rack! We placed the filters on the rack in our solarium, and they dried in no time.
 After tucking them away for several days, we came home from the beach today {some of us still sporting our bathing suits and sandy fingernails} and dug them out for a quick pre-nap project. We also gathered a pair of scissors, some long green pipe cleaners, and some short colourful pipe cleaners (regular pipe cleaners cut into thirds).
 To transform our beautiful watercolour-y filters into flowers, we started by carefully folding them in half three times.
  Then Grae would give me some sort of petal description (‘long and skinny!’, ‘pokey like the rose bush!’, ‘big, big, big, big, BIIIIIIIG!’, and ‘you know…..like….ummmm….like the little circle circle ones?’ were a few) and I’d cut the curved edge to match. I also snipped the very tip of the point off at this point too.
 Then came her very favourite part – carefully unfolding the cut filter to reveal its shape.
 Here are a few of the other shapes we came up with together.
 Next, Grae would pick a small pipe cleaner, bend over the top so it was no longer pokey, and place the bottom through the tiny hole in the centre of the filter.
 Then she’d bring the filter up around the pipe cleaner and pinch it at the base.
 While she held it tightly, I’d wrap a long green pipe cleaner around the filter and short pipe cleaner to form the stem.
 Fun, right?
 Every flower turned out completely different from the last…
 And by the end we had a beautiful bouquet of colourful flowers perfect for the mantle, a table centrepiece, or a Mother’s Day gift.


 Another day at the beach. Because it’s too gorgeous to be anywhere else.
 Breakfast // Plain organic yogurt with
  Breakfast // Scrambled eggs. Fruit salad.
  Breakfast // Hot oatmeal with almond milk, fresh blueberries, and chia seeds.
 Breakfast // Wholewheat sourdough french toast with all-natural peanut butter. Plain organic yogurt for dipping.
 Breakfast // Plain organic yogurt with
  Breakfast // Scrambled basil parmesan eggs. Sweet potato hash. Pink lady slices.
 Breakfast // Plain organic yogurt with fresh mango, unsweetened coconut, and chia seeds.
 Snack //
  Snack //
  Lunch {on the go} // Steamed beets. Cottage cheese. Blackberries. Satsuma slices. Pistachios and cashews. Yellow pepper slices. Baby carrots. Unsweetened banana slices. Organic yogurt-covered raisins (the queen of all treats in our house!)
 Lunch //
  Lunch {on the go} // Avocado. Banana coins. Seedy crackers with sharp cheddar. Cashews. Apple sandwiches filled with almond butter, oats, and chia. Baby carrots. Broccoli florets.
 Lunch // Wholewheat pita pockets filled with almond butter, banana slices, and chia seeds.
 Lunch {on the go} // Strawberries. Blackberries. Starfruit. Mini wholewheat flatbread. Seedy crackers. Avocado. Miniature
  Dinner //
  Dinner // Coconut encrusted chicken. Roasted sweet potato. Roasted Brussels sprouts. Steamed beets.
 Dinner // Ravioli soup with fresh parmesan. Roasted broccoli.
 Dinner // Roasted sweet potato, cauliflower, beets, and carrots with pan-fried onions and all-natural apple chardonnay chicken sausage.
 Dinner // Baked potato. Barbecued chicken and veggie skewers. Green salad.
 Dinner // Baked spinach pasta and cheese with turkey and green peas.
 Dinner // Chicken and bean ‘soft tacos’ with sautéed peppers, cheddar, avocado, and black beans on the side. Sour cream and green salsa for dipping.
 Dinner //
  While we’ve done plenty of


 With days as gorgeous as today, there’s no choice but to soak it all in. It was a morning of sand and sunshine at Spanish Banks for us today.


 Saturdays don’t come better than this.
 This afternoon the sun was out and I decided to set up something really fun for Grae to explore and experiment with in the backyard.
 The set up was pretty simple… Several differently shaped jars and medicine bottles filled with coloured vinegar (we used gel food colouring), a couple of small jars of baking soda, a couple of spoons, and a few empty mixing containers all on a tray. Oh, and some safety goggles. Because in Gracen’s world, science equals goggles. ☺
 After helping her with her goggles, Grae set off to work.
 As I usually do with this kind of activity, I didn’t give her any instructions. I simply said, “Do you want to play?”
 The answer was an excited ‘yes’, and after a few questions about whether or not she could dump/mix/pour things (of course the answer to all was yes), she got started.
 While she’s seen the reaction baking soda and vinegar have while
  And she loved it. Mixing a little bit of this with a little bit of that in order to cause colour changes and fizzy foam eruptions was right up her alley.
 My little scientist made reaction after reaction, delighting each time she caused foam to spew out of the top of her jar.
 One thing that was interesting is how the colour of the vinegar seemed to change with the addition of baking soda. In the case of the orange and the pink, the colours seemed to explode with brightness as the reactions occurred.
 With almost all of her baking soda resources used up and her largest jar of vinegar left, we fetched just a little more baking soda from in the house.
 It started off slowly, but the reaction did not disappoint. After scrounging leftover baking soda from wherever she could, she managed to create enough fizzing foam to have it flow generously out of the top of the jar. Success!
 A Grae-nado as we call it.


 Yesterday, when I told Gracen that we’d be celebrating Papa’s birthday soon, the first thing she said was, “We need to make a cake!” Then she went on about painting him party hats and getting 3 pink gifts, but I digress. Originally, I was thinking about doing two cakes. Something delicious and wildly unhealthy from
  Here’s the lineup of ingredients my little sous chef and I used to make our mini mason jar cheesecakes… Sour cream, cream cheese, lemon zest, pure maple syrup, pure vanilla, almonds, an egg, and coconut. Plus the mini mason jars themselves, of course. 5 of these little jelly jars works perfectly with this recipe.
 To make our crust, we added some coconut, some raw almonds, a little bit of pure maple syrup, and a little bit of pure vanilla into our food processor and blended until it was thick and sticky.
 Then we scooped the crust mixture evenly into our 5 jars, and Miss G used a cork to flatten them out.
 This was the end result.
 With our crusts ready to go, we switched our focus over to the actual cheesecake part. First, we added our room temperature cream cheese and egg into our mixer and beat until smooth.
  Next we added our sour cream, pure maple syrup, pure vanilla, and lemon zest, and mixed again.
 Baking is ridiculously fun, wouldn’t you agree?
 With our cheesecake filling prepared, we poured the mixture evenly into our 5 mason jars.
 Then we placed them into a high-walled baking dish, filled it halfway up the jars with hot water, and baked the entire thing.
 When they’d finished baking, I topped the ones for Gracen and I with stewed blueberries…
 And the birthday boy’s with deliciously naughty Nutella. Of course the options are endless really… Fresh berries, shredded coconut, sliced bananas, or mini dark chocolate chips would all make yummy toppings too.


