Last Christmas, I made the kids each one of these DIY LEGO kits and I’m so glad I did. They were a super easy project and they’ve been so great for taking along on our travels and vacations. We don’t use them in transit (too many small pieces to be used in a car or on a plane for me), but they’re perfect for down times once at our destination {usually in an airbnb}.
I wish I would have taken proper step-by-step photos of the process, but truly they’re not even needed – it’s so easy.
Of course if you’re making just one kit, you could get away with a single carry kit, a smaller base plate, and a smaller LEGO brick box. Or if you have a different carry case already on hand, you could easily use that and just refer to this material list and the following instructions as a basic guide. Whatever works! In the past, we’ve even made the most basic portable LEGO kits using old-school metal lunch kits.
Now to make the LEGO kit! Here’s what you’re going to do:
1. Start by measuring the inside of your carry case’s lid.
2. Measure out a piece of baseplate that will fit nicely inside the carry case’s lid and mark your cut points with a pencil. For this particular case, I made my base plate 16 centimetres by 23 centimetres.
3. Using regular scissors, carefully and slowly cut your baseplate down to size.
4. Using your scissors or a sanding block, round the edges of the baseplate piece so there at no sharp / pointy corners.
5. Apply several mounting squares to the bottom side of your baseplate and press them down firmly to ensure they’re well adhered.
6. Peel the sticker backings off of the mounting squares, position the baseplate inside the carry case’s lid, and press it down firmly. I like to take a few minutes and really ensure a good stick here.
7. Place the dividers into the carry case to make sections for the different LEGO colours. I chose to add only two dividers – one between the green and blue sections and one between the orange and red sections.
8. Fill the carry case with LEGO! I chose to separate mine by colour because I’m a total sucker for rainbow anything, but you could do by brick type / size too! Whatever floats your boat.
And that’s it! You’ve got a DIY LEGO kit that’s perfect for taking along on the go.
What I love about this particular carry case is that the clasps are crazy strong, so I don’t worry about them flying open as the kids carry them {and inevitably fling them around – especially in Sam’s case}. Also, I feel like two clasps are always better than just one… Just in case!
The other thing I love? The lids of these particular kits open completely flat, which is so, so helpful when building. (The lids on our metal lunchbox LEGO kits have never opened flat, which can be a little annoying, just fyi.)
With Christmastime quickly approaching, I’ve been thinking a lot about gifts for the kids… We’ve kept it pretty minimal for the last few years and have just done a really good stocking for each of them, plus their usual book and jammies on Christmas Eve, but at this point, even filling a stocking feels unnecessary. Our kids are truly the luckiest and really just don’t need anything at all. With the help of my friend Crystal {of Otherware}, I’ve come up with an experience gift I’m super excited about and I just know they’re going to LOVE it. I’ll be sure to share it here afterwards, but it’s a lot like this ‘a special day in a box’ gift idea I used earlier this year to plan a special day with each of my kiddos.
Now a little back story first… As much as I’d love to take credit for the idea, Grae was actually gifted an ‘adventure in a box’ by her uncle and his girlfriend a few years ago and I just thought it was the sweetest, most clever gift ever! It was presented in a little box with a beautiful ‘Adventure’ sticker on top and inside were little notes and items that explained the day. BRILLIANT, right?! Firstly, it meant a really special day with two people she loves, and secondly, it completely avoided the addition of STUFF. Something I appreciate beyond measure. {Plus I just really love a good DIY kid’s gift.}
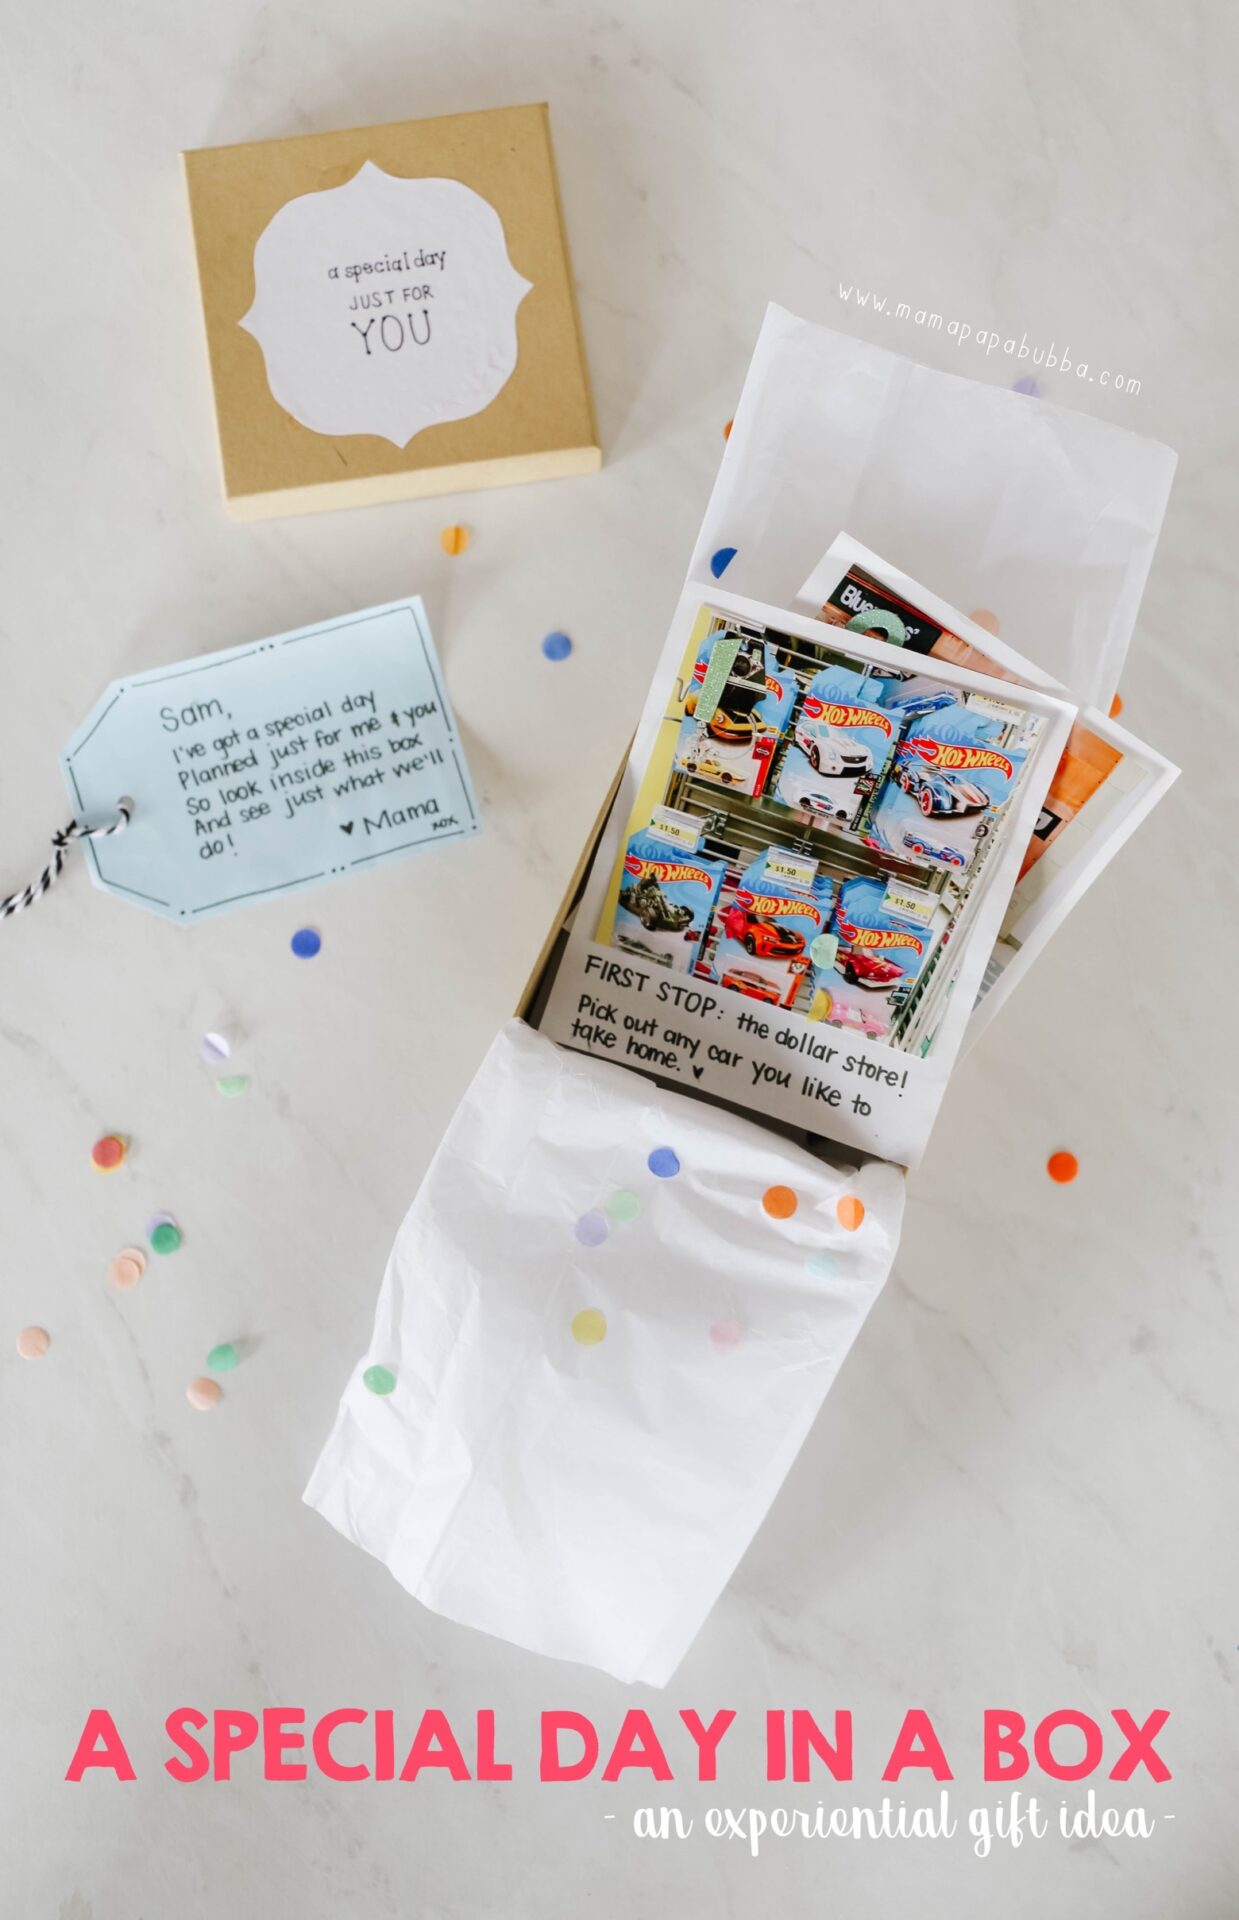
Here’s a peek at how I put together my version of ‘a special day in a box’ for Grae and Sam….
{this post contains affiliate links}
First up, supplies… You’ll definitely want a box (I bought mine at the dollar store) and a photo representing each of the stops on your child’s special day (I snuck out one night after bedtime, quickly went around town and snapped them on my iPhone, and sent them off for printing at London Drugs that same night). Once those things are ready, scour your drawers for items like paper, scissors, fine liners, tape, glue, baker’s twine, tissue paper, card stock, labels – whatever you think you might need to put it all together!
Alright – now to put it all together! First up, create a label for the top of your box. It can say anything you like – I went for ‘a special day just for you’, but ‘let’s go on an adventure’ would be cute too. Whatever floats your boat.
Stick or glue the label on the box and that’s done.
Next up, write a little note to your child explaining the gift… I did this on a tag-shaped piece of paper with a little baker’s twine through the hole at the top and went for rhyming and cheesy and wrote:
Sam,
I’ve got a special day planned just for me and you,
So look in this box and see just what we’ll do!
Love,
Mama
Now to prepare the activity cards… Again, this can look however you like, so feel free to make it your own! I had my photos printed as squares (4×4 if I’m not mistaken), then cut out card stock rectangles that were slightly larger. When I glued the photos onto the card stock, I glued them nearer the top so the finished cards would look similar to polaroids (not that my kids would know what those are – hah!), and wrote a little note at the bottom explaining the stop and what we’d do while there. I finished off the activity card with a number sticker in the top corner just because I had them and I knew they’d provide Sam with some good exposure to numerals {do teachers ever stop thinking like teachers?!}
Here’s a look at what Sam’s special day in a box included, though keep in mind that we live in a small town with very limited options and I gifted these to my kids for Valentine’s Day, so smack dab in the middle of our cold, snowy winter… Had we lived in Vancouver at the time – oh my gosh – the possibilities! Or had it been when the weather was nice? So many outdoor options!
Anyways, with that disclaimer out there, his special day included a stop at the dollar store to pick out a Hotwheels vehicle (his absolute favourite), a trip to the mall to ride those cars you put a dollar into, a stop at the bookstore to browse and select a book, and a visit to his favourite cafe to have a warm drink, play with the trains, and enjoy a baked good.
Now I will say this… As much as I maybe felt like some of these options were a bit lame and more focused on STUFF than I would have liked them to be, Sam thought each stop was absolutely incredible and was nothing short of STOKED throughout our adventure. I actually don’t think the activities matter a ton. Of course you want them to be things your child enjoys, but I think it’s more about the time together and the fact that this is a dedicated ‘special day’ than anything else. I could have told him that we were going to the park right by our house that we go to all the time and my guess is that he would have been thrilled with that too.
And here’s a peek at what Grae’s ‘special day in a box’ included… You can actually pop over to CBC Parents to read my ‘Build an Adventure Day in a Box’ post all about G’s day.
Alright, time to finish off the gift! I lined my box with a strip of tissue paper, then set the activity cards in, making sure they were in the correct order with the last stop in the bottom of the box and the first stop on the top.
Then I wrapped the activity cards up in the excess tissue paper, put my little note on top, closed up the box, and that was that… A special day in a box ready for gifting.
Honestly? I wasn’t ready to dive into all things fall just yet, but when we returned home from our Seattle and Vancouver trip to freezing cold weather (we’re talking zero overnight and 4 degrees by the time we were heading off to school), I decided we’d better get on it in case we skip fall altogether this year and transition straight into winter {fingers crossed that DOES. NOT. HAPPEN.} So today, while Sam and I were out on our morning walk / scoot, we kept our eyes peeled for beautiful fall leaves and collected them in a little bag along the way. Once we got home, we rinsed them off, dried them, and put them to work in all kinds of really fun, really simple activities, one of which was this fall leaf colour sort.
Here’s what we found… There wasn’t ton of colourful leaves on the ground just yet, but we still managed to find several leaves in browns, reds, oranges, yellows, and greens which was good enough for us!
{this post contains affiliate links}
Now just for fun, we decided to do this little activity in our beloved Ikea sensory table… When we were down in Vancouver, I picked up 4 of the smallest TROFAST bins with sorting activities just like this in mind (previously we just had the 2 larger bins) and they worked perfectly. I folded pieces of brown, red, orange, and yellow card stock in half, pressed them down into the base of the bins, and our fall leaf colour sorting game was ready to go!
That being said, you certainly don’t need a fancy sensory play table for this activity… You can just as easily tape 4 pieces of card stock or construction paper to the table or floor or use a set of 4 bowls or containers. Work with what you have on hand!
Next up, I set the leaves around the edges of the table and invited Sam to come and take a look.
Given that he’s 3 {soon turning 4} and we’ve done plenty of sorting activities (our car and truck colour sorting was one of his faves), this leaf colour sort was a total breeze for him even though I wondered if a few of the leaves might be a little tricky….
They weren’t (hah!) He basically moved at this speed until every last leaf was in the bin of the corresponding colour.
Sorting is such an important skill and building block for other future skills that I absolutely would not consider something like this – something that’s really “easy” for him – a waste of time. Reinforcement is super important for kiddos and “easy” activities are excellent for building confidence, so go on and do those too easy activities anyways!
See that yellow and read leaf over the edge of the table? When activities are fairly easy for your little one, it’s a great opportunity to guide the learning a little further, really discuss what’s happening, and model new language. When Sam decided that that leaf should go in the yellow bin (I would have done the same), I said, “Oh interesting. How did you decide to put that leaf in the yellow container?” We then went onto to talk about how it’s MOSTLY yellow, more yellow than red, even though the TIP is red, etc. and it was the perfect chance to reflect on his choice and use some comparison language in our conversation.
Here’s a peek at the other two fun little things we used our leaves for…
With Grae back to school, I feel like I basically have two main goals at the moment… 1) Getting us all ready, out the door, and to school on time, and 2) keeping everyone {especially my preemie babe Sam} healthy with all of the gross school germs currently being reintroduced into our lives. So far so good, but we’re only two weeks in, so fingers crossed for a fairly healthy winter. Being a NICU mama I feel like I have lots of little tricks for avoiding sicknesses as much as we can, and one of those things is definitely daily green smoothies. This particular one is the very best green smoothie I’ve ever had (truly!) and everyone seems to like it – even the green smoothie critics I’ve encountered. While it’s got lots of great greens and nutrition in it, I think the key is that it’s nice and sweet and has a little punch of tartness from the pineapple and orange… Basically it tastes good vs. TOO healthy like some green smoothies do. That being said, it is healthy… It includes lots of leafy greens and fruits, plus it’s got vitamins, healthy fats, protein, omega-3 fatty acids, calcium, iron, fibre, and more. A definite win-win in my books.
Here’s the full list of required ingredients: kale, spinach, banana, frozen pineapple, frozen mango, avocado, oranges, hemp hearts, chia seeds, and pure apple juice (which is optional but does make a difference in the finished flavour of the smoothie). We use the stuff from our local apple orchard that is absolutely to die for and freeze it into easy to use ice cubes since juice is not something we keep on hand usually.
Now you can just use this recipe to make your smoothie each morning as usual, but what I like to do is prepare smoothie bags in advance. Basically that means I haul all of the ingredients out, fill multiple bags / jars / containers with all of the ingredients save the liquid, and I have pre-made smoothies ready to go for the week {or more}.
{this post contains affiliate links}
Now I will say that last winter I made up a ton of smoothie jars, strategically placing everything {well except that coconut yogurt that was a mistake – hah!} in order to ensure I’d be able to get everything out come smoothie making time, and let me tell you, it was an epic fail. Even the jars that you’d think would be easy to dump out were a huge pain in the butt and I think I wasted more time scraping ingredients out of jars than it would have just taken me to make the smoothies from scratch in the mornings. Lesson learned. I would maybe try the jar method again in the future, but certainly not with these jars… They’d have to be something with a wide enough mouth that I could stick my whole hand in them to retrieve ingredients if needed.
While I’m not happy about it, I’ve resorted to using 6 of my very precious use-only-for-gifting-play-dough-kits-zip-close-bags this time around as they were my only option (I haven’t bought plastic bags for regular use in several years now and I don’t have enough glass containers to spare), but I’d really like to invest in a set of large Stasher bags or something similar to use as dedicated smoothie bags. (I just found these on amazon and they seem to have good reviews and are super affordable.) Anyways, until then, rest assured that these 6 bags will be used again and again until they can’t be used anymore…. (We’re the people who wash out bags from bread and tortillas to reuse multiple times before sending them off for recycling.)
Alright, now onto the very best green smoothie smoothie bags!
First up, a big kale leaf. We often use lacinato kale {because it makes amazing kale chips and is what we have on hand}, but you can use any type you like. One leaf per smoothie bag. We have a Vitamix so I don’t even bother removing them stem bit, but if you don’t have a high-powered blender, you may want to.
Next up, a handful of spinach per bag… Literally just however much you naturally grab. Smoothie recipes are just one of those things that always turns out, so no need to be finicky or exact.
Add a ripe banana to each… The key here is ripe. A green banana won’t do you much good as you’re really counting on the banana for some sweetness here.
Now, 1 cup of frozen pineapple. Pineapple is what makes this smoothie in my opinion, so if you have to choose, be more generous with it than less generous.
Next up, frozen mango… I cup of that per bag too.
Add half an orange…
And half an avocado… (You can skip this if needed, but healthy fats are important – especially for kids and avocado does add a creaminess to smoothies too.)
Okay, almost there… Next up, about a teaspoon and a half of chia seeds and a teaspoon and a half of hemp hearts. You can add any other nutritional add-ins you love here too.
Lastly, two ice cubes worth of frozen apple juice. We don’t keep juice in the house usually, so this ice cube method works really well for us, but you can also just add in a splash before blending.
And that’s it! Seal these up and store them in your freezer for super quick and easy smoothies on busy mornings {or afternoons, or whenever!}
When you’re ready, simply dump the contents of your smoothie bag into your blender, add about 2 cups of water {or a little more or less depending on your blender’s abilities and the consistency you’re going for}, and blend! I use the smoothie setting on our Vitamix A2500 Ascent Series, which is 50 seconds long.
This recipe makes a good amount of smoothie… We get four smoothies from each smoothie bag… A small / medium one for Sam, Grae, and I and a big one for Brad. That being said, if you’re an adult who enjoys smoothies as breakfast, I’d say this makes two BIG adult size smoothies that would fill you up.
The Very Best Green Smoothie Smoothie Bags
1 leaf of lacinato kale
1 handful of spinach
1 ripe banana
1 cup of frozen pineapple
1 cup of frozen mango
1/2 of an orange
1/2 of an avocado
1.5 teaspoons of chia seeds
1.5 teaspoons of hemp hearts
2 ice cubes of frozen pure apple juice
2 cups of cold water
Fill bags or containers with the ingredients above, seal well, and freeze. When ready, dump the contents of one smoothie bag into the blender, add approximately 2 cups of cold water (or a little more or less depending on your desired consistency and your blender’s abilities), and blend until smooth.
Is there anyone who is NOT drowning in zucchini this time of year?? My zucchini is doing terribly at the moment {in fact my entire garden is pretty sad this year}, but thanks to my friend Stesha, there’s been no zucchini shortage around here! I’ve been grating it up and throwing it into soups, sauces, veggie ground for tacos, and wherever else I can get away with it and there’s still more! We LOVE our super cakey {and also vegan, naturally sweetened, and whole wheat} chocolate zucchini muffins, but sometimes a girl just needs some lemon in her life, am I right? {I freaking. love. all. things. lemon.} After completely winging a batch of lemon zucchini muffins and having them turn out flavourful but too wet and zucchini-y, I came to a brilliant conclusion… Why would I not just adapt my chocolate zucchini recipe?? It’s crazy delicious and nearly fail-proof, which would make for a good jumping off point, right?
RIGHT.
I’m so stoked on how these turned out. They’re super lemony, tender, and I hate myself for saying it, but MOIST. (Gag! Grossest word in existence.) The only thing I may experiment with next time around is using a combination of traditional whole wheat flour and whole wheat pastry flour as they’re almost too tender and flaky if that’s possible. {If you try it, I’d love to hear from you in the comments!}
The other thing I’ll say about these {and most of the muffins I make} is that because the veggie content is so high, I usually keep what we’re going to eat in the coming few days in an air-tight container in the fridge and then freeze the rest to pull out one at a time when needed. They freeze well and this ensures that they don’t turn to mush as healthy muffins sometimes do.
Aren’t they pretty too? I was surprised to see that they’d turned a yellow-y hue when I pulled them out of the oven. I guess that’s what happens when you make muffins loaded to the brim with lemon zest and juice, hey? {Hah!}
1 1/2 cups of finely grated zucchini, deseeded if necessary
Preheat your oven to 350 degrees.
In a small bowl, measure out the ground flax or chia seed and warm water. Stir to combine and set aside to thicken. {This mixture is two flax / chia ‘eggs’.}
In a large bowl, add the flour, baking powder, baking soda, and sea salt. Whisk until thoroughly combined and sprinkle lemon zest on top.
In a separate smaller bowl, whisk together the olive oil, pure maple syrup, lemon juice, and vanilla.
Add the liquid mixture and the flax eggs into the dry mixture and gently mix with a spatula until almost combined. Add the finely grated zucchini and give the mixture a few more gentle stirs. {A word on the zucchini… If you pre-grate your zucchini like we usually do, by the time you go to use it, there will most likely be some liquid that has drained off. No need to include this. Simply pick up the zucchini by the handful, allow it to drip over the bowl for a few seconds, and then add it to your mixture, tossing out any liquid that’s left in the bowl afterwards. Do not squeeze your grated zucchini dry before adding it… The moisture from the zucchini is what makes these muffins so dang good.}
Line your muffin tin with silicone muffin liners and distribute the batter evenly amongst the cups. Bake for approximately 20 – 24 minutes, or until a wooden toothpick comes out clean. I sometimes like to turn my oven to broil for the last minute or two of the baking time in order to get the muffin tops nice and golden and just a touch crispy, but be sure to watch your muffins closely if you choose to do this… Broil is no joke.
Remove the muffins from the oven and allow them to sit for several minutes before removing them from the pan and placing them on a cooling rack.
Once completely cool, store in an air-tight container on the counter or in the fridge for a few days or freeze the muffins and pull them out as needed.
Two of my favourite things? Kid’s books and play dough kits… So a book-inspired play dough kit?? Oh my gosh… A match made in heaven!! We made this Little Blue Truck play dough kit last year when all of the Little Blue Truck books were on heavy rotation in our house and it was such a hit.
{this post contains affiliate links}
For the purpose of the kit, we decided to use the original Little Blue Truck as our inspiration, but they’re all so good {well, with the exception of the spring one – it’s not my favourite if I’m being honest}. They’re just such fun books to read aloud… They have great rhythm and rhyme and they have really sweet messages behind them too – win! I’d highly recommend all of these:
While I wasn’t sure what colours of play dough we’d do for this kit, a few flips through the pages of the book and it was settled. We’d go with rich, fall colours just like the ones in the illustrations.
Here’s a look… We did a deep, brick red, a charcoal grey, a mustardy yellow, a coppery brown, and a mossy green. Of course you could switch these up and do any colours you and your little one like though!
To make the play dough, I actually did 5 separate batches of dough (one for each colour) and then split each batch in half to make two kits – one for us to keep and one for us to gift. Depending on how full I want our kit to be, I usually do two or three batches of play dough, so 5 batches split in half gave us the perfect amount. You can find our go-to play dough recipe, as well as our tips and tricks to making the perfect play dough, here. For this particular kit, we skipped the scent and used our favourite Wilton gel colours.
Here’s how the dough fit into our go-to play dough kit container, the GLIS divided box from Ikea {US | CAN}. (One thing to note is that while these dough balls are not wrapped in anything, the GLIS containers are not airtight, so I do gently place the dough into a large zip-close bag and then back into the container both for gifting and for personal storage. In an air-tight bag, this play dough will last for months and months, whereas if you just leave them loose in the kit, you’ll notice them drying out and becoming sort of crystal-y fairly quickly.}
Next, we gathered up our animals and vehicles… We already had all of the animals in the story in our collection of Schliech and PAPO figurines, so that’s what we went with. You can find them here:
duck (this is a goose, but it looked more like the duck in the book than our duck figure did)
toad (ours is a green tree frog by Safari Ltd. that I can’t seem to find on amazon)
These figurines are beautiful quality and while we’ve built our collection slowly over many years, they’re definitely more pricey than others. If you’re giving this as a gift and you’d like it to be more affordable, I would recommend going with Safari Ltd. or Wild Republic figurines… Or even the ‘no name’ ones available in big toy stores and dollar stores. You should be able to find all of the story characters and more, at a fraction of the cost.
{One other thing to note is that while I always use amazon links in my posts as those seem to be the most universally accessible for most, we buy almost all of our figurines from our very favourite toy store in Vancouver, Dilly Dally Kids. It’s owned and run by a young local family and they’re amazing and the most sweet, helpful people ever. They also ship all over the place and have really good shipping rates, so I’d highly recommend checking them out.}
We also happened to have a perfect little CAT dump truck on hand too (we found ours at Winners, but you can also find it here), so the only thing we purchased was a little blue truck from our local teacher store (but this one or this one would be amazing!)
Weird, but one of my favourite things about putting together play dough kits is figuring out how to best fit everything into the GLIS box… We went with all of our little animal friends in the big spot on the left and the trucks in the middle spot in the front.
To finish off the kit, we added some natural wooden matchsticks {to be used as long grass, fence posts, or anything else the kiddos dream up} and a handful of autumnal trees from our Safari Ltd. Tree Toob.
Here’s the finished kit… Wouldn’t this make a lovely gift for a special little someone?
My favourite part about play dough kits is that you set them out and the kids have everything the need to start playing / creating…
And open-ended play invitations like this tend to appeal to a wide range of ages, which I love.
One thing I tend to get asked about play dough kits is, “How are they supposed to play with it?” and my answer is always that there is no right way to play – so long as they’re following the basic expectations you’ve set out for play dough play of course. I find that kids don’t really need instructions when it comes to enjoying the combination of play dough, loose parts, and figures… They have plenty of imagination and the best thing oftentimes is for us to stand back and observe.
They might create scenes that look similar to the ones in the story…
They might use the play dough and parts to retell the story…
Or they might do something completely different – which is 100% okay.
Either way, they’re most likely flexing their imaginations, hand muscles, and fine motor skills, which are all great things.
It feels like we’ve had a slow start this year, but summer seems to be here in the Okanagan and Sam’s been enjoying his little backyard truck garden again!
Here’s what inspired us creating a truck garden… This hilly corner of our yard filled with dirt, rocks, and loads of debris discarded by our big old tree. Now if we knew that this home was our forever home, we’d probably do something different, but without wanting to invest a whole lot of time, energy, or money, a truck garden turned out to be a fantastic solution.
Of course every yard is going to be different, but I do think the truck garden concept could be adapted to many different spaces, hilled or flat.
Another fun part of this project? Other than the little orange pilons and some paint, we only used things we already had on hand to put it together.
First up were these road bricks… They started out as regular old bricks left in the yard by the previous home owners, so I painted them grey with a sample of outdoor paint I picked up and then added some little yellow dashes freehand using some acrylic craft paint from the art cupboard. More than a year later, these have held up super well. What I love about them is that they can be moved and configured how ever Sam likes, and they give him an opportunity to do some heavy lifting.
The other little upcycle / repurpose project we did was turning some wood and flooring scraps into these road planks.
I had previously seen this idea on my friend Chelsey’s site, Buggy and Buddy, and when I found a bunch of wood scraps left in one of the sheds, I knew it would be perfect.
I just painted the boards a charcoal-y black colour using an outdoor paint we already had, then freehanded the white dashes using a small paintbrush, some acrylic craft paint, and an old metre stick as a guide. And voila – wooden roads and ramps!!
{this post contains affiliate links}
Then we added all of the fun stuff… Our kids’ garden tool set for raking up branches, creating dirt mounds, etc., a big bin of DIY blocks Brad and his dad made using some 2×4 and 2×8 scraps that were also left in our yard, and Sam’s collection of Green Toys and Wonder Wheels trucks. All of these have been gifted to him over the years and they’ve seen endless hours of play. They’re big, sturdy, and made from recycled plastic. These are the ones he has currently:
I also created a little picnic space at the top of the truck garden using our kids’ picnic table from Ikea and a little black and white striped umbrella, but I didn’t find that it got used a whole lot last summer, so I skipped it this summer and kept those items on our patio below instead.
It was a cute little set up though!
Possibly the biggest hit of the space? This little sit-on excavator we got during a campaign I did with Canadian Tire. Sam just LOVES it and could spend ages scooping up loose dirt and moving it to a different space or filling a bucket.
I can’t tell you how much play this little space has seen!
Here’s a look at the whole thing… It’s certainly not the prettiest thing, but it’s such a great spot for playing in the dirt, getting filthy, and enjoying trucks.
One final addition that’s also been a favourite? These PVC pipe ramps! While this wasn’t something I felt comfortable taking on myself, I took advantage of my brother being in town and he helped me pick up the largest piece of PVC pipe Home Depot carried and then cut it in half vertically. We sanded the edges and created these ramps that smaller cars can ZOOM down!
My summer wish? Slower mornings that are still productive enough to get out of the house and have some fun before nap time rolls around at noon. Plus, with Brad home for the summer, a couple of hours to work each morning too… Hah! Too much to ask maybe, but we’re giving it a go and so far this morning routine flip chart has been super helpful!
Here’s the thing – while I usually work on all things blog / writing gig related from about 10:00 p.m. to 1:00 a.m. during the school year, I find that during the summer, I’m just more tired and less motivated at night… I don’t know if it’s because we spend a good amount of time hosting guests and travelling during the summers, but when we’re at home and without houseguests, I honestly just want to go for a walk, tidy the house, prep things for the next day, and then chill on the patio or watch a show with B at night. And since he’s off work for almost all of July and August, I figure that a couple of hours each day where Brad’s the go-to parent is a reasonable request, right? Not going to lie – he wasn’t super on board with the plan because a) he loves nothing more than sleeping in and would happily stay in bed until 10 or 11 everyday of the summer and b) because having to get up AND feed the kids breakfast and get them ready for the day is just something he’s not used to doing. But since making our morning routine flip charts, the kids are able to be more focused and independent, which I think has been helpful for everyone.
{This brilliant file folder idea came from this chore chart I saw on Pinterest back in the day, so I can’t at all take credit for that aspect of the project.}
Bahahaha – can we just stop for a moment and appreciate the hilariousness that is taking blog photos with a toddler?!? Gotta get in where you can, right?? Oh, Sam!
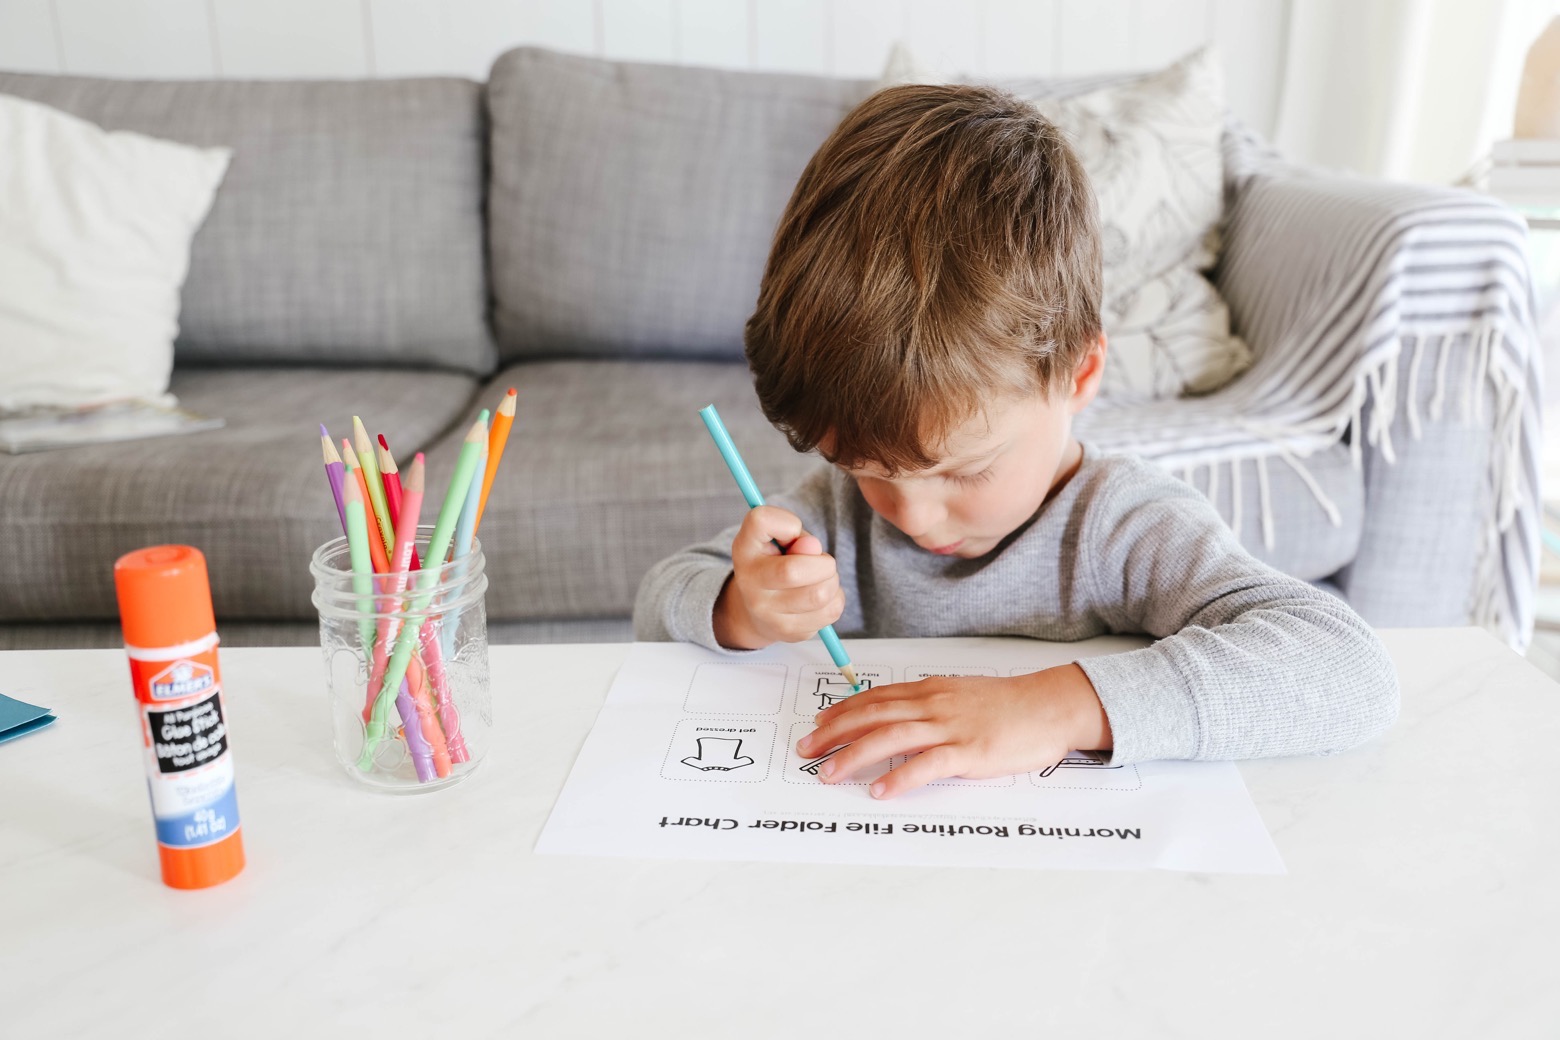
Alright, back to it. With all of our materials gathered, Sam and I got to work putting together his morning routine flip chart. First job? Colouring in his ‘job pictures’. As he coloured, we talked about each picture and what they meant and I helped him out here and there when he asked me to. (Don’t mind the pencil grasp… We’ll be working on that soon… He’s not shown a ton of interest in pencil / paper activities just yet, so I want to be very gentle with my guidance so as to keep his interest up when it does arise.)
Done! {You’ll notice that there’s an extra empty box on the printable… This can be used if you want to swap one of the jobs out for something that better suits your little one’s morning routine – just drawing a little picture, write in the name of the job along the bottom, and you’re good to go!}
Next up, I cut the job cards out just outside the dotted lines. While I did that, Sam worked on cutting up some of the scraps using his spring scissors. {Because cutting scraps into the teeniest paper shards is still scissor practice after all, right? HAH!!}
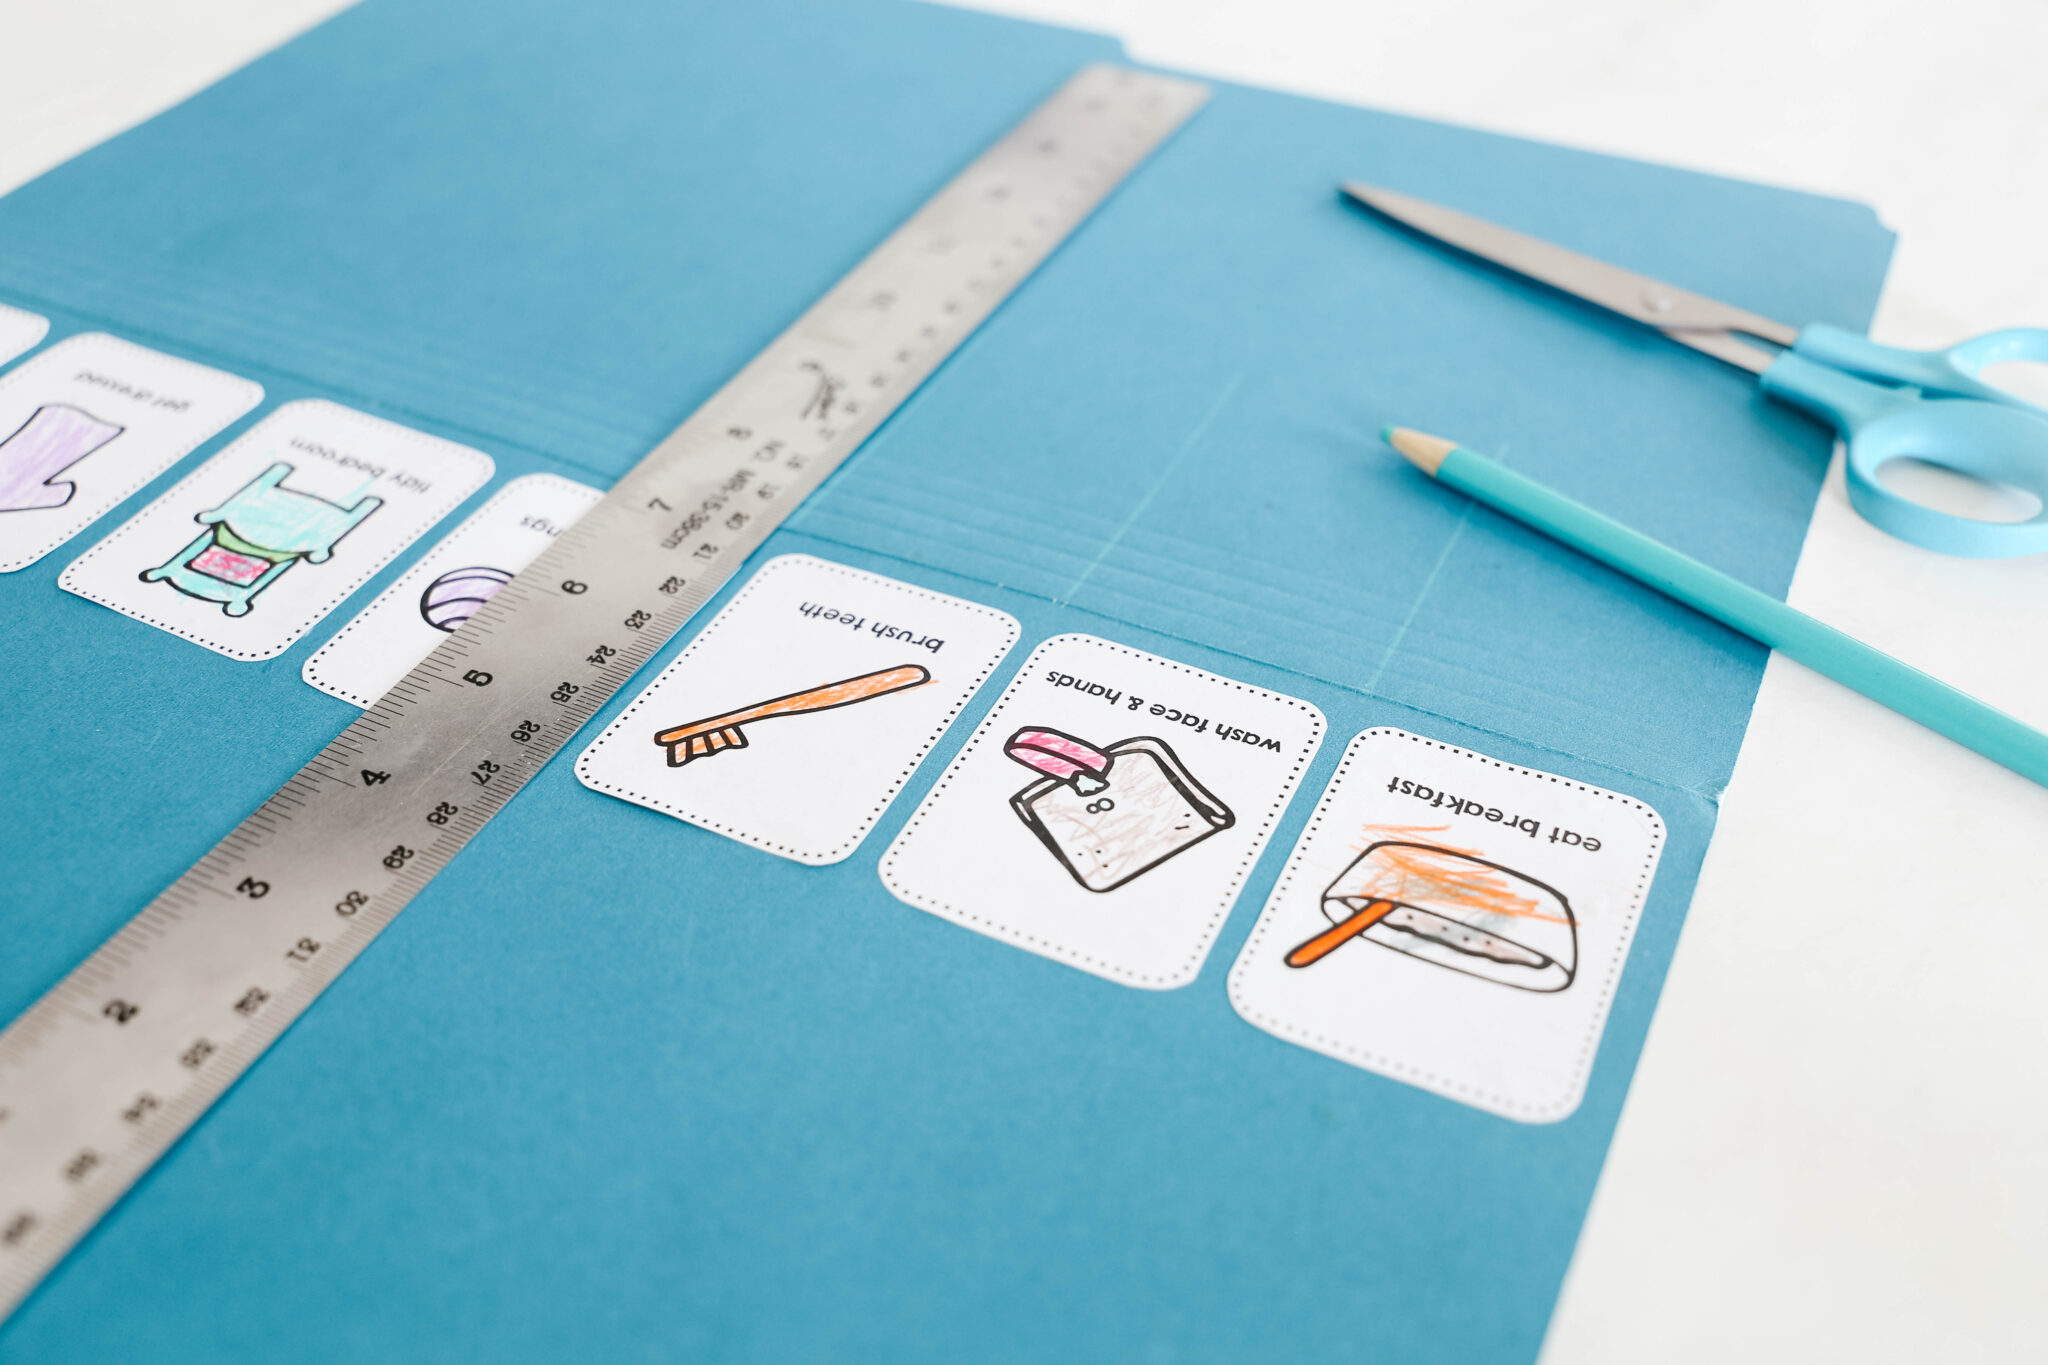
Next, I opened up the file folder and set the job cards out in the order I thought made most sense for how our mornings go, but obviously these can be put in any order that works best for your fam! Because the file folders I bought had some text on the inside, I opted to use them inside out, so you’ll notice that I’ve placed them on what is actually the back of the file folder here. Once I had them placed and spaced how I wanted, I glued the job cards down using a glue stick.
At this point Miss G joined us to make a morning routine flip chart of her own… She doesn’t ‘need’ one like Sam does and is very used to getting ready for school in the mornings either on her own or using her morning routine jaror morning routine chart, but I find that a) having a visual does help her stay focused and on track and b) switching up the visuals every now and then helps to keep things fresh and interesting.
With all of the job cards glued down, I used a ruler to draw straight lines down from in between the job cards to mark where I’d need to cut to create flaps.
Then I trimmed the bottom of the file folder off {making sure to leave enough space to add a magnet above each job} and cut along the lines I had previously drawn to make the flaps.
Next up, I measured out one inch chunks of magnetic tape, ensuring I had 14 magnets total.
Then I adhered one magnetic strip above each job.
In order to get the placement bang on, I stuck a second magnetic strip {magnetic side down, sticker side up} on each of the adhered magnetic strips, then removed the sticker backing one at a time, and closed the flaps, pressing the magnets down firmly to ensure a good stick. (Does that make sense?)
Then I added “Sam’s morning routine” to the top of the chart…
And trimmed off the excess file folder at the top.
This is what it looked like once done and hung on the side of our island in the kitchen and I’m happy to report that it’s been a total hit. His morning routine flip chart has totally let him take charge of getting ready for the day and even though he does need help with a few of the tasks, he’s able to be the one driving the process, which I think is really empowering.
He just checks in with his chart to see what’s up next…
Goes and does it…
And then returns to close the flap!
Ready to make your own morning routine flip chart?
Oh my goodness… Can we please just soak in the delicious ridiculousness that is these vegan compost cookies?! And while I’d love to say that they’re healthful, there’s really not much that’s healthful about them… They’re CRAZY delicious though! Filled with oats, pretzels, graham cracker crust, chocolate chips, butterscotch chips, potato chips, and coffee grounds (everything you’d find in a compost?), they’re a crispy and chewy and salty and sweet all at once. I usually make them once a year {okay, maybe twice a year when Brad was at his last school}, but this year when we were brainstorming teacher gifts, Miss G decided that she’d like to do big jars of homemade compost cookies and I was totally on board. We paired the jars with a bag of locally roasted coffee beans and our completed ‘Thank you for being my teacher’ printable and that was that.
Since we now eat vegan at home, I also took the opportunity to recipe test a veganized version of the recipe we usually use, and I’m so happy to report that it turned out amazingly well! I also took a chance and swapped out some of the sugar for coconut sugar, so while these still have a ton of sugar in them, at least some of it is a little less refined.
Okay, just look at this…
And that’s not all… There were still potato chips to be added!
Now a quick word on the potato chips… While we usually buy a locally made kettle-chip style of chips to snack on {Hardbite}, these cookies are much better with a classic, cheap potato chip. You know the ones that are a little too greasy and a little too salty? Yup, oddly enough, those are the ones you want. The other ones are so thick that they’re almost too crunchy whereas these thinner ones add just the perfect amount of crunch!
Dough done! (I always double this recipe when making it.)
Okay, now here’s the one unfortunate thing about this recipe… The dough has to be refrigerated before baking the cookies off. Ugh – not the best news for a get-in-and-out-of-the-kitchen-as-quickly-as-possible person like me, but trust me on this one. I’ve made them plenty of times and skipped this step and they’re still delicious. BUT – if you want them to have that crispy outer coating and super thick, chewy inside, you need to refrigerate. I just roll the dough into big balls, pop them into a baking dish, and pop them into the fridge. Come back in an hour and they’ll be good to go.
The last thing… The butterscotch chips. Every type of butterscotch / caramel chip I could find in our little town contained milk products, so those were a no go for us, obviously. I did see that there are some available online for purchase, but I just opted to try making my own using this recipe. It didn’t turn out perfectly (I was left with some extra butter/oil floating around and the butterscotch was soft at room temperature), but I just kept the pan in the freezer, broke off some little chunks and pressed them into the flattened dough balls as I took them out of the refrigerator to bake and it worked out just fine!
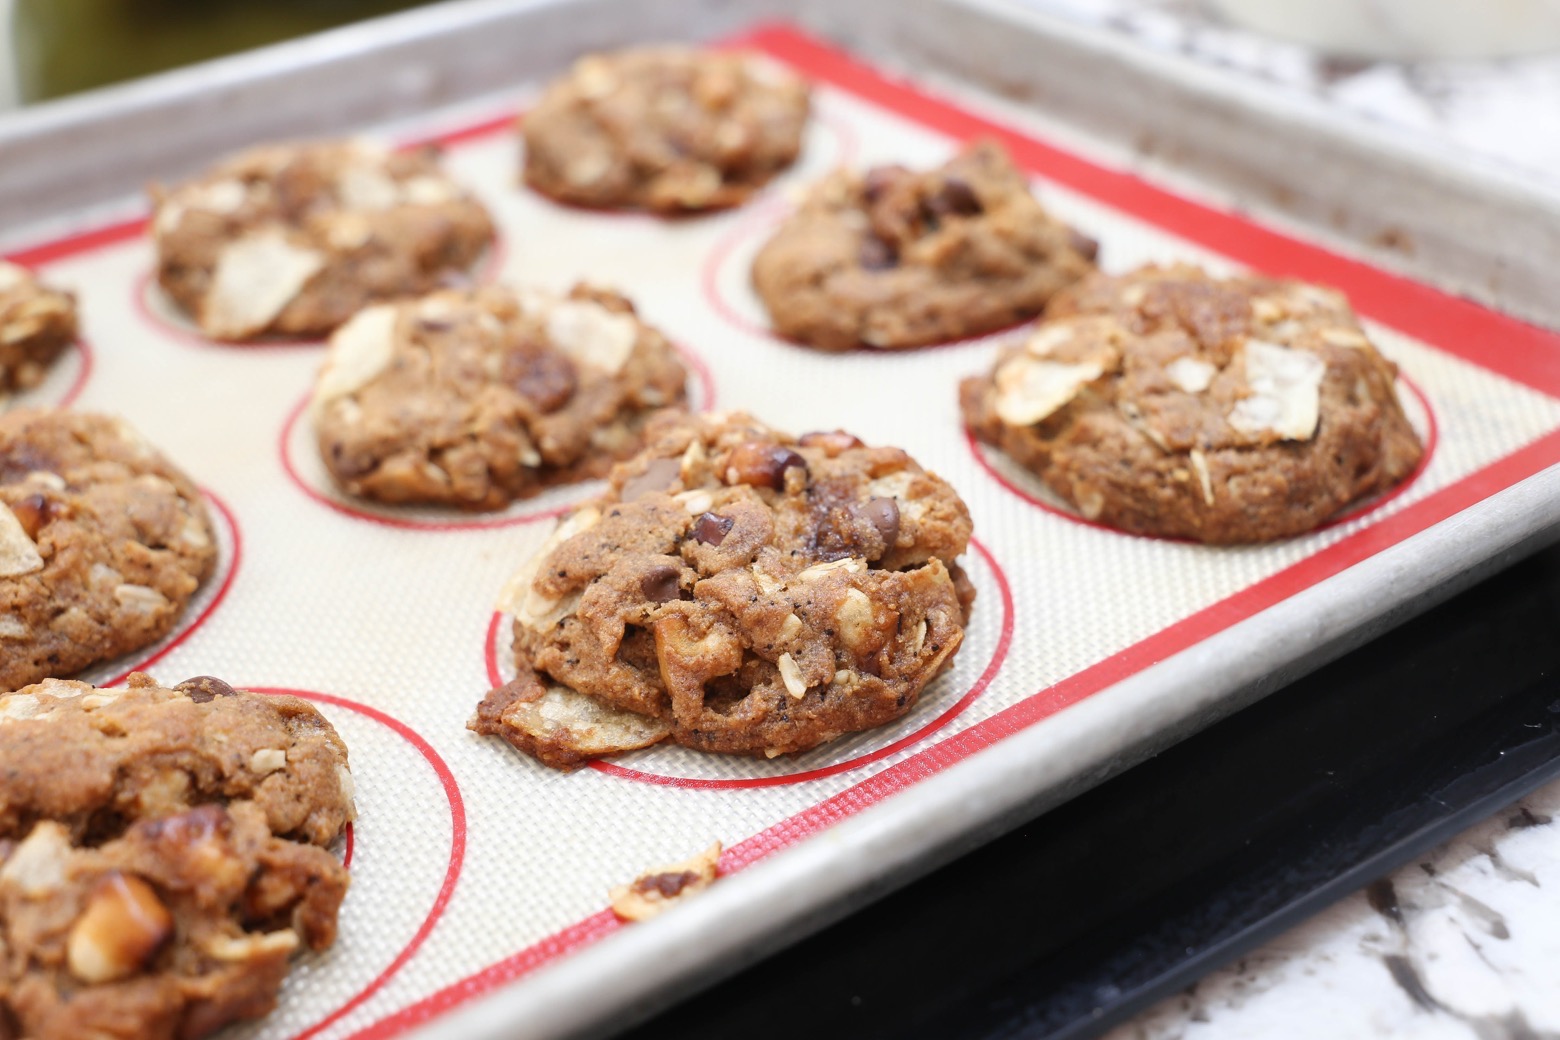
Here’s what they look like straight out of the oven…
{this post contains affiliate links}
Also, I can’t recommend getting one of these silicone baking liners enough… They work just like parchment paper does and are waste-free!
Here they are completely cooled and ready to be packaged…
We picked up some big glass jars with good seals at a local shop {these are very similar}, filled them up to the top with cookies, added a little homemade tag using baker’s twine, and that was it! Big jars of vegan compost cookies ready for gifting.
Here’s our recipe…
Vegan Compost Cookies (based on this recipe by table for two)
1 tablespoon of ground chia seeds
3 tablespoons of warm water
1/2 cup of graham cracker crumbs (double check the ingredients to ensure your graham crackers don’t have honey or milk products in them)
1 tablespoon + 1 teaspoon of vegan butter
2 teaspoons of pure maple syrup
1 1/3 cups of bread flour
1/2 teaspoon of baking powder
1/4 teaspoon of baking soda
1/2 teaspoon of sea salt
1 cup of vegan butter
1 cup of coconut sugar
2/3 cup of packed brown sugar
1 tablespoon of agave syrup
1/2 teaspoon of pure vanilla
graham cracker crust
3/4 cup of mini vegan chocolate chips
1/2 cup of vegan butterscotch chips*
1/3 cup of old-fashioned oats
3 teaspoons of ground coffee beans
2 cups of plain potato chips, crushed
1 cup of mini pretzels
Prepare your ‘chia egg’ by combining the ground chia seeds and warm water in a small bowl. Set it aside to thicken.
Prepare your graham cracker crust by working the vegan butter and maple syrup into the graham cracker crumbs with your fingers in a medium-sized bowl. Set this aside until needed too.
In a large bowl, whisk together the flour, baking powder, baking soda, and sea salt until everything is evenly distributed.
In the bowl of a stand mixer fitted with a paddle attachment, cream together the vegan butter, coconut sugar, brown sugar, and agave syrup on medium-high for two minutes. Scrape down the sides, add in the chia egg and vanilla, and mix for another few minutes until the mixture is light and fluffy.
On low speed, slowly add in the dry ingredients until just about combined – little flour pockets here and there are fine.
Still on low speed, pour in the graham cracker crust, chocolate chips, butterscotch chips (if using them), old-fashioned oats, and ground coffee beans. Allow it to mix for about 30 seconds and then add in the potato chips and pretzels and mix just enough to distribute them throughout the dough.
Using a medium sized cookie scoop, portion the dough out into generously sized cookie dough balls, place them in a container, and pop them into the fridge to chill for one hour (this step is important – I highly recommend not skipping it).
Preheat the oven to 365 degrees and prepare a baking sheet by lining it with a silicone baking mat or parchment paper.
After an hour, retrieve just enough dough balls to cover your baking sheet and gently flatten them down. If you’re using the homemade butterscotch ‘chips’ like we did, break off a few little chips and gently press them into the dough near the centre of the cookie.
Bake for 13 – 14 minutes in a fully preheated oven. When removed, the cookies will still be very soft to the touch and will look darker than most due to the coconut sugar. Allow them to cool for at least ten minutes before transferring them to a wire rack to cool completely. The goal is for the outsides to be golden and crispy and the insides to be soft and chewy.
Once completely cooled, pop the cookies into jars for gifting or into a container at room temperature to enjoy / store for up to a week.
Okay, I’m probably aging myself here, but do you remember being able to get frozen bananas dipped in chocolate at Dairy Queen growing up? The ones that came on a stick and were absolutely delicious? Because I do! I don’t know if it’s sad or awesome that I’d choose a frozen banana over everything else one can get when at a fast food chain full of frozen treats, but I loved them. And apparently I still think they’re awesome because chocolate covered frozen banana pops happen every summer in this house. We most often sprinkle them with chopped nuts (peanuts + chocolate + banana = actual heaven), but this time around we went for the naturally coloured candy sprinkles I bought ages ago for a birthday party {they’re not at all healthful, for the record – just naturally coloured}. Put a few candy sprinkles on anything and the kids will think it’s amazing, but the best part of these frozen banana pops for me? Not having to melt actual chocolate. In fact, there’s no actual chocolate involved.
With Sam not feeling well earlier today, we decided to spend our afternoon close to home and out of the sun. I love setting little play invitations out for the kids to discover after school, but since I hadn’t gotten a chance to set something up during nap time, I quickly pulled together a classic while Grae and Sam devoured their afternoon snacks… Magic mystery painting! {An absolute childhood classic if you’re old like me – hah!}
{this post contains affiliate links}
Now I have to preface this all with the fact that I wasn’t planning on sharing any of this here, so didn’t pull out my big camera like I should have… hence the cell phone photos. Not ideal, but meh.
* Other thick, absorbent papers will work too, but watercolour paper can soak up a ton of paint without sogging up and ripping and it dries flat.
** Any type will do, but we love our Sax liquid watercolours and I think they’re PERFECT for this project… They make it super easy for little ones to get a brush full of paint (just dip and go) and they’re super washable. We used just a few drops of liquid watercolours diluted in small cups of water.
Okay, so here’s how easy this is… First, use the white pastel to draw simple pictures, lines, and designs all over your watercolour paper. Two things to keep in mind… 1) Solid, thick pastel lines make for the best end result, so be sure to use lots of pressure when drawing and 2) your kiddos don’t care what your drawings look like whatsoever, so don’t let the fact that “you can’t draw” stop you from doing this… Just really go for it!
Here’s how I set it out for Grae and Sam… My white pastel drawings on a giant page of watercolour paper, plus little jars of Sax liquid watercolours diluted in water right on top. Oh, and paintbrushes too, of course!
I had already told Grae and Sam that this activity involved something magical / mysterious, so they wasted no time getting to painting once I told them it was ready to go.
And they were totally wowed. (Even though Miss G’s done this loads of times… The resist part is fun, but it’s uncovering the hidden drawings that makes this activity so fun and engaging.)
Part way through they decided that they’d try to paint the entire surface so as not to miss a single drawing or design, which I thought was very clever!
When they were mostly done, I encouraged them to go in and add more paint – a) because the paper can handle it and b) because it allowed them to explore colour mixing.
Isn’t their piece beautiful?! Plus, when you have kiddos with a 5-year age gap, the very best thing is finding activities they both enjoy and can do alongside one another.
When they were done with the first one, Miss G asked if she could create a second one full of things Sam loves… And I mean, how can you say no to that, right? So while she worked on her version, Sam whipped her up a snack of toast, carrot, ice cream, and pancake.
Then it was back to work!
Here’s the one G made… Isn’t it the sweetest? Complete with all of the things Sam loves – fire engines, food, and Blippi, plus his name and his age.
Today, with Sam still recovering from his latest bout of croup and Miss G home from school to catch up on some rest she can hopefully avoid getting sick, I decided it was time to make our first batch of popsicles of the year. I wanted them to be super healthy, full of vitamins, but still delicious, and so these fruity GREEN popsicles came about!
Now there’s no hiding this – all these fruity green popsicles really are is a green smoothie in frozen form {though if your kids are like my kids, it won’t matter one bit because anything in popsicle form is exciting and loved}. Truthfully, you don’t need a recipe at all because you really just can’t go wrong here… Just whip up a regular green smoothie, pour it into some popsicle moulds, and freeze! If the smoothie tastes good, the popsicles should too!
That being said, I know that there are lots of people who really like having a recipe to guide them, so if that’s you, here’s exactly what we included in our fruity green popsicles… Frozen mango, clementines, lacinato kale, pineapple juice, coconut water {which is optional}, hemp hearts, and chia seeds. Super healthful, right?
The best part? The kids did almost everything on their own! First up, they washed the kale and removed the cores.
{this post contains affiliate links}
Then they put the kale and fruit into our Vitamix…
And added our juice and coconut water.
Looks delish, doesn’t it?
Then Sam did the honours and blended everything up.
Now I will say that if you don’t have a high-powered blender, you may want to skip the chia seeds and hemp hearts – unless your kiddos don’t mind a little texture.
Our Vitamix {which was worth every penny of its purchase price} blends them up like nothing, so add them to your heart’s delight if you have a similar blender.
Next up, we poured the fruity green mixture into our popsicle moulds. We have quite the random assortment and used all shapes and sizes and got 17 popsicles out of this recipe.
Here they are when done. They look good, right??
Here’s the recipe…
Fruity Green Popsicles
2 cups of mango, fresh or frozen
2 clementines (or other small oranges)
5 lacinato kale leaves, washed with the cores removed
1 tablespoon of chia seeds
1 tablespoon of hemp hearts
1 cup of pure pineapple juice*
1 cup of coconut water*
* for sweeter popsicles, omit the coconut water and use 2 cups of pure pineapple juice
Add everything to a blender and blend until smooth. Pour into popsicle moulds and freeze for at least 5 hours or overnight.
Oh how I love spoiling my kiddos on special occasions like Easter! My goal is always to fill their baskets with quality items that they’ll actually USE, even if it means spending a little more or purchasing less. Their baskets vary year-to-year of course, but usually include three types of things… Books to read, supplies to create with, and open-ended toys to play with. I also love using holidays like Easter to add to their most loved collections (things like their LEGO, animal figurine, musical instrument, and Maileg mice collections).
You’ll find all of my recommendations in the ‘Easter Basket Goodies’ section of my amazon shop, but in case it’s easier in list form, here are some of my favourite quality items to put in your child’s easter basket…
Alright, there you have it… My recommendations for quality items to put in your child’s Easter basket. Ooh – and don’t forget a couple of sweet treats of course!
YOU GUYS… It’s March 6th and currently? It’s snowing. SNOWING!! I can’t even. And so, when you don’t have the power to change the weather, you may as well enjoy it, right? Except for that it’s cold and miserable…. So we brought the blizzard inside. {Just enough to fill a small bin – my kind of blizzard. Hah!} Mixed Sam’s very favourite thing (vehicles, obviously) and created an icy blizzard car rescue that he absolutely loved.
Here’s how I did it…
{this post contains affiliate links}
First of all, I picked out a few Hot Wheels / Matchbox vehicles from Sam’s collection and placed them into a small bin with just a couple of centimetres of water and two drops of aqua liquid watercolours (one of my very favourite art supplies – they’re super vibrant and super washable). Then I popped the bin into the freezer, arranged the vehicles as I wanted them, and let it all freeze over night.
When it was time to play, I sprinkled some snow on top in order to add to the whole blizzard feel, but if you don’t have snow you could certainly skip this step.
Next up, I set out a few ‘tools’ to assist in the rescue…
a little wooden hammer for breaking / chipping away at the ice
some coloured salt (just regular table salt and a couple of drops of liquid food colouring shaken in a reusable bag until uniform in colour), also for melting ice
Here’s the finished play invitation!
NOW… I just purchased this FLISAT table from Ikea {even though we really didn’t need it} and although I’m already so, so in love with it, you certainly do not need a fancy sensory table to set this, or any other sensory play invitation, up. A smaller bin inside a larger bin would work perfectly, as would a blizzard bin with a tray of tools next to it.
When I told Sam that the vehicles were stuck in an icy blizzard and needed to be rescued, he was thrilled.
I briefly ran through the tools with him and he was off!
I feel like ice rescue activities like this one {and this frozen ocean animal rescue and this frozen ocean mermaid excavation} are great for helping kiddos develop grit, patience, and perseverance because they take a good amount of time and effort.
While Sam immediately went for the warm water and salt, he soon moved onto trying the wooden hammer.
What I didn’t anticipate is that he would create his own warm salt water mixture in hopes of that being the winning solution… Clever little nugget!
It took some time {and maybe a tiny bit of assistance from Sister – she just can’t help herself!}, but he eventually got a truck loose.
Of course Miss Chloe was right in on the action as she always is.
One thing I should mention is that the combination of cold and salt can sometimes bother little ones’ hands. Miss G’s never minded – even after ages of play – but after dunking his hands in water and then into the salt, Sam told me that his hands felt ‘hot’. A couple of things you can do to if your little one seems to have sensitive hands: a) let them play with gloves on or b) have a bowl of clean, warm water and a small towel nearby.
Of course as time passes, the vehicles become easier to rescue…
Please tell me I’m not the only one who loves whipping up on-theme food for my kiddos on holidays and special occasions. I know, it’s a little bit nerdy and over the top, but I love it so much. Last Valentine’s Day I made the kids these strawberry ice cream chia pudding parfaits and oh my word… You should have seen their little eyes light up when I set breakfast down in front of them!
Besides the fact that they’re both nutritious and super delicious, the thing I love about these ice cream chia pudding parfaits is that they’re a lot easier to make than they look. In fact, you can do most of the prep work the night before so they come together super quickly come morning.
First up, you’ll want to cut a bunch of strawberry hearts… Just cut the green leafy part of the strawberry off to create a ‘v’ shape at the top, then slice! You’ll want fairly thin hearts to place along the inside of the mason jars, so keep that in mind while slicing. If prepping these the night before, just pop them into an air-tight bag or container in the fridge. And while you’re at it, wash and dry a few blueberries and add them in there too.
Next up, your chia pudding. I have a couple of posts about chia pudding (our tropical version | our chocolate version), but if you haven’t tried it, you really must. It’s so unique and delicious and my kids just love it! To make it, pour 1 cup of coconut milk into a jar along with 3 tablespoons of chia seeds, 1 tablespoon of pure maple syrup, and a little splash of good vanilla. Shake it up like mad and then place it in the fridge overnight to thicken. If you can, give it a couple of extra shakes before going to bed for the night to help prevent clumping. If not, no worries – it’ll be fine either way.
Alright… Now for the part that has to be made in the morning… The strawberry ice cream! Or nice cream as it’s often called.
Chuck 3 frozen bananas, along with 5 big frozen strawberries and a splash of good vanilla, into a food processor. I find this works best if the frozen fruit has had just 5 minutes at room temperature, but you can do it straight from the freezer too. Basically, you just need to blend it like CRAZY. It’ll take a little while and will most likely require you stopping the food processor to scrape down the sides a few times, but keep going {past the chunky stage, past the mealy stage} until your bananas and strawberries are the consistency of soft serve. Mmmm… so good!
Now it’s time to assemble! Line a mason jar with your strawberry hearts simply by pressing them against the glass surface…
Then gently fill the jar about halfway full of chia pudding…
And generously top with strawberry ice cream.
Finish off the strawberry ice cream chia pudding parfaits with a strawberry heart and a few blueberries on top and breakfast (or snack) is served!



 {this post contains affiliate links}


 {this post contains affiliate links}


 {this post contains affiliate links}


 {this post contains affiliate links}


 {this post contains affiliate links}











 {this post contains affiliate links}


 {this post contains affiliate links}


 {this post contains affiliate links}


