My personal rule? All things Christmas wait until December 1st. Well, besides crafting or purchasing the odd little gift here and thereI guess…
This year though, I’ve broken my own rule. I’m not sure how it happened, but we were looking for a fun afternoon activity and somehow I ended up whipping up a batch of baking soda clay without giving any thought to the fact that it’s still November. Oops… It’s okay, though. We started the tradition of making special handcrafted ornaments together as a family last year, and I already have {more than a} few new types in mind for this year, so we’ll just call this our practice round…
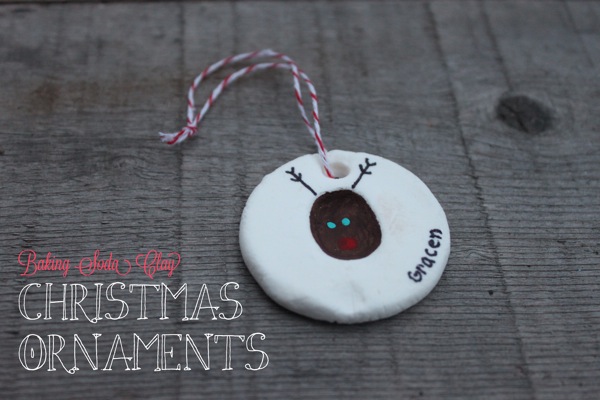
I’ve always been a fan of salt dough ornaments. The dough is easy and inexpensive to make, it’s really easy to work with, and you can shape and mould it almost any way you like. The only downside to salt dough, however, is that it loses some of its appeal when it dries out. Last year we made several different salt dough ornaments, and though they are special because they are handmade, they did crack / puff up / brown a little bit during the drying process. So when I started seeing baking soda clay pop up all over Pinterest just after Christmas last year, I knew we’d have to baking soda clay ornaments a shot during our next round.

The dough itself is very easy to make. It involves just three ingredients (baking soda, cornstarch, and water) and a little heat, and before you know it, it’s done. I followed this recipe almost exactly, but added about a tablespoon more cornstarch. The result is this amazingly soft, smooth, bright white dough that feels silky in your hands.
UPDATE: The recipe link we used for this project no longer exists… Here is a similar baking soda clay recipe.
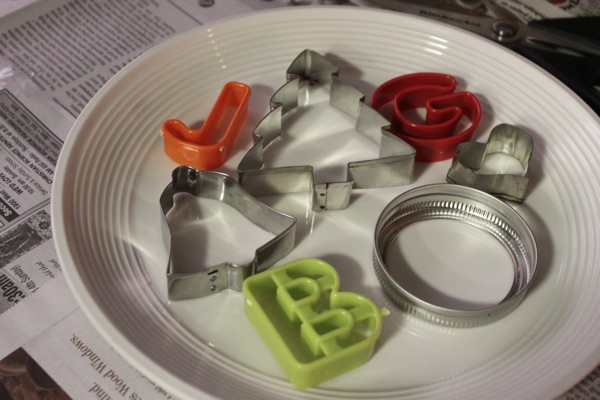
Once the dough was made and was cooling, I collected a few things from around the house to use to create shapes. Cookie cutters were the obvious first choice, but mason jar lids, the rims of glasses, and butter knives all work well for the job too.

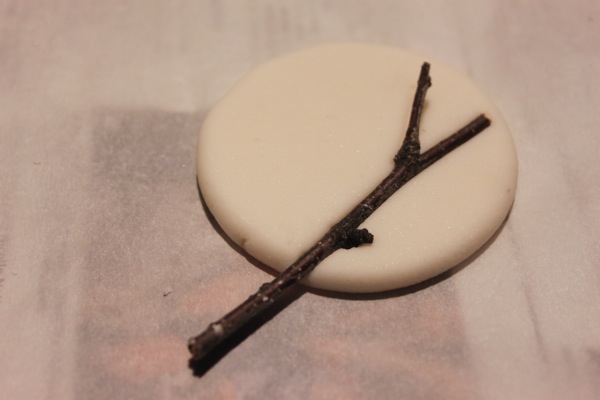
Next, I gathered some materials to make impressions in the dough. After a visit raiding Gracen’s stamp collection and nature shelf, this is what I had.
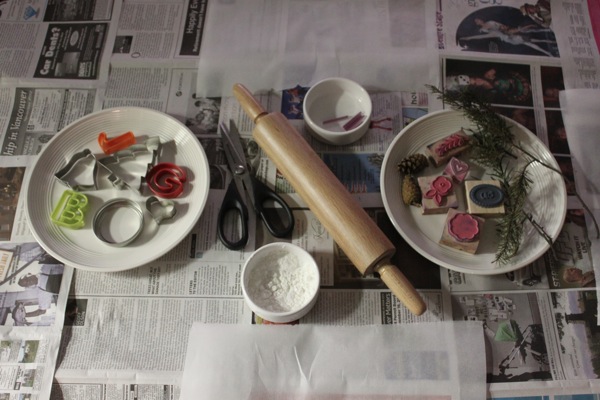
I also got out a rolling pin, some kitchen scissors (for freehand shapes), some straw pieces (for creating holes to tie twine through), and some extra corn starch to prevent the dough from sticking to everything.
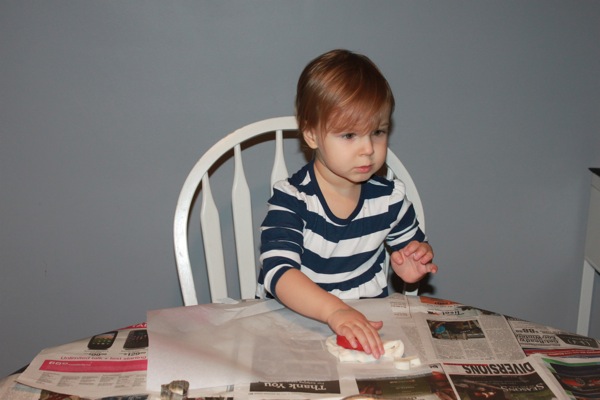

We got started by giving Gracen a chunk of the dough to just play with and explore at first, but of course she requested a cookie cutter and stamp and was right down to business. That’s just her style.
Now anywhere you read about baking soda dough, the instructions will clearly advise to leave the dough sit until completely cool, but we were too impatient for that. As a result, our dough was still a tad bit warm and sticky, which made it a little bit tricky to work with. My advice? Wait until it’s completely cool. Lesson learned.

What we found worked really well, even with our warm sticky dough, was using the bottom of a flat dish or glass to flatten the dough, rather than using the rolling pin. The rolling pin was just too sticky for our dough, but the dish bottoms worked perfectly.


As far as making the impressions went, we found that lightly dusting the stamp or object with cornstarch first, then pressing it into the dough and removing it slowly turned out great results.

The same technique worked best with the cookie cutters too – dust cookie cutter with cornstarch, then push the dough out of the cookie cutter gently and slowly.

When we’d used up every last bit of dough, I popped the ornaments onto a parchment-lined baking sheet and put it into a just-warm oven to dry out. We left them in there for several hours, flipping them every now and again, and before going to bed, I turned off the heat and left them sit in oven overnight.


The next day, we got out our paintbrushes and acrylic paints, and painted away.

These are some of my very favourite ornaments that Grae made. She pressed the dough, cut the shapes, and decorated them all by herself.

This little reindeer family was made by making 3 small balls, flattening them down with the bottom of a cornstarched bowl, and then pressing our thumbs into the middles. I cheated a little bit and used a Sharpie for the antlers and names, because well, we all know how they would have turned out had I used paint…
 This heart ornament also started as a flattened ball, and then I used a cookie cutter to push just part of the way through to the dough to make the heart shape.
Once our paint was dry, we added some string to hang them from. Ribbon or jute would be pretty, but I have a thing for baker’s twine currently, so we went with that. Here are some of our finished ornaments…


Aren’t they pretty?

And because our yearly ornament making tradition is bound to leave us with heaps of special, handcrafted tree decorations one day, we added the year onto each.
♥
Though we didn’t do it this time around, giving the ornaments a light coat of Mod Podge or spray-on sealant make protect them and help them last longer.

Do these keep? X Look fantastic by the way I hope to try make some if I can pull my finger out!
To be honest, Nic, I can’t say for sure. I know I have salt dough ornaments from long ago that are still in perfect condition, but this is my first time using baking soda dough… My guess is that yes, they’ll keep well, but I guess we’ll have to wait and see… :)
Did they keep now, a year later!? I’m about to make some for a gift for family members but last year the gift I made didn’t keep, which was embarrassing!
I have a regular salt dough ornament that has lasted perfectly for 25 years.
Yes the keep. I have some that are about 20 years old and they are fine still.
We were impatient here too… in fact I didn’t let the dough cool down at all… I furiously kneaded it burning my hands lol… and chances are it’ll happen again with round two shortly lol.
Good idea on the added cornstarch and the glasses for presses… I did use a rolling pin and just rubbed cornstarch on it, but my counters are tiled, so I had to improvise on the bottom of a baking sheet lol.
I made my ornaments way too thick so they did crack… when they say half an inch depth make sure its half an inch depth lol…
Those look awesome by the way!!
Oh, that’s a good point, Carrie! We kept ours to about 1/4 -1/2 inch thick and it worked perfectly, but I could see thicker ones cracking possibly. I’m excited to see some of yours! This time around, be kind to your poor hands and make that dough in advance! :)
Oh, I’m so glad I found this! We want to try homemade ornaments this year – do you think you could do handprints with these or would the dough be too sticky?
I definitely think this dough would work for handprints! In fact, we did one with our little girl, and despite the warm sticky dough it still turned out just fine. We’re going to make some more handprint ornaments as gifts soon, and this time we’ll use the same recipe with a few added tablespoons of cornstarch. :)
Awesome ornaments! Thanks for sharing at tip-toe thru Tuesday.
these ornaments look great, and your explanations are thoughtful and thorough! but what recipe did you use? My computer won’t allow me to access your recipe link :(
Since christmas is gone by I’m making sculptures and beads but I’m researching recipes and wondering which one you used… please send me your recipe! thanks <3 Rachael
Gah! Seems the blog I linked to is gone! :( I don’t remember 100%, but I’m pretty certain this is the same recipe: http://thenewnew.blogspot.ca/2011/07/baking-soda-clay.html. Enjoy!!!
I am hoping to use this dough in a gum paste mold set of the alphabet and then use the letters to make a sripture on a painting I have! The mold letters are verry small. Do u think this might work? The cake makers who have used this mold had trouble getting letters out. Do u think a dusting of cornstarch would help? I can just try and hope but I would appreciate your input.
Hi Ruth! Good question! We did use alphabet cookie cutters (though ours are about 2 inches tall) and it was tricky. Dunking the cookie cutter in cornstarch definitely helps and I think it may be doable with some serious patience and a steady hand, but my best guess is that it won’t be easy… Good luck with it!!!
thank you soooo much for answering!!!! have blessed day.
Happy to! You too, Ruth. :)
I am a potter and have this problem when cutting letters in clay . If you leave the clay in the cutter for a while it should shrink a little so you can push out. Be patient
That’s a great tip! Thanks, Moya!
i cant get the recipe…is there other way?
Unfortunately the original link is now broken. :( Here is one that is either the same for very similar: http://thenewnew.blogspot.ca/2011/07/baking-soda-clay.html. :)
Hello, I log on to your blog like every week.
Your writing style is awesome, keep up the good work!
Hello, can anyone answer as to why my ornaments have all cracked. the dough turned out fine, i dried for a while in the oven then left to air dry. They were approx 1/4 inch thick. Can anyone help as i would love to make more.
You can go to Argo Cornstarch website and get many helpful hints on making cornstarch play clay. One reason for cracking is over cooking the dough is what the site said.
We made this today, however when we knead it it still seems a little bit sticky? did i do something wrong?
Hi Hayley. My guess is that you did absolutely nothing wrong. If you’re finding it a bit sticky and the dough is full cooled, simply add a little bit of extra corn starch – that should take care of the problem. :)
Hi Jen, I want to try this with my class at school. Any idea about how many ornaments a batch will make? Roughly of course! Thanks :)
What could you put on these to give a glossy “ceramic” look after finished?
Krista – Did you put a gloss on top of your ornaments? If so, what did you use?
I used “Glossy Accents” and “Diamond Glaze”. I am curious to see how both products hold up over time.
How long does it take for the dough to cool completely? At this point, I can only do this project on a school night, so do I have enough time to make the dough around 4:30pm, let it cool and make handprints before bedtime at 7:30? If that’s not enough time, could I make the dough that morning and use it when I got home at 4:30pm? Would it hold well in the refrigerator?
Thanks! :)
Hi there,
I was wondering if these ornaments hold well. We are trying to make them as a fundraiser at our local university and I am unsure what I did wrong with my first batch. What would you suggest to do if the clay was cracking? Approximately how long did you leave them in the oven for? If you were to sell these what price would you suggest?
Thanks!
How long do they last? Do they break down over time?
Did any of yours crack? I made some thin ones and they were fine but I made some thicker ones to do my dog’s paw print and they cracked while drying. Suggestions?
Hi! I’m an active crafter and found this recipe and made a bunch of them. They have a good deal of cracks in them. I allowed them to air dry and are about 1/4 to 1/3 inch thick. What are your thoughts?
Hi, I’m hoping you can help me! I have a preschool and have used your recipe to make handprint ornaments after 8 epic Pinterest fails yours is the best. But, we have had about 8/24 crack and crumble. Any ideas? We have been letting them air dry and flipping them every other day. We live at sea level, not sure if we should be baking them? Thank you!
Those are so cute
Does anyone know if this works for outdoor projects, if the clay gets wrecked if its wet or anything? Wanting to make some projects for the garden!
Hi Samm! I wouldn’t recommend this recipe for pieces you’d like to leave outdoors… Better to use actual clay!
Thank you!
A specialist undertaking a simple mold remediation job can charge as less as $3000-$4000. On the contrary, in removing the mold from complicated areas Mould Vancouver , the specialists can charge as huge an amount as $15,000-$20,000 or even as much as $30,000.