Mama.Papa.Bubba. -
Menu
Skip to content
  • SHOP
  • preemie
  • baby
  • play
  • craft
  • learn
  • cook
  • DIY
  • kuwait
  • vancouver
  • contact
  • about

Tag Archives: homemade Christmas ornaments

Test Tube Snow Globe Ornaments

11 / 30 / 1812 / 1 / 18

Test Tube Snow Globe Ornaments | Mama Papa Bubba

After making the most adorable little Christmas truck ornaments {inspired by Little Blue Truck’s Christmas} with Sam earlier this week, today Miss G and I made her book-inspired ornament of the year… Test tube snow globe ornaments inspired by the pages of Ada Twist, Scientist!  I wasn’t sure how they were going to turn out, but now that they’re done, I think they’re so beautiful and fun!

Test Tube Snow Globe Ornaments{this post contains affiliate links}

If you’ve not read Ada Twist, Scientist, you must…  Along with the other books in the collection (Rosie Revere, Engineer and Iggy Peck, Architect), it’s one of our absolute favourites.  Ada is endlessly curious and while her experiments and quests to figure out how things work often wreak havoc in her family’s day-to-day life, she learns the value of thinking her way through things and always remaining curious.

Test Tube Snow Globe Ornaments

The pages of the book are filled with bottles of Ada’s colourful concoctions and experiments, which is exactly what inspired Miss G’s little test tube snow globe ornaments.

Test Tube Snow Globe Ornaments

There’s a lot of wiggle room as far as which materials you use for these test tube snow globe ornaments, but here’s what we used to make ours:

– little glass craft jars with screw on lids (I REALLY wanted ones with rounded bottoms like these ones with cork tops, but alas… small town living doesn’t always allow for these things.  We ended up finding these very similar flat-bottomed glass craft jars at our local Dollarama and they worked just fine. In fact, they’re probably better for the fact that they stand on their own while making them, but they’re just not quite as test tube like.)

– Gorilla Contact Adhesive (I wouldn’t use something like this with Sam, but Miss G is 8 now and this glue worked really well)

– mini bottle brush trees (we found ours at Michael’s in the Tiny Treasures section)

– water

– liquid food colouring

– different types of confetti and slime add-ins

– water

– embroidery thread

– washi tape (which we ended up adding into the mix at the last minute)

Test Tube Snow Globe Ornaments

Here’s a closer look at the little confetti bits and slime add-ins I put out for Miss G to use.  These were all things that came in one of those big slime making add-in kits you can order online.

Here’s how Grae made her test tube snow globes…

Test Tube Snow Globe Ornaments

First up, she tested the bottle brush trees in the glass craft jars to make sure they fit well.

Test tube snow globes

Most of them fit perfectly and the ones that didn’t simply got a little trim.

Test Tube Snow Globe Ornaments

Test Tube Snow Globe Ornaments

Test Tube Snow Globe Ornaments

Then it was time to adhere the trees in the bottoms of the test tubes.  To do this, we simply followed the instructions on the Gorilla Contact Adhesive packaging and put a little glue on the base of the tree, a little glue in the bottom of the test tube, let both sit for two minutes, and then carefully put the tree down into the test tube and pushed it down firmly.  {In true Miss G fashion, the two minutes of waiting just HAD to be filled with reading.}

Test Tube Snow Globe Ornaments

Now while the glue we used does say that it’s ‘immediate contact’, it also says that the glue isn’t fully cured for 24 hours, so we probably should have waited before adding water, but we didn’t.  We gave the trees 10 or 15 minutes to set, then went ahead with the project like the impatient people we are – hah!  One thing to note is that the trees / test tubes that we used a thin layer of adhesive on definitely formed a more immediate bond, while the ones with more adhesive were still wiggly when we moved on to the next step

Test Tube Snow Globe Ornaments

Next up, the water.

Test Tube Snow Globe Ornaments

Aren’t they pretty just like this?

Test Tube Snow Globe Ornaments

Then Grae worked on tinting the water with liquid food colouring.  Because a full drop was too much for the amount of water in our little test tubes, she used a food pick to add the teeniest bit of colouring at a time until the colour was just right.

Test Tube Snow Globe Ornaments

With the water the perfect shade, she added in all of the confetti, bits, and bobs her little heart desired.

Test Tube Snow Globe Ornaments

Here are her finished test tube snow globes…  Aren’t they gorgeous?

At this point you could secure the test tube lids with glue, but we skipped that part and just ensured that they were screwed on as tightly as possible.

Test Tube Snow Globe Ornaments

Test Tube Snow Globe Ornaments

Now while I thought we’d tie our baker’s twine / embroidery thread around the test tubes and create our little hanging loop that way, it just didn’t work out how we thought it would…  Instead, we opted to tape a little loop of thread to either side of the lid and then secure everything with several rounds of decorative washi tape, which I think looks really cute too.

Test Tube Snow Globe Ornaments

Here they are all done and ready for the tree!

Test Tube Snow Globe Ornaments

NewImageThis post is part of the awesome  10 Days of #KidMadeChristmas Ornaments series we’ve participated in in years past…  If you’re looking for some fantastic ornament ideas to try at home with your kids, pop over and check out the master list of kid-made ornaments – there are SO many lovely ones this year!

Are you following us on social media?

Find us on: Facebook  |  Instagram  |  Pinterest  |  Twitter

We’d love to have you!

3 Comments

Homemade Christmas Truck Ornaments

11 / 29 / 1812 / 1 / 18

Homemade Christmas Truck Ornaments | Mama Papa Bubba

One of the Christmas traditions I just adore?  Making a new Christmas ornament with each kiddo every year!  It’s such a fun one-on-one project and I think the kids really love hanging their newly made decorations on the tree {and revisiting their old ones each year}.  The type of ornament we make is often inspired by something they love or by a favourite book, and this year Sam’s little homemade Christmas truck ornaments were inspired by Little Blue Truck, the star of a collection of books we’ve read again and again.

Read More

1 Comment

Mini Christmas Letter Ornament

12 / 6 / 1612 / 1 / 18

Mini Christmas Letter Ornament Keepsake | Mama Papa Bubba

This weekend we took our stash of Christmas books out and oh my word… Was Miss G ever excited.  She’s been asking to take them out for ages now, so as soon as we did, she got straight to sorting, organizing, and reading them.  {Gosh, I love her.}  

Read More

2 Comments

Baking Soda Clay Baby Footprint Keepsake

12 / 5 / 1612 / 1 / 18

baking-soda-clay-baby-footprint-keepsake-mama-papa-bubba

It’s hard to believe, but we’re already amidst December, and in our house, December 1st means that all things Christmas are fair game.  We’re doing a very low key Christmas this year {like really low key}, but low key doesn’t mean without tradition.  Our fun little traditions are much too special anticipated to let go of, so this year we’ll simply pare down a little bit when needed.  Like instead of 10 different types of homemade Christmas ornaments, maybe one or two will do…  

Read More

6 Comments

Gingerbread People Ornaments

12 / 4 / 1412 / 1 / 18

Gingerbread People Ornaments | Mama Papa Bubba

One of my very favourite things about the holidays is making all kinds of fun homemade ornaments with Miss G.  I just love it.  We gather up our materials, put on some music, chat while we create side-by-side, and in the end, we’ve got at least a couple of new colourful and quirky ornaments to add to our colourful and quirky Christmas tree.  

Read More

4 Comments

Fingerprint Heart Ornaments

11 / 21 / 141 / 21 / 15

Fingerprint Heart Ornaments | Mama Papa Bubba

Woohoo!  The season of homemade Christmas ornaments has officially begun in our house and we’re already loving it.  We always dedicate a morning or afternoon to creating special ornaments for the tree as a family, and then Grae and I add to our collection right up until Christmas {as you do}.  

Read More

24 Comments

Colour Theory Ornaments

11 / 18 / 1412 / 1 / 18

Colour Theory Ornaments | Mama Papa Bubba

Oh my goodness…  It feels like Gracen and I have been waiting for this week’s instalment of our preschool book club forever!  Shortly after sharing our magnetic polka dot sensory bag inspired by Press Here {one of our favourites}, Herve Tullet’s publicist contacted us and asked if we’d be interested in checking out his newest book, Mix It Up!  Ummm.. YES?!  {And stay tuned until the end of the post, because we’re also giving away a copy to one of our lovely readers!}

Read More

26 Comments

Upcycled Light Bulb Santa Ornament

12 / 16 / 1311 / 30 / 18

Upcycled Light Bulb Santa Ornament | Mama Papa Bubba

Gracen and I have been busy crafting up all sorts of fun homemade ornaments for our tree this week, and this cute little Santa is the latest addition to the fleet.  I’ve made these with several classes of students during my time teaching, and while they’re a perfect project for older kids, Miss G and I had a great time working on one together.

Read More

2 Comments

Glitter Monogram Ornaments

12 / 14 / 1311 / 30 / 18
DIY Glitter Monogram Ornaments | Mama Papa Bubba{this post contains affiliate links}

While Miss G and I were out oohing and ahhing at all of the pretty things in Pottery Barn Kids earlier this week, I spotted some beautiful glitter monogram ornaments that I knew we could easily make at home.

Read More

3 Comments

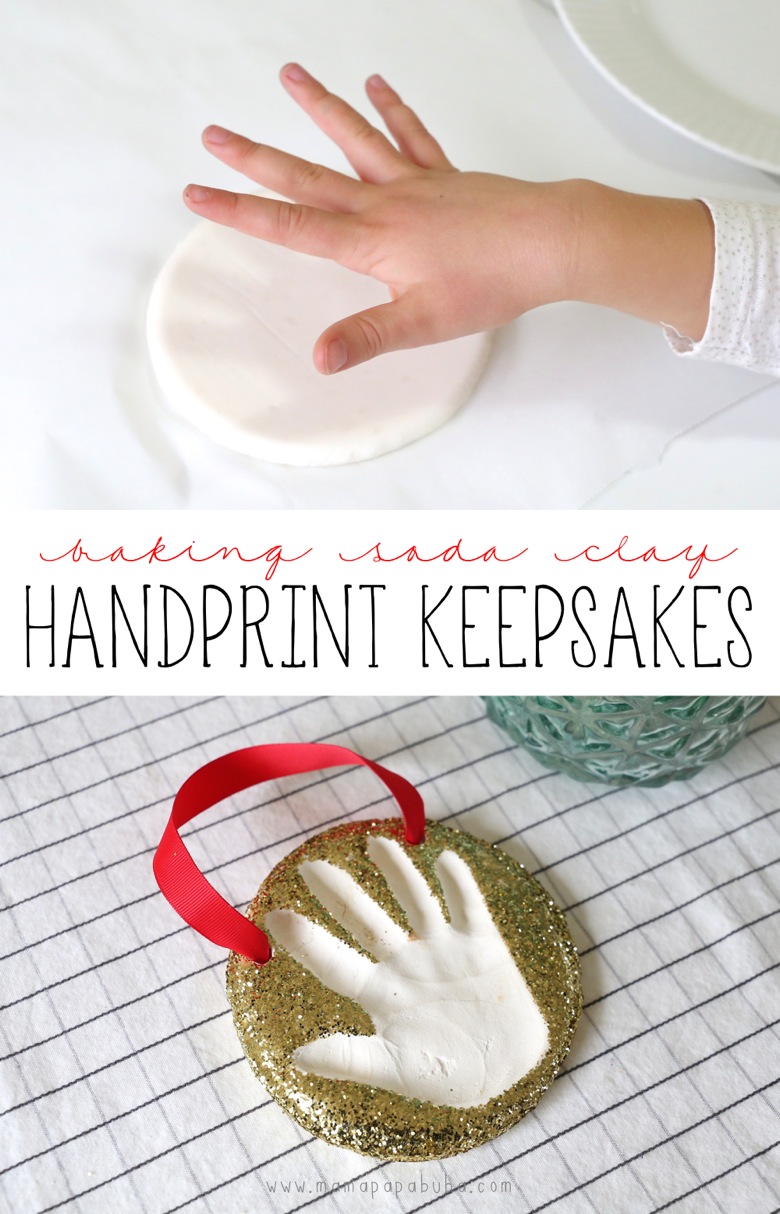
Baking Soda Clay Handprint Keepsakes

11 / 12 / 1311 / 30 / 18

Baking Soda Clay Handprint Keepsakes | Mama Papa Bubba

Okay, I fully admit it…  Between the yearly handprint canvas we did just a couple of months ago and the paper strip handprint art we did just a couple of days ago, we may be a teensy bit handprint obsessed.  I can’t help it.  I don’t know if it’s the Kindergarten teacher in me or the mama in me, but having these little handprints frozen in time just makes my heart happy.

These keepsakes are a favourite in our house.  Miss G and I have made variations of this project many times in the past, some of which have become decor, some heartfelt gifts, and others Christmas tree ornaments.

IMG 4303

IMG 4311

No matter what they become in the end, we always make them out of our very favourite homemade baking soda clay.   This stuff is a dream to work with and is super easy and inexpensive to make {plus you most likely have erything you need to make it in your kitchen at this very moment!}

IMG 1619

IMG 1632

How you decorate them is up to you, but we went with GLITTER this time around, which both Miss G and I loved. So pretty, right?!  {Not to mention that it’s super forgiving when it comes to little cracks and imperfections along the edges of the keepsake…  Add glitter and consider them gone!}

For all of the details of this project, as well as our simple baking soda clay recipe, pop on over to CBC Parents and check out our Baking Soda Clay Handprint Keepsakes post.  


FYI: With the recipe in the link, we made our handprint keepsake, plus 20 small cookie cutter ornaments, which is probably equivalent to 3 or 4 handprint ornaments {depending on the size you make them of course}.

Admittedly, baking soda clay can be a little finicky sometimes…  For tips and tricks we’ve learned over the years, click here.

While you’re at it, check out some of our other favourite handprint projects here.

Are you following us on social media?  Find us on:
Facebook  |  Instagram  |  Pinterest  |  Twitter

We’d love to have you!

57 Comments

Puzzle Piece Wreath Ornament

12 / 16 / 1212 / 19 / 12

Puzzle Piece Wreath OrnamentNot too long ago, Miss G ‘s advent calendar pouch included jigsaw puzzle pieces and the instructions required to make a snowflake ornament.  Gracen really enjoyed the project and loves her sparkly snowflake hanging on the tree, so she was excited to find more puzzle pieces and a note saying that they could be used to make a wreath ornament today.

IMG 3586This time, we started with an ‘O’ shaped cardboard base.  Gracen glued her puzzle pieces (this time using just regular white glue) onto the cardboard doughnut, overlapping them as she went along.

IMG 3589When the ‘O’ was covered to her liking, we set it aside to dry for a while.

IMG 3592Later in the day, she came back and painted the puzzle piece wreath all green.  She quickly discovered that dabbing the paint on gave much better coverage than brushing it on, so she went with that method.

IMG 3599When she was done painting, we let the wreath dry again.

IMG 3601Next came the really fun part – decorations!  She chose magenta sequins as holly berries, but you could easily use buttons, mini pompoms, foam circles, or dot stickers too.  Just add some dots of glue to the wreath and pop your decorations on.

IMG 3697The last step was adding a little ribbon bow I’d quickly made for her… Regular white glue worked just fine for this job too.
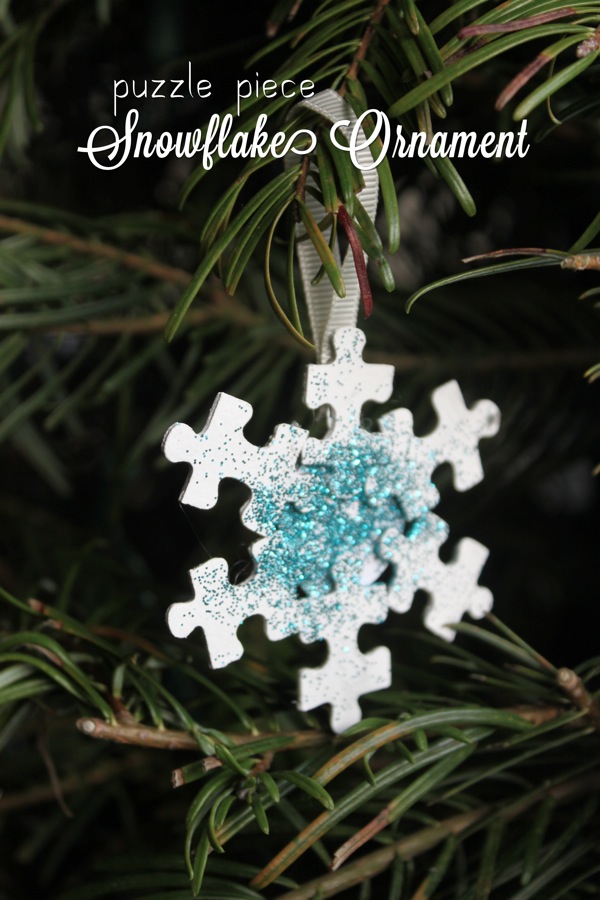
Later on in the evening, once the frontside was dry, I flipped it over and added a ribbon loop using my glue gun (I had it out already – you could just as easily use white glue or craft glue) and the pretty little ornament was ready for hanging.

♥

 To keep up with all the Mama.Papa.Bubba. fun, like us on Facebook here and find us on Instagram here.

1 Comment

Puzzle Piece Snowflake Ornament

12 / 5 / 1212 / 7 / 12

Puzzle Piece Snowflake OrnamentToday, Gracen’s advent calendar pouch included a handful of jigsaw puzzle pieces (from Urban Source) and a handwritten note telling her that they could be used to make a snowflake ornament (I originally found the idea here). She of course was ready to begin the project the very instant she opened it.

IMG 3261While puzzle pieces are the main material, a few other things are needed to make this pretty little ornament… Glue of some sort (craft glue or hot glue would probably work best), some white crafter’s acrylic and a paintbrush, a scrap of cardboard or card stock cut into a circle, a small piece of ribbon or string to hang the ornament from, and some glitter (completely optional, but not in Miss G’s opinion).

IMG 3262To get started, glued 3 puzzle pieces onto our cardboard circle, evenly spaced like this.

IMG 3269During the process, we quickly realized that pieces shaped similarly to this one were going to work the best, so we dug those out and put the others aside.

IMG 3264Next, we added 3 more puzzle pieces.  We tried to place them on top of the original 3 as the instructions say to do, but when it didn’t work out very well for us, we slid the original 3 out closer to the edges, and added the next 3 onto the edges of the cardboard circle too.  It worked out perfectly and was much easier for Gracen to do.

IMG 3271When our snowflake was completely dry about an hour later, Gracen gave it a good once over with white paint.

IMG 3272While the paint was still wet, she did the job I think she looks forward to most when crafting…. She sprinkled on a very generous amount of sparkles over the entire thing.
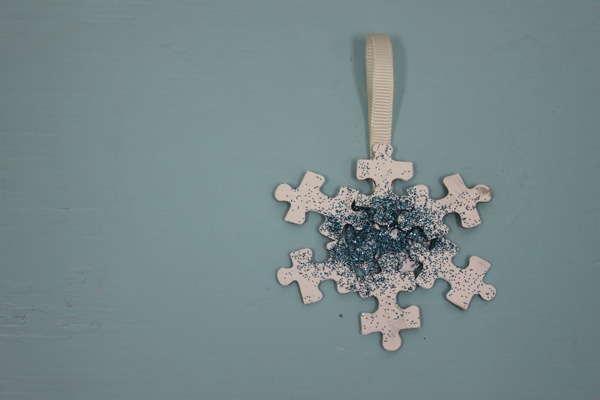
IMG 3283Later in the evening when her snowflake was dry, I hot glued a little loop of ribbon onto the back, and voila – a new handmade ornament to add to our tree.
♥

 To keep up with all the Mama.Papa.Bubba. fun, like us on Facebook here and find us on Instagram here.


6 Comments

Baking Soda Clay Ornaments

11 / 20 / 1211 / 5 / 13

My personal rule?  All things Christmas wait until December 1st.  Well, besides crafting or purchasing the odd little gift here and thereI guess…

This year though, I’ve broken my own rule. I’m not sure how it happened, but we were looking for a fun afternoon activity and somehow I ended up whipping up a batch of baking soda clay without giving any thought to the fact that it’s still November. Oops…  It’s okay, though.  We started the tradition of making special handcrafted ornaments together as a family last year, and I already have {more than a} few new types in mind for this year, so we’ll just call this our practice round…

Baking Soda Clay Christmas Ornaments

I’ve always been a fan of salt dough ornaments.  The dough is easy and inexpensive to make, it’s really easy to work with, and you can shape and mould it almost any way you like.  The only downside to salt dough, however, is that it loses some of its appeal when it dries out.  Last year we made several different salt dough ornaments, and though they are special because they are handmade, they did crack / puff up / brown a little bit during the drying process.  So when I started seeing baking soda clay pop up all over Pinterest just after Christmas last year, I knew we’d have to baking soda clay ornaments a shot during our next round.

IMG 2463

The dough itself is very easy to make.  It involves just three ingredients (baking soda, cornstarch, and water) and a little heat, and before you know it, it’s done.  I followed this recipe almost exactly, but added about a tablespoon more cornstarch.  The result is this amazingly soft, smooth, bright white dough that feels silky in your hands.

UPDATE:  The recipe link we used for this project no longer exists…  Here is a similar baking soda clay recipe. 

IMG 2464

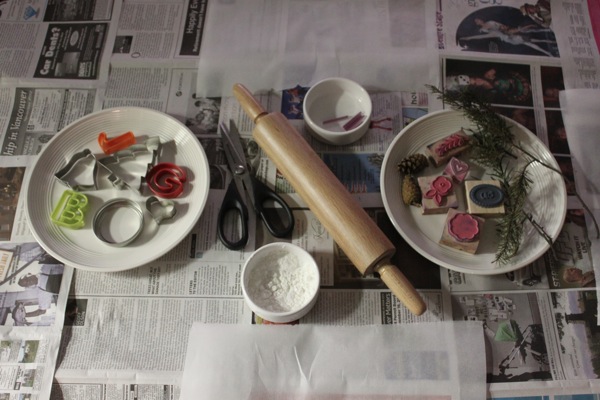
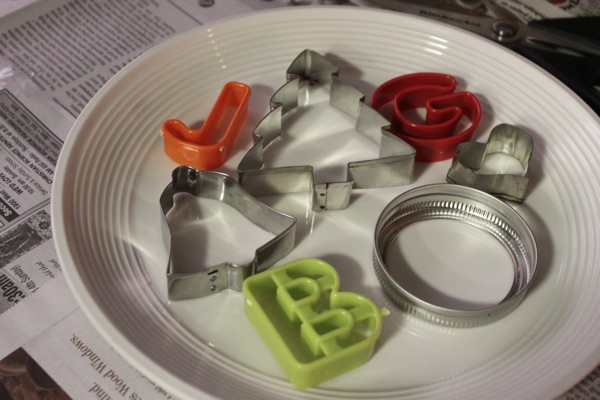
Once the dough was made and was cooling, I collected a few things from around the house to use to create shapes.  Cookie cutters were the obvious first choice, but mason jar lids, the rims of glasses, and butter knives all work well for the job too.

IMG 2466

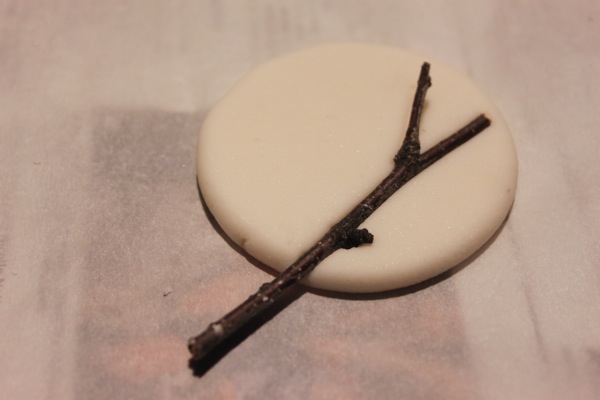
Next, I gathered some materials to make impressions in the dough.  After a visit raiding Gracen’s stamp collection and nature shelf, this is what I had.

IMG 2467

I also got out a rolling pin, some kitchen scissors (for freehand shapes), some straw pieces (for creating holes to tie twine through), and some extra corn starch to prevent the dough from sticking to everything.

IMG 2473

IMG 2479

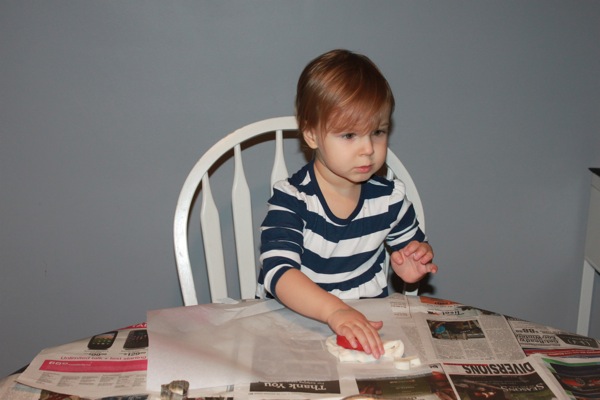
We got started by giving Gracen a chunk of the dough to just play with and explore at first, but of course she requested a cookie cutter and stamp and was right down to business.  That’s just her style.

IMG 2480

Now anywhere you read about baking soda dough, the instructions will clearly advise to leave the dough sit until completely cool, but we were too impatient for that.  As a result, our dough was still a tad bit warm and sticky, which made it a little bit tricky to work with.  My advice? Wait until it’s completely cool.  Lesson learned.

IMG 2481

What we found worked really well, even with our warm sticky dough, was using the bottom of a flat dish or glass to flatten the dough, rather than using the rolling pin.  The rolling pin was just too sticky for our dough, but the dish bottoms worked perfectly.

IMG 2483

IMG 2489

IMG 2492

As far as making the impressions went, we found that lightly dusting the stamp or object with cornstarch first, then pressing it into the dough and removing it slowly turned out great results.

IMG 2494

The same technique worked best with the cookie cutters too – dust cookie cutter with cornstarch, then push the dough out of the cookie cutter gently and slowly.

IMG 2503

When we’d used up every last bit of dough, I popped the ornaments onto a parchment-lined baking sheet and put it into a just-warm oven to dry out.  We left them in there for several hours, flipping them every now and again, and before going to bed, I turned off the heat and left them sit in oven overnight.

IMG 2507

IMG 2525

The next day, we got out our paintbrushes and acrylic paints, and painted away.

IMG 2524

These are some of my very favourite ornaments that Grae made.  She pressed the dough, cut the shapes, and decorated them all by herself.

IMG 2515

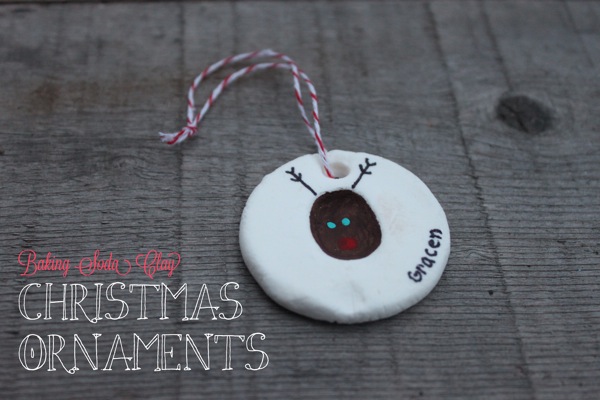
This little reindeer family was made by making 3 small balls, flattening them down with the bottom of a cornstarched bowl, and then pressing our thumbs into the middles.  I cheated a little bit and used a Sharpie for the antlers and names, because well, we all know how they would have turned out had I used paint…

IMG 2522This heart ornament also started as a flattened ball, and then I used a cookie cutter to push just part of the way through to the dough to make the heart shape.

Once our paint was dry, we added some string to hang them from.  Ribbon or jute would be pretty, but I have a thing for baker’s twine currently, so we went with that.  Here are some of our finished ornaments…

IMG 2534

IMG 2538

IMG 2542

IMG 2546

Aren’t they pretty?

IMG 2562

And because our yearly ornament making tradition is bound to leave us with heaps of special, handcrafted tree decorations one day, we added the year onto each.

♥

Though we didn’t do it this time around, giving the ornaments a light coat of Mod Podge or spray-on sealant make protect them and help them last longer.

40 Comments

Making Ornaments: A Yearly Tradition

12 / 20 / 1112 / 1 / 13

IMG 3158

This morning we took advantage of Bradley’s later shift and made some ornaments for our teeny tiny tree.

IMG 3161

The pipe cleaner decorations were a little bit tricky for G to make, so we adapted the activity and gave her some pasta to thread onto her pipe cleaners.  Although she could do it, eating the dry noodles was apparently more appealing.

IMG 3430

Gracen’s Borax crystal ornaments made for her by Papa.

IMG 3437

The messy glittery glass ornaments were more up G’s alley and she loved getting to pick out her own glitter colour.  I have a feeling if we make this one yearly, we’ll have to start buying bigger glass bulbs.

IMG 3450

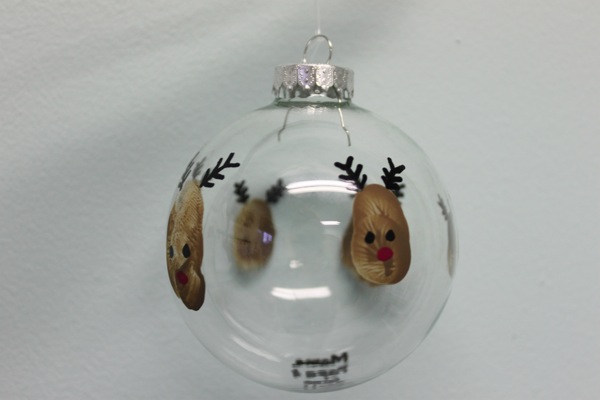
Our reindeer family ornament.  The little Rudolph on the righthand side was made using Grae’s thumbprint.

IMG 3457

We also made a few different salt dough ornaments.  The Christmas bulbs on these little trees were made using our thumb imprints.

I’m looking forward to keeping up this tradition in years to come…  Before you know it, we’ll have a giant tree filled with all kinds of eclectic handmade ornaments.  :)

1 Comment

find us here

  • Facebook
  • Instagram
  • Pinterest
  • Twitter
  • Email

looking for something?

want our posts to your inbox?

popular posts

  • Footprint Butterfly Flower Pot
    Footprint Butterfly Flower Pot
  • Make Ten {an easy card game for kids}
    Make Ten {an easy card game for kids}
  • EASY Portable Activity Kit for Road Trips
    EASY Portable Activity Kit for Road Trips
  • Magic Mystery Painting
    Magic Mystery Painting
  • Homemade Air-Dry Modelling Clay {aka baking soda clay}
    Homemade Air-Dry Modelling Clay {aka baking soda clay}
  • Chunky Monkey Frozen Yogurt Bites
    Chunky Monkey Frozen Yogurt Bites
  • Tape Pull Fine Motor Activity
    Tape Pull Fine Motor Activity
  • Portable Activity Kit for Little Travellers
    Portable Activity Kit for Little Travellers
  • Hand-Shaped Ring Dish
    Hand-Shaped Ring Dish
  • Frozen Ocean Animal Rescue {salt, water, & ice play}
    Frozen Ocean Animal Rescue {salt, water, & ice play}

archives

Site made with ♥ by Angie Makes
Angie Makes Feminine WordPress Themes