After travelling all over the world with Miss G {hello 36 hour treks to and from Kuwait!}, a six hour road trip really isn’t a big deal to us. That being said, our little lady is a huuuuuuuuuuge talker, and sometimes you just need to have a moment of quiet {or a moment to talk to your spouse} while in the car. That, and sometimes our little Sam Jam just needs a moment of silence in order to fall asleep… Big sisters’ animated stories and ramblings are much too interesting to doze off to {obviously}!
{this post contains affiliate links}
So, the night before our recent trip home to the Okanagan, I decided to put together one of our portable activity binders to keep Grae happily engaged during the quiet portions of our trip. These binders full of simple activities have always been a hit with both Gracen and the friends we’ve gifted them to, but since our previous kits had been created for airplane travel, several of the included activities were geared towards having someone to play with {LEGO tic-tac-toe, UNO, memory match, etc.} This time around my goal was to include only activities that could be done independently, and whatever they were, they needed very little prep – we were leaving the next day and I didn’t have a whole lot of time.

Luckily I had thought about putting together a portable activity kit for road trips earlier in the week when we were at Target… There I got these brightly coloured pencil pouches with binder holes {similar to these}, and though they’re plastic and not the best in terms of quality, they worked just fine. {If I’d had the option, I’d have definitely sprung for a stronger fabric option with plastic or mesh window – like these or these}.

I’d also picked up a soft 3 ring binder and a couple of packs of self-adhesive laminating sheets while at the dollar store, so we were good to go.
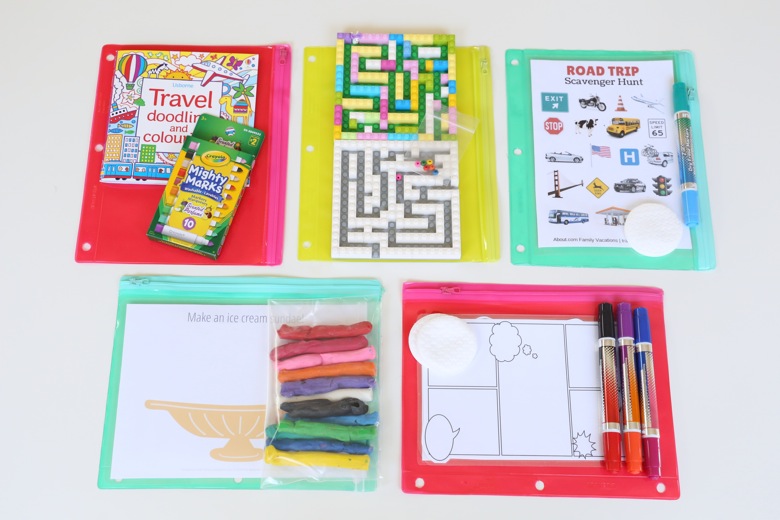
Here’s a look at what I included in the kit…

First up, LEGO mazes! Out of all of the activities, these took the most prep, but it still wasn’t much. They’re fun and easy to make and this time around I created one for a tiny little bunny that had come in one of our LEGO Friends sets and one for beads. I’ve always wished that LEGO made clear plates so I could cover the top of our mazes and ensure the bead wouldn’t get lost, but if you’re worried, a zip-close bag works in a pinch. This time around I simply included a few extra beads and called it good.

Next up, a mini Travel Doodling and Colouring book by Usborne (they make such great activity books!), plus a pack of scented Mighty Marks I found at the dollar store {score!} Easy peasy.

Next, I printed off a couple of road trip scavenger hunts… This generic one that includes everything from bridges to flags and buses, and this one that specifically focuses on road signs. After laminating them back-to-back, I included a dry erase marker and a cotton pad for erasing, and that was that.

When we travel, I almost always bring along some sort of play dough or plasticine activity, and this time wasn’t any different. I had recently bought a set of plasticine from our local dollar store, so I paired that with a couple of printables from Picklebums – one of my very favourite sites for play dough mats. There are tons to choose from, but I picked the ice cream sundae and dinner one from their fun food play dough mats set and laminated them once again with my self-adhesive laminating sheets.

Lastly, and one of Miss G’s very favourites being the little comic lover that she is, I put together a little ‘create your own comic’ set with these comic book templates from the lovely Picklebums {once again}, a few dry erase markers, and couple more cotton pads. These were laminated for durability and reusability too, of course.

One thing I should mention is that I scaled down all of the printables during the printing process in order to allow them to fit easily into the plastic pouches. I forget now exactly, but I believe I scaled them down to 70%? Either way, this will vary depending on your pouch size, so I’d just recommend playing around with the sizing of one of the printables that requires the least amount of ink before printing them all off.

Here’s the whole collection of activities…

Pretty simple, right?

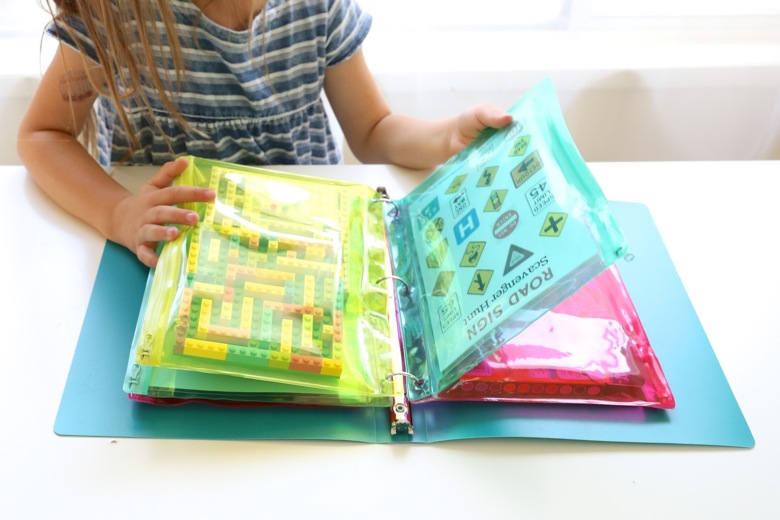
With the activities prepared, I popped the pouches into our binder.

If available, I certainly would have gotten a thicker binder (possibly a 2 or 3 inch?), but even this thin 1 inch worked out just fine.

Miss G was thrilled to finally see a portable activity kit after not knowing where hers are… They’ve been missing since we moved home from Kuwait and I’m hoping that they’re in the garage in some random box we’ve forgotten to unpack rather than left in Kuwait during the craziness of a cross-continent move, but who really knows at this point? I still go to retrieve things and when I can’t find them wonder if it’s something I’ve ever had here in Canada or if it’s something we owned in Kuwait and passed along when we left. {#expatproblems}

Anyways, that’s it – our portable activity kit for road trips! Miss G really enjoyed it and it’s actually remained in our car ever since. ☺
Are you following us on social media? Find us on:
Facebook | Instagram | Pinterest | Twitter
We’d love to have you!

i love this!!!! my toddler boy and i wi;; be travelling soon and this will be perfect i think!
Absolute Genius ~ Thank you for sharing!
Awesome ideas! I’m going to be looking for some of these options at the store this week to build some of these travel options. I’d already printed the road signs, but really love the lego and molding clay options. So organized!
So great! I added a felt craft , dollar store activity packet, and glued a lego Matt to the inside so my kid could build his own duplo structure.
What an awesome idea. I am going to make some for my 3 older grand kids (3,4 and 6) The twins that are only 1 ( I will get a few new small toys) will love something too!
Good day! Very interesting.