I adore fall. The colours, the crisp air, the scarves, the boots, the crunch of leaves underneath your feet… It all just makes me warm and fuzzy inside. My social media feeds have been full of it recently, and for that I’m thankful (because hey – I’ll take it however I can get it). While we may be in the desert and it may still be 40 to 45 degrees on an average day, there’s no reason why we can’t make fall happen right here in our own apartment. And so we began today.
Is it crazy that I’m totally stoked on this awesome, non-crumbly, and fully edible peanut butter play dough we came up with today?! The truth is, it’s taken us a few attempts to come up with the perfect recipe. I really should have known which ingredient would be the key to our success – it’s a long time favourite of mine – but it took us a while to get there. We started with the classic recipe I grew up with – peanut butter, dried milk, and honey – and while it’s yummy and fun to play with, it crumbles absolutely everywhere and is super tricky to roll out and cut using cookie cutters. This one, on the other hand, is like pure luxury. It’s super soft, silky, and rolls and cuts with ease.
Today Gracen and I put together this very simple sensory bin stand for her brand new {big} bedroom. It was an idea I’d seen on Ikea Hackers a few years back, and I’m so glad I remembered it. It’s simple, inexpensive, multipurpose, and fully customizable, which I love. And now that we’ve put it to the test, I think we may even get another one to add to our collection.
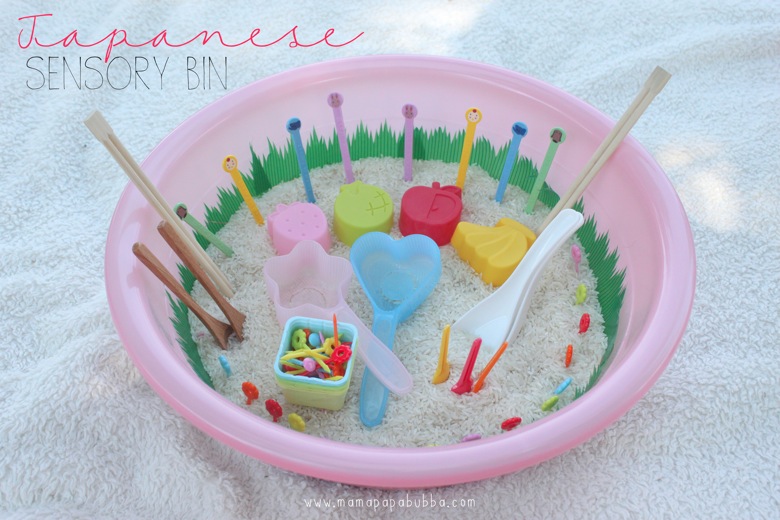
Our rice-filled, Japenese-themed sensory bin was such a hit with the little girls at Gracen’s 3rd birthday party, we decided to bring it out to enjoy again today. We brought a soft blanket, parked ourselves in the shade of a big tree on the far side of the yard, and Grae snuck in the calm, quiet time she quite desperately needed in order to regroup after a couple of busy people-filled days (if you’ve yet to try it, slowly running your hands through dry, cool rice is quite therapeutic).
While Gracen napped this afternoon, I decided to finally put the bag of marshmallows I’ve been carting around for the last couple of weeks to good use. And oh my word, am I ever glad I did!
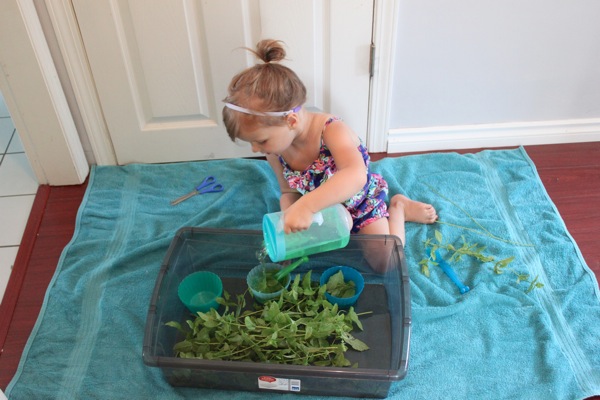
The last few days have been hectic. With only 5 days to pack up our entire house and prepare for our first of two upcoming moves, Brad and I have been working at full steam sorting through things, preparing boxes of items we’ll need for August, boxes that will go straight to Kuwait, and boxes that will go into storage until we return home to Canada in a few years. Sort of sadly, that leaves our little lady to play independently almost all day long most days. As a result, I’ve been pulling together all kinds of random, super simple activities with whichever everyday materials are nearby at the moment. Luckily for me, this morning as I popped on the internet for a brief moment, there was a discussion on different ways to use fresh mint going on in one of the awesome blogger networks I belong to (if you’re not already one of the 68 000 people that follow our Pinterest board, you certainly should be!) We have loads of mint growing in our backyard, so I took a bunch of the suggestions, mashed them together and created this fresh mint soup station for Miss G to explore.
To start out, I set out a big bunch of fresh mint, a pair of Gracen’s scissors, and few plastic bowls and spoons. Grae began smelling and cutting and ripping the mint and the amazing scent of fresh mint filled our house. She dished out bowls of ‘salad’ and delivered them to us as we worked.
Before long, I sensed that something would have to be added to the mix in order to keep Grae engaged in her play, so I grabbed a small container of green glitter and a jug filled with water and a couple drops of green food colouring and quietly added them to the bin. (Slowly adding elements to sensory bins as play progresses is one of my favourite tips for keeping munchkins engaged in their play.)
In no time at all, bowls of sparkly green soup were rolling out of Gracen’s fresh mint kitchen.
Looks delicious, right?
This was such a simple set-up, but Grae enjoyed it so much that I just tidied it up to make it look inviting again, and I’m leaving it out overnight for Miss G to enjoy again tomorrow. We’ll see how the mint lasts!
♥
For extra fun, like us on Facebook here and find us on Instagram here.
This morning I had a little bit of housework to do and Miss G suggested that she’d play with some freshly coloured rice I’d made while I got my clean on. It’d been a quite a while since she’d last opted to play with a rice bin or tray, so I was happy to hear that she was still excited about such a simple sensory activity. While I put the rice into small containers, she picked out items she wanted to use while playing with it. She gathered up a divided plate, heart-shaped ice cube tray, cup, scoop, bowl, and funnel and we laid everything down on a large blanket in the living room.
She got to playing right away and immediately mixed the different colours in the bowl while using the funnel. Watching the individual colours mix into speckled sea of rainbow colours is always so much fun (and so is crazy bed head ☺).
There was a lot of mixing, dumping, and pouring, but the favourite of the morning was definitely this little scoop paired with the funnel. She quickly learned that using the two together was a great way to fill the little heart-shaped ice moulds and we later on we even experimented with extending our funnel using a bubble tea straw.
After she was through playing, we scooped up the rice, added it to the bin of coloured rice we keep in the solarium, and shook the remaining grains off of the blanket outside. Easy, simple fun.
Knowing Grae’s love of popsicles, my mom sent her home from the Okanagan with a couple of new popsicle mould sets the other day. While I knew she’d be excited, what I wasn’t expecting was for two new popsicle moulds to keep her happily playing in her rear-facing car seat for at least 1/2 of our 7 hour drive home. She was so engaged with them that Brad actually said, “Well I know what we need to bring on the plane to Kuwait.” (If you’re travelling through Germany in August and see a woman with popsicle mould parts clumsily falling out of her purse, that’ll be me.)
When we got home and I started thinking about fun play opportunities for the week, I thought it would be fun to try to set up a popsicle-themed pretend play station. Of course, the first thing that came to mind was making the pretend pops out of ice, but I wanted something a little different. Enter gelatine. With a fun texture that can be jiggled, squished, and crumbled, I knew it would be a hit.
To make the pops quite sturdy, I mixed up 3 packets of Knox unflavoured gelatine with 3/4 of a cup of boiling water, then added 3/4 of a cup of cool water once the gelatine had been dissolved. I popped a few drops of liquid food colouring into each of my popsicle cups, poured the gelatine mixture in, mixed it up, and put the faux popsicles in the refrigerator over night.
This morning while we were preparing breakfast together, Miss G immediately noticed the rainbow coloured popsicles in the fridge and asked if they were for playing with. Let me tell you, this girl doesn’t miss a thing. She patiently waited until after our morning outing, lunchtime, and her nap, and I had this little set up ready ready for her when she woke up.
She was delighted to see it and immediately asked, “Are these just for playing, Mama? Or are they for eating?” With the fact that they were for playing with cleared up, she began naming the flavours – my favourite of which was tomato soup (the red one). Then she began doling out the treats in bowls with spoons, as she often likes her popsicles.
Next up, all of the popsicles went back into their moulds and got put into her pretend freezer. Then she took them out, one by one (with the help of a spoon and some serious shaking) as though she were filling customer orders.
For the customers who preferred to eat their frozen treats from a bowl rather than a stick, she happily crumbled the popsicles up. As you do.
There was lots of play with the popsicles in their smushed up state…
Then she moved onto making rainbow pops. Because I mean, who wants only one flavour when you can have several, right?
And then there was soup. Oh, was there ever. Soup stirred so enthusiastically that bits flew out of the bowl and landed in various spots around our living room.
I’d say pretend popsicles were a hit, wouldn’t you? A colourful, messy, joyful hit.
♥
For extra fun, like us on Facebook here and find us on Instagram here.
Have you every come home from a shopping trip with surprise item in your bags? That’s exactly what happened with this hair gel… I do not use hair gel. Brad does not use hair gel. No one in our house uses hair gel. Yet after returning home from a grocery shopping trip with Miss G a few weeks ago, there it was in one of our bags. My immediate thought was, ‘Crap! Did we accidentally steal this?!’ I checked the bill and nope, we’d paid for it. How it got through the checkout and into our bags, I have no idea.
Anyways, knowing that we wouldn’t be using it in our hair anytime soon, I decided we’d use it for some sort of play. And when nothing brilliant had come to mind in a few week’s time, I decided that we’d mix it with cornstarch. Because cornstarch mixed with any sort of liquid = cool, right?
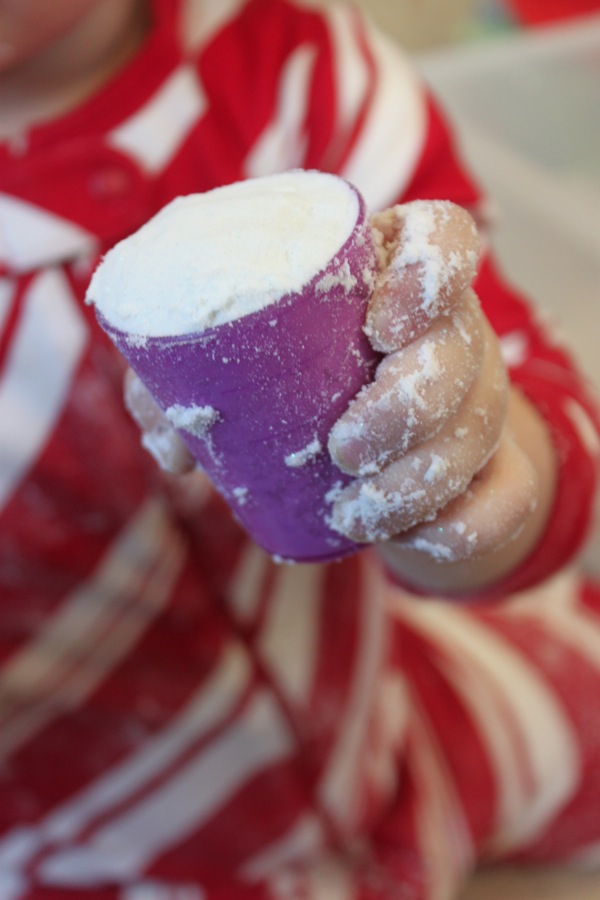
It took some serious mixing to bring the ingredients together first, then it took some serious kneading to smooth it out and soften it up. The result, however, was quite lovely. Pillowy soft and lightweight, this dough behaves a lot like ooblek does. When handled gently and moved slowly, it’s stretchy and elastic, and when handled more abruptly, it breaks off in chunks.
Gracen wanted to play with it immediately, so together we collected some bowls, silicon moulds, and plastic utensils and brought everything outside to play with.
She began exploring her new dough by sinking her hands into it, squishing it between her fingers, and poking holes into it…
Then it was time to fill all of the containers with “oatmeal”.
With a good breakfast in our tummies, it was time for dessert. ☺ The dough rolls into balls really nicely, so Miss G turned our ball collection into cupcakes with cherries on top.
When we were done with our first round of dessert, Gracen shouted, “Cookies next!” and took off into the house running. She returned with a tray of creative table goodies – buttons, pony beads, straw pieces, gems, and sparkly pompoms. I was put in charge of forming the cookies and she was in charge of decorating.
To show that we had eaten the cookies all up, Miss G crumbled them all into a bowl.
The cool part was that as soon as she was done, the crumbles had already started melting together to form one mass.
This was such a fun new dough to explore and play with. One thing we did notice is that after being played with for an hour, it had dried quite a bit. It definitely can be played with again, but this is not the type of dough you’ll want to leave out for very long when not in use.
Oobleck Dough
1 cup hair gel
1/2 cup water
food colouring (optional)
2 cups corn starch
Mix the wet ingredients together. Add in the cornstarch and mix really well. Once the dough comes together in a mass, knead until smooth and soft.
Play!
♥
For extra fun, like us on Facebook here and find us on Instagram here.
On the way home from a little mama/daughter photo shoot today, Gracen asked if we could build a duck pond. I’m not sure where how or why this request came about, but I was as game as she was.
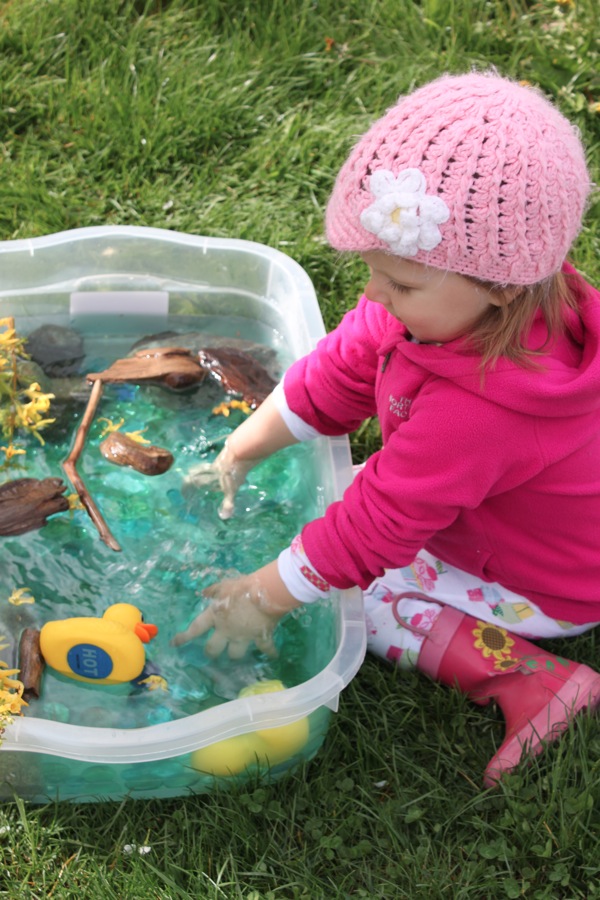
It’s been a while since we’ve put together a new sensory bin and what I loved this time around was that instead of me putting something together for her to explore and investigate, we created this one together. Very similar to a frog pond sensory bin we’ve played with before, our duck pond sensory bin included glass beads in blues and greens, rocks, driftwood, some flowered branches from the yard, and a couple of toy ducks we already had on hand.
In order to make it outdoor-friendly, the pond’s water was nice and warm.
So warm apparently that Miss G didn’t mind getting her entire body soaking wet.
Grae played for a little while before moving onto more exciting things with Grandma Charlotte, but I know she’ll get lots more play out of it once the excitement level gets back to normal around here.
Do you ever set up an activity that you think will be a total hit and it just kind of flops? Or if it doesn’t flop, it just doesn’t take off the way you thought it would? That was the case with this sensory tray.
After a Sunday morning adventure and a good afternoon nap, we decided to hit the backyard. Brad and I wanted to get some yard work done, so I decided to set up a sensory station for Grae to explore in between searching for rocks, running around, and helping with the yard work.
I kept it very simple and filled a tray with raspberry-scented shaving foam, sprinkled glitter on top of it, and set out a warm bucket of water with a hand towel.
Grae dove in.
She definitely had fun mixing up the different colours of glitter and squishing the foam between her fingers…
And she even thought it was funny that it stuck to her hands at first, but after a while, the fact that she couldn’t properly clean the foam off of her hands and arms, even with the bucket of water and towel, started to bother her.
She decided to gather some sandbox tools and played for a while longer, but the activity never really took off the way I thought it would. In the end, there was a giant tray of semi-played with foam just left there and she was done.
If anything, this was a great way to get messy. ☺
I guess all activities can’t be a total hit, can they?
♥
For extra fun, like us on Facebook here and find us on Instagram here.
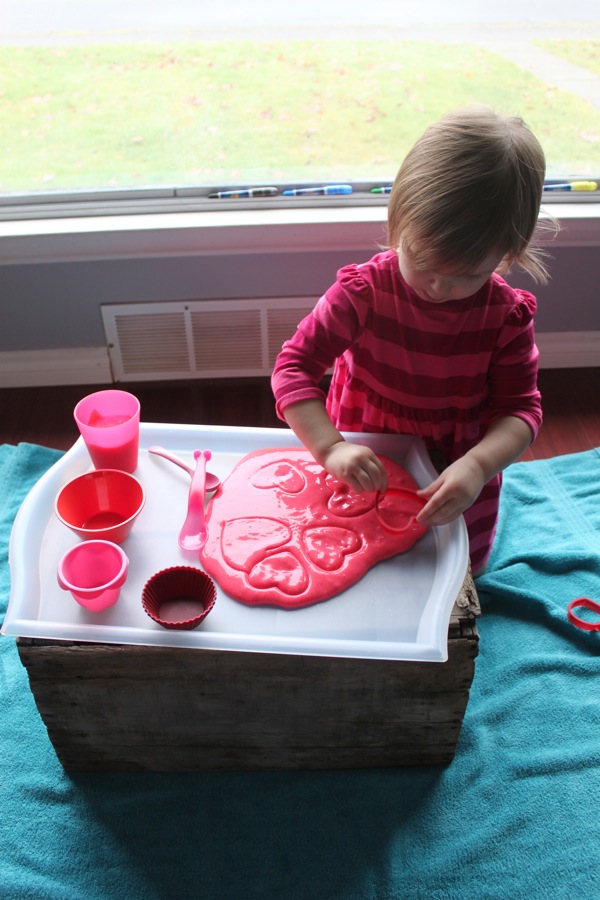
After putting together our ‘Will you be my Valen-slime?’ favours this afternoon, Miss G and I got out a few things and put together a really simple Valentine-themed slime sensory tray.
Slime is just one of those things that never gets old. Miss G’s spent quite a lot of time playing with it in the past, but was every bit as thrilled to play with it again today.
Her favourite part of today’s set up was definitely the heart-shaped cookie cutters. She’d imprint a bunch of hearts, watch them slowly melt away, and then loudly exclaim, “MAMA! THEY DISAPPEARED!!” before making more.
My favourite part was that because this batch turned out just a tad firmer than our last, there was zero mess. It didn’t stick to her hands, it didn’t goop up the bowls and kitchen utensils, and it didn’t cling to her clothes. (A seemingly messy activity sans the mess = win!)
We left this out for most of the afternoon and evening, and Miss G came back to it again and again before it finally had to be sealed up just before dinner. But before that happened, she wanted a guarantee that her tray and container of slime would be left out and ready for her to enjoy first thing the next morning.
♥
Keep up with all the Mama.Papa.Bubba. fun… Like us on Facebook here and find us on Instagram here.
After making a few batches of ice cream dough this afternoon, Gracen and I set up a simple little ice cream shop in the living room. We used an old wooden apple crate for her table top and made sure the floor was protected with a large bath towel.
Then we went around the house to collect a few other items. First up – ice cream cones. Yes, the real ones… We had them on hand from her 2nd birthday party and they’d never be used otherwise, so may as well use them for some fun pretend play, right?
Of course, for customers not partial to cones, you need to have a bowl option. These silicon baking cups did the job perfectly.
Next, we gathered up some spoons and an ice cream scoop…
As well as some buttons, beads, and straw pieces for candies and candy sprinkles.
And with that, our little ice cream shop owner got to work.
There was plenty of scooping, touching, smelling, and exploring to be done.
Of course the ice cream treats rolled out of the shop one after another too. A hazelnut ice cream cone for Papa…
And a strawberry ice cream cup {with extra candy sprinkles!} for Mama.
This was such a simple set-up, but I can already tell that she’s going to get hours of fun out of it. Of course, it’s more than just fun… This little ice cream shop incorporates pretend play, a sensory experience, and creativity too.
This afternoon Gracen and I tried out a new sensory material originally created by Jessie of Play Create Explore (if you’re a parent and haven’t checked out her blog before, you definitely should – she’s got hundreds of sensory play ideas, fun bath ideas, and tons more) and it was AWESOME.
The ingredients seem a little strange, but they work perfectly together to create a hard ice cream-looking texture. The main two ingredients are cornstarch and conditioner – yes, hair conditioner – the cheapest variety you can find. The other stuff is just food colouring and cheap imitation extracts to make it look and smell more like real ice cream.
We decided on making 3 ‘flavours’ (coconut, strawberry, and hazelnut), Gracen started us off by putting an equal amount of conditioner in 3 bowls.
Then she added our food colouring – none for coconut, red for strawberry, and a combination of red, green, and yellow for the hazelnut.
Then she added a generous pour of extract into each of the bowls…
And mixed them up.
One thing I will say is that we should have spend a little more time looking for an unscented {or at least a very lightly scented} conditioner. At $1.28, the price was certainly right, but the strong ‘fresh’ scent gave our imitation extracts a serious run for their money. Even something food scented would have been better… Next time we’ll look for something of the strawberry / coconut / mango variety.
Next up was the messy part… Mixing the cornstarch into the conditioner mixture.
After gently folding and blending the cornstarch and conditioner together, this was the end result.
Isn’t it crazy how much it looks like REAL hard ice cream?!
Here’s a close up view.
And as long as it’s handled like hard ice cream usually is (not rolled or smoothed over too much – thanks for the tip, Jessie!), it scoops perfectly – just as ice cream does. ☺
We followed Play Create Explore‘s ratios exactly, so please visit the original post here. The amounts we used for these batches, along with details on the colouring and extracts are as follows:
I loved this simple variation on the usual cloud dough, and today I simplified it even further for some messy morning sensory play with the cousins. To create some “snow dough” of our own, I simply made our usual cloud/moon dough and dumped in a couple of small bottles of silvery light blue glitter. A fun way to kickstart the New Year, right?
Though I could have added more festive / wintery items (mini evergreen trees, plastic animals, snowman accessories, etc.) to the sensory bin, I just stuck to the usuals this time around… Plastic cups, bowls, spoons, and cookie cutters and the kiddos loved it.
Three of the four munchkins were very eager to join.
Let the fun begin!
The sparkles are hard to see, but if you look closely, you should be able to spot them.
Kinslee digging in.
The fourth monkey just couldn’t resist the fun.
Snow dough toes. ☺
Korbin was a master moulder.
A girl who isn’t afraid to get messy.
Snow dough smoothie, anyone?
Experimenting with snow dough snowmen…
A safer building site.
Snowballs stacked.
Ummm, Grae… What happened to your hair?
Who says the snow dough has to stay in the bin?
Mission accomplished!
This explains things.
Sparkly Snow Dough (we doubled this recipe for a group of 4 children)
8 cups of all-purpose flour
1 cup of baby oil (or other oil)
1 small container of white/silver/blue glitter
Mix with your hands or a whisk until ingredients are evenly distributed. Play!
♥
Keep up with all the Mama.Papa.Bubba. fun, like us on Facebook here and find us on Instagram here.






 Knowing Grae’s love of popsicles, my mom sent her home from the Okanagan with a couple of new popsicle mould sets the other day. While I knew she’d be excited, what I wasn’t expecting was for two new popsicle moulds to keep her happily playing in her rear-facing car seat for at least 1/2 of our 7 hour drive home. She was so engaged with them that Brad actually said, “Well I know what we need to bring on the plane to Kuwait.” (If you’re travelling through Germany in August and see a woman with popsicle mould parts clumsily falling out of her purse, that’ll be me.)
 When we got home and I started thinking about fun play opportunities for the week, I thought it would be fun to try to set up a popsicle-themed pretend play station. Of course, the first thing that came to mind was making the pretend pops out of ice, but I wanted something a little different. Enter gelatine. With a fun texture that can be jiggled, squished, and crumbled, I knew it would be a hit.
  This morning while we were preparing breakfast together, Miss G immediately noticed the rainbow coloured popsicles in the fridge and asked if they were for playing with. Let me tell you, this girl doesn’t miss a thing. She patiently waited until after our morning outing, lunchtime, and her nap, and I had this little set up ready ready for her when she woke up.
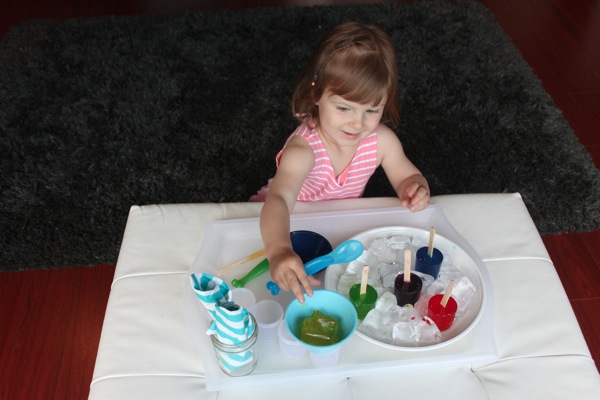 She was delighted to see it and immediately asked, “Are these just for playing, Mama? Or are they for eating?” With the fact that they were for playing with cleared up, she began naming the flavours – my favourite of which was tomato soup (the red one). Then she began doling out the treats in bowls with spoons, as she often likes her popsicles.
 Next up, all of the popsicles went back into their moulds and got put into her pretend freezer. Then she took them out, one by one (with the help of a spoon and some serious shaking) as though she were filling customer orders.
 For the customers who preferred to eat their frozen treats from a bowl rather than a stick, she happily crumbled the popsicles up. As you do.
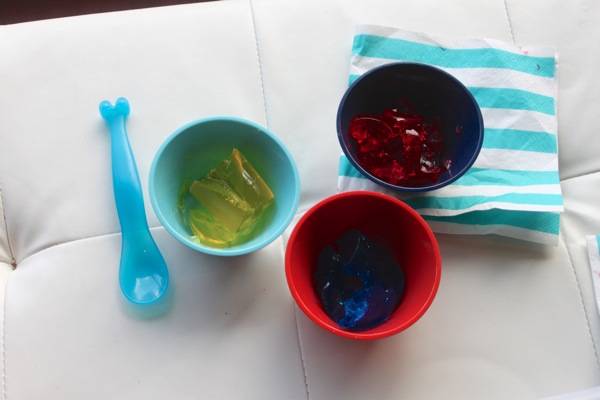 There was lots of play with the popsicles in their smushed up state…
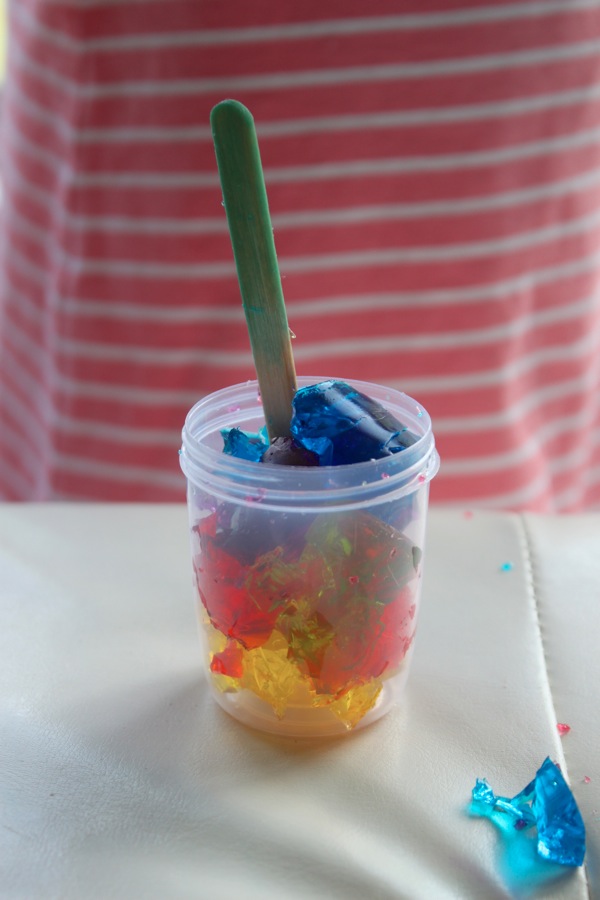 Then she moved onto making rainbow pops. Because I mean, who wants only one flavour when you can have several, right?
 And then there was soup. Oh, was there ever. Soup stirred so enthusiastically that bits flew out of the bowl and landed in various spots around our living room.
  I’d say pretend popsicles were a hit, wouldn’t you? A colourful, messy, joyful hit.
 Have you every come home from a shopping trip with surprise item in your bags? That’s exactly what happened with this hair gel… I do not use hair gel. Brad does not use hair gel. No one in our house uses hair gel. Yet after returning home from a grocery shopping trip with Miss G a few weeks ago, there it was in one of our bags. My immediate thought was, ‘Crap! Did we accidentally steal this?!’ I checked the bill and nope, we’d paid for it. How it got through the checkout and into our bags, I have no idea.
  Anyways, knowing that we wouldn’t be using it in our hair anytime soon, I decided we’d use it for some sort of play. And when nothing brilliant had come to mind in a few week’s time, I decided that we’d mix it with cornstarch. Because cornstarch mixed with any sort of liquid = cool, right?
 It took some serious mixing to bring the ingredients together first, then it took some serious kneading to smooth it out and soften it up. The result, however, was quite lovely. Pillowy soft and lightweight, this dough behaves a lot like
  Gracen wanted to play with it immediately, so together we collected some bowls, silicon moulds, and plastic utensils and brought everything outside to play with.
 She began exploring her new dough by sinking her hands into it, squishing it between her fingers, and poking holes into it…
 Then it was time to fill all of the containers with “oatmeal”.
 With a good breakfast in our tummies, it was time for dessert. ☺ The dough rolls into balls really nicely, so Miss G turned our ball collection into cupcakes with cherries on top.
 When we were done with our first round of dessert, Gracen shouted, “Cookies next!” and took off into the house running. She returned with a tray of creative table goodies – buttons, pony beads, straw pieces, gems, and sparkly pompoms. I was put in charge of forming the cookies and she was in charge of decorating.
 To show that we had eaten the cookies all up, Miss G crumbled them all into a bowl.
  The cool part was that as soon as she was done, the crumbles had already started melting together to form one mass.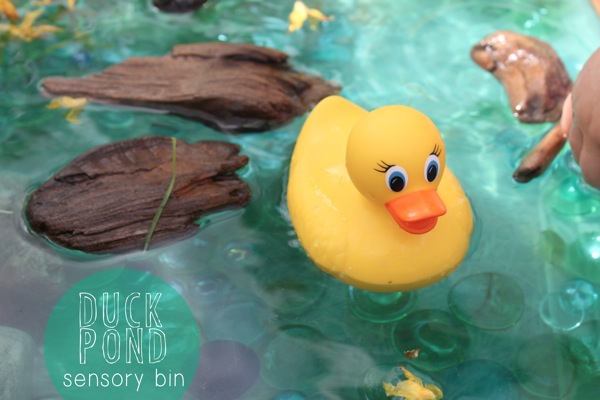



 Do you ever set up an activity that you think will be a total hit and it just kind of flops? Or if it doesn’t flop, it just doesn’t take off the way you thought it would? That was the case with this sensory tray.
 After a
  I kept it very simple and filled a tray with raspberry-scented shaving foam, sprinkled glitter on top of it, and set out a warm bucket of water with a hand towel.
 Grae dove in.
 She definitely had fun mixing up the different colours of glitter and squishing the foam between her fingers…
 And she even thought it was funny that it stuck to her hands at first, but after a while, the fact that she couldn’t properly clean the foam off of her hands and arms, even with the bucket of water and towel, started to bother her.
 She decided to gather some sandbox tools and played for a while longer, but the activity never really took off the way I thought it would. In the end, there was a giant tray of semi-played with foam just left there and she was done.
 If anything, this was a great way to get messy. ☺